
While a very short piece of Paracord may be handy for replacing boot laces or tying something down in an emergency car breakdown situation, it is evident that lovers of the outdoors should consider carrying longer pieces of Paracord, and a Paracord survival belt may be just the way to do that.
In the outdoors, longer lengths of Paracord will not only allow you to cut off small lengths of Paracord as you need it, but it could make a real difference in a life-or-death situation. If you need to lift or lower someone on a cliff or steep slope, you will need a double or triple length of Paracord to accomplish it safely, and 10ft of Paracord will, sadly, not go a long way.
We Just Love Paracord
Every outdoorsman has a love affair with Paracord. Whenever lovers of the outdoors come together, they will discuss their gear and experiences, and they will invariably come up with a list of essential items including a good knife or multi-tool, first aid kit, shoes and so on.

However, when examined for multipurpose uses, not one of these articles are as versatile as a good length of Paracord, and we expect someone to come up with a list of “100 uses for Paracord” soon. In fact, we could probably come up with such a list ourselves! Paracord belongs in every backpack, survival kit or Bug-Out-Bag.
What is Paracord?
550 Paracord is a lightweight, slightly elastic nylon rope with a smooth finish and a break strength of 550lb (249kg), originally used for US parachutes during WWII. Since then, this sturdy, colorful cord has been used everywhere by anyone needing to tie one thing to another including, famously, repairs to a part of the Hubble Space Telescope.
Even though Paracord is slim, long lengths of Paracord can still take up the space you need for something else. For this reason, many people wear Paracord bracelets and accessories. It is sensible – and has become quite fashionable – to “EDC” their Paracord: converting a length of Paracord into an “Every Day Carry” object, in myriad ways.
EDC Accessories
Bracelets are arguably the most fashionable and popular way to carry Paracord. However, cord bracelets typically only contain about 8 to 15ft or less. You can purchase ready-made bracelets or make one to your precise specifications. Depending on which method you use to weave the bracelet, you typically use about 1ft of cord per inch of the final product, and the type of buckle you use will also influence the final length of usable Paracord.

Short pieces of Paracord can be utilized for identification of people or objects, marking a trail, hanging tools on hooks, belts, backpacks or your person, and replacing drawstrings in stuff packs or pants. You can hang food or equipment from a tree, tie down items in a storm, and even make a small shelter. More exotic uses include using the internal strands to floss your teeth and repair tears in clothes or even wounds (gasp).
The Long And The Short of It
Bracelets, lanyards, and most other EDC gadgets are fantastic ways to let you keep a short piece of quality cord at hand, but there is no harm in converting 80 to 100ft of Paracord into a functional, daily use item – just in case! Paracord can be purchased by the foot or even by the reel. Making a pet leash is an excellent way to carry a longer piece of Paracord, but Fido may not be conveniently at hand when you need 80ft of Paracord urgently. We suggest you convert 100ft of Paracord into a super-useful and convenient Paracord Survival Belt.
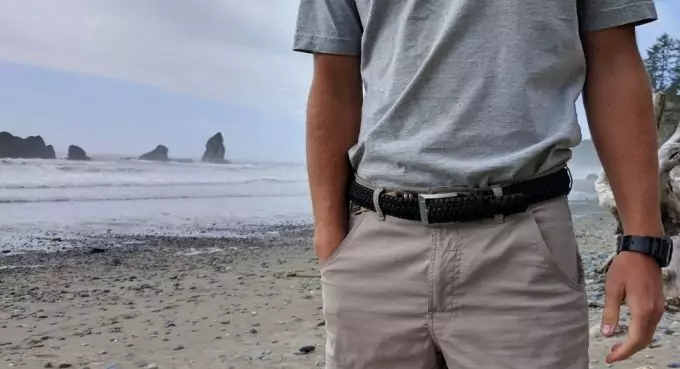
We’ll show you how to make a Paracord survival belt that will not only perform the obvious function of keeping your pants where they need to be during a strenuous hiking trip but will also let you unravel the belt within seconds when you need a really long single cord in a hurry.
There are even more benefits to making your own Paracord survival belt.
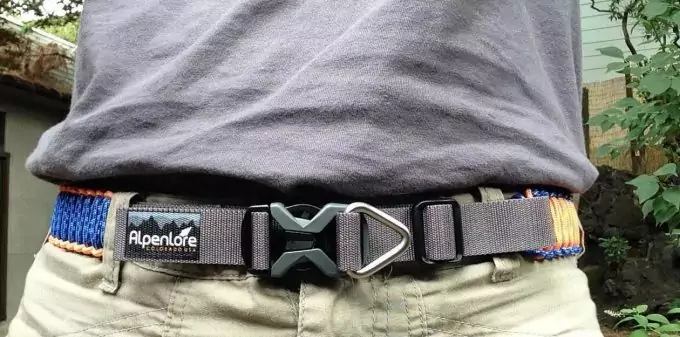
Unique Color And Style
Functional? Absolutely. Colorful? You choose! Make several belts in different colors so that you always have a Paracord survival belt handy, no matter what outfit you are wearing. And remember, this belt is not just for men. Paracord can be obtained in almost every imaginable color, perfect for a fashionable finish for females.
Easy and Fun Instructions
We have instructions for a Paracord survival belt for which you don’t need to measure, clip, or even use tools. You can make it as broad and long as you like, measuring as you go. It is a great family project to let each one make his or her own survival belt and will help to familiarize kids with knots, ropes, and survival principles.
Even Granny might join in, remembering similar knotting skills from her crafting days when it was fashionable to use the same knotting techniques to make macrame hangings and decorations.
Fabulous Fit And Function
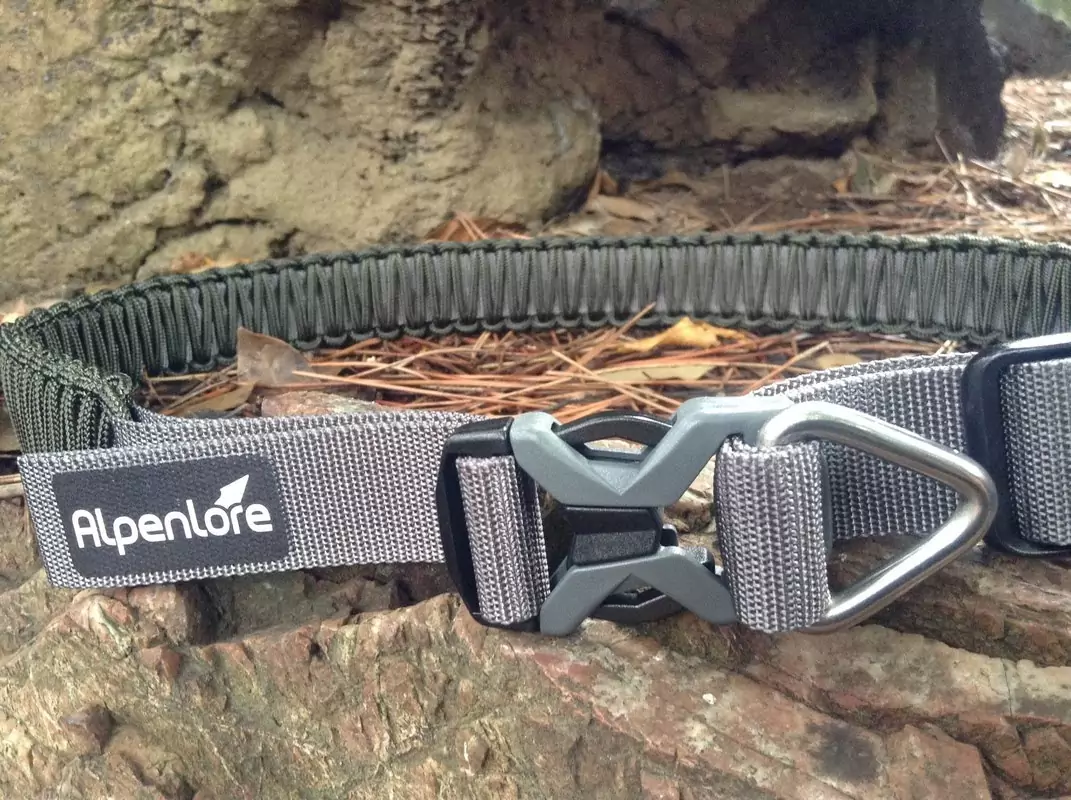
Best of all, you can use a standard side-release buckle if you want one perfect fit, or you can make the belt into a multi-function carrier by clipping various devices into the woven design.
If you use a carabiner as a buckle, you will always have an extra one at hand, or you can make the length fully adjustable to fit several members of the family by using a regular belt buckle. There are also great new gadgets to choose from, like buckles that incorporate a whistle and a flint and striker.
Instructions for Making The 1-Strand Paracord Survival Belt
If you have never attempted any Paracord weave we recommend that you watch this video to get a good overview of the weaving process before you follow the step by step instructions:
Step 1 – You Will Need
- A spool or reel of Paracord. You will need 1 – 2,5ft of Paracord to create 1” of the belt. If you use six loops in every row, the belt will be about 1.6” wide, and up to 47” long, depending on how tightly you weave, taking up about 100ft of Paracord. In these instructions, we used five loops.
- A pair of scissors
- A lighter
- A small pair of pliers
- A size 5-6 crochet hook (optional)
- A lacing needle for Paracord (optional)
- A side-release buckle, carabiner or standard belt buckle of approximately 1″. A wider buckle can be used if you wish to widen the belt.
Step 2 – Burn The End
Always ensure a clean, non-fray start and end point by burning ends. First, snip off about a centimeter of the cord for a solid start. Use the lighter for a few seconds to burn the end, rotating it in the flame to ensure even exposure of all the sides, coating, and inner strands. Squeeze the hot end lightly with a pair of pliers or your fingers to flatten the tip while the cord is still hot.

Image Credit: agirlandagluegun.com
This will help you to thread the cord and will keep the ends neat while the belt is in use.
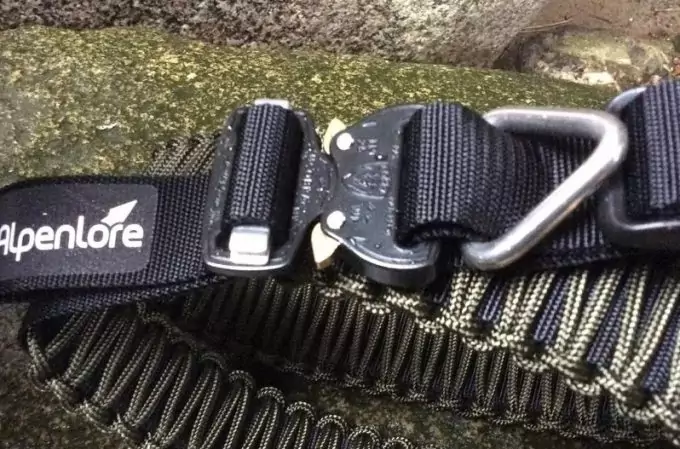
Step 3 – Secure The Buckle
Push the loose end through the buckle ring (slit) and feed about 10” through the ring. Immobilize the long end of the cord, and the buckle with your left hand. Take the shorter, loose end and loop it back through, and around, the buckle ring. Make a total of 5 loops for a standard buckle (more loops or fewer loops may be necessary if you use a larger or smaller buckle). Keep the loops loose and even; you will be passing the long end through it soon.
Adjust and make sure the loops are even and loose enough. Leave a few inches of the short end free.
Hold the buckle in your right hand with the short end dangling to the left.
With your left hand, tuck the short end back through the loops towards your right hand. This leaves you with both the short and long end on the same side. Do not tighten yet.
Step 4 – Start The First Row
Take the long end (the working end, from now on) in your right hand and fold it to form a loop (a bight) about 2,5” long. Point it back towards the 5 loops on the buckle ring and thread this looped, doubled-up cord back through the center of the 5 loops on the buckle ring.
You will now have 3 cords passing through the loops, lying flush with the buckle ring, ending in a loop on the left-hand side.

Once you have fed the bight (loop of doubled-up cord) through the original 5 loops, gently tighten the 5 loops around the buckle ring. Do not tighten it too much; you will need room to spread the loops apart as you start the weave on the next step. Start to tighten the loops from right and work towards your left-hand side.
When you are done, take out the slack in the left-most loop by pulling the short end, and then make a half-hitch knot in the short end to prevent it from coming loose as you follow the next few steps.
The loop you started with on the right-hand side has now been passed to the left-hand side, to form a new side loop on your left. We will return to use this new side-loop in the next few steps.
The short end is on your right. You won’t be using the short end again, from now on we start weaving in earnest using only the long end.
Step 5 – Creating Loops for The Second Row
Keeping the new side loop on your left open, gently tease apart the 5 loops on the buckle ring, starting from the left and working to your right. Identify the long end of the cord where it lies underneath the 5 loops. Pry apart loops no 1 and 2, and tug the long cord upwards to form a new loop between no 1 and 2. This new loop should be of a similar size to the side loop you created in the previous step.
TIP: Use the crochet hook to tug the cord upwards when you create a new loop. You can use any thin object with a blunt end that won’t damage the fiber to make this process easier on your fingers and nails.
Move to the space you created between no 2 and 3, and tug the diagonal long cord upward again, to form a new loop between no 2 and 3. Repeat with no 3 and 4, and then with no 4 and 5.

You have now made 4 new loops, and combined with the side loop, you have 5 loops in total. As you create new loops, tighten the old starter loops a little to ensure there will be no slack between the buckle ring and the start of the belt after you are done.
Both the long and short ends of the cord remain to the right-hand side of the buckle.
Step 6 – Threading The Second Row
Like before, take the long end in your right hand and fold it to form a bight about 2,5” long. Point it back towards the 5 loops you just created, and thread this bight back through the center of the 5 loops.
TIP: As you start to thread the bight, twist the loops gently in a clockwise direction. Turn each loop slightly so that the right-hand side of the loop is rotated towards you before you start threading.
Step 7 – Tightening The Weave
After threading the bight through the 5 loops, you will again end with a new side loop on your left, and the original loop on your right. Before moving on, make sure that the short end did not get caught up in the loop on your right, then pull the bottom cord quite hard from the left to close the right-hand loop and tighten up the right-hand side of the weave.

Image Credit: mobiobione.wordpress.com
Next, tighten the loops individually, this time working from left to right, taking up all the slack; first, tug on loop no 2, then no 3 until you reach the end. It is essential to pull it quite tightly to ensure and attractive end product.
Step 8 – Continue The Weave
Repeat steps 5 and 6, until you have either used up all of your Paracord or have a Paracord survival belt that is long enough to suit your needs.
TIP: Inevitably, the cord will twist a little as you work. Just untwist it gently as you go along, always working from the left to the right-hand side. It is important to untwist the cord during weaving, as it will ensure a smooth ‘undo’ when you need the cord in a hurry. The process gets easier as you find the correct tension for your weave. Practice will make perfect!
Step 9 – Attach The Other End Of The Buckle
After your final row, burn the end of the cord with your lighter to make it easier for you to attach the lacing needle to the short end – you will need about 10” to finalize the belt. Keep the belt in your left hand, with the end of the cord and the lacing needle in your right hand as you will be working from right to left.
Push the needle through the buckle ring, creating a loop, then pry loop 4 and loop 5 apart. Press the lacing needle in between the two loops, underneath the diagonal cord. Continue the loop through the belt ring, and bring the needle back down to separate loops 3 and 4, and up again – pretty much sewing the buckle to the belt using the material of the belt itself. Don’t pull it tight as you work, first, complete the looping to attach the buckle to the belt loosely.

After passing the lacing needle through the side loop on the left, tighten all the loops firmly. Finish the end with a half-hitch. This will give you a permanent starting point to allow you to loosen the buckle fast in an emergency situation. If you wish, you can pass the needle back to the right-hand side, through the loops, for additional security before making the half-hitch, though this is not recommended if you intend to detach the buckle from the belt extra fast!
To find out more about paracord knots used for weaving, see our informative article on the topic.
Step 10 – Tidy Up
You can use the lacing needle to work the loose end of the cord into the weave, though the half-hitch should ideally be in an easily accessible spot.

Image Credit: mobiobione.wordpress.com
The entire belt may be a slightly loose or uneven directly after you finish, but gentle tugging will soon let it settle in an even, beautiful weave.
If you need a bracelet to complement your belt, see our article on how to make a paracord bracelet for your reference.
Here are some useful and fun paracord projects by The GeekPrepper.com
Uses
This belt could certainly carry around 6000lb – more than enough to rescue a friend from a pit of quicksand! A few tugs will undo the whole belt, leaving you with 80 – 100ft of prime Paracord for your needs. You will no longer be restricted to small projects: You can build a shelter, lean-to, ladder, raft, stretcher, hammock or furniture, or rig a pulley system to lift heavy objects. To find out how paracords are used for survival, see our informative piece on the topic.
We hope we inspired you to try something new with this tutorial. Let us know about your experiences and recommendations in the comments below.


I don’t have time to make my own so would probably buy one of these. Although I am not an outdoor type, I recognize the value of the paracord belt as an EDC. Earthquakes, fires, buildings exploding because of terrorism are risks even people in the city can encounter and this belt can come in handy as an escape rope or survival gear.
I have seen a lot of pretty interesting and useful stuff made out of the paracord belt: pulley system, snare, ladders, snow shoes, hammock and more, so probably it would be a good use of my time to start learning how to weave a simple paracord bracelet or belt rather than just watching netflix movies during my downtime. This would be especially useful WHEN I do move to my retirement cabin.
A lot of people feel the same way as you, David. The paracord is something one will need since we’re definitely living in extraordinary times. I have one inside my car at all times and another in my bag. There’s a long list on what you can do with the paracord, that’s a fact!
What better time to do that, but now, right Sean? I’ve also watched tons of excellent videos on DIY paracord belts and I’ve also finished a couple to give my friends. The paracord is durable and handy. It’s also great that these are so inexpensive, for such useful items.
Thanks for dropping by Sean!