
Backpacking gear can be quite expensive, so it is only natural to want to make your own gear to save money and maybe be more earth friendly. Even if you are not a crafty person, you can make some basic DIY backpacking gear from scratch and use it on your next adventure! Since there are so many items you do need to buy, why not save some money and make certain items yourself?
It would be so great to be able to save money to go backpacking in a place you have longed to go. Instead of purchasing some of the backpacking gear you need, making it will allow you to save that money for the adventure you have always dreamed of, which can get costly. The world of crafting your own homemade camping gear can allow you to build something to be proud of, while saving you a ton of cash.
In this article, we are going to show you many DIY camping gear items you can make on your own, for a huge fraction of the cost of buying it new. Here, you can learn how to sew a sleeping bag liner and make a survival bracelet, among other projects. Are you ready to learn more about the world of homemade backpacking gear? Let’s go!
Things To Consider Before You Start
Before you head out to the nearest camping gear store for new, costly gear, know that making your own can save you hundreds of dollars or more! While making your own gear takes time, there is a huge sense of accomplishment and savings that comes when you are finished with the product. See below for some features to consider when you decide to make your own backpacking gear.
Know What You Want To Make
What items do you need that you cannot afford? Or rather, what items would you prefer to make, over purchasing? Knowing what outdoor items you need can help you narrow down what type of gear or food to make. Do you need a new hammock? What about a backpack? Maybe you just need to figure out how to keep extra warm in your sleeping bag.
Either way, you will need to do a little research to find out what to do and what items you will need. You can find patterns, maps and other items to help you along your creative journey. Being prepared is the first step.
Know Which Fabrics or Ingredients To Use
Let us say that you need to make a sleeping bag liner, but you are not sure on what fabric to use as insulation. While some people might think cotton is the way to go, you actually will want some type of down fabric to insulate your sleeping bag. The reason behind this is because down fabric, holds in the warmth better than cotton, plus it offers more comfort so you can sleep through the night.

If you want to make food, you will need to know which ingredients you need and how much you need to make. For example, if you are making trail mix, you need to get nuts, raisins, and other items you enjoy in the mix.
How To Store Food And Keep Food Edible
If you are bringing along food, know how long it will stay good for so you do not have it go bad while you are on the mountain. Find yourself some airtight containers or bags to tote along your trail mix, beef jerky or any other foods you want to bring along. If you plan to bring a cooler, be sure you keep ice inside of it so food stays edible.
You can find a metal food locker to store your food, or a bear bag. At night, you can hang your food on a pole so that bears cannot get to it. If you do hang food, you should hang it at least 10 feet high, out of the reach of bears. Any spoiled food should be disposed of properly.
Your Budget
Since crafty people tend to be those on a budget, you need to total up all of the costs of what you plan to make and create a budget to stick to. Some craft items are not cheap, so you will need to know how much you need so you do not over spend.

Search around for sales at local stores as well as coupons to help you keep the price down, while still getting quality materials and ingredients.
Be Confident!
Not everyone is super crafty, and sometimes DIY projects can seem overwhelming. Having some confidence in yourself can help you to succeed in your projects! As long as you are prepared, have what you need, and can follow the instructions, you are on the path to success.
Just believe in yourself and you can accomplish your DIY projects!
10 DIY Projects For Backpackers
Now we have come to just some of the many projects you can create on your own confidently! Now that you know what you need, you can invest in some of the ideas below to save money and have a sense of accomplishment of something you made.
Sleeping Bag Liner
When making a sleeping bag liner, you will first want to lay your sleeping bag flat out and estimate the area in square yards you will need. Once you have your liner fabric, you can add the exterior fabric and begin sewing it to the sleeping bag. There are several steps involved, but once you get the insulation attached to the fabric, sewing it on will not be that hard. You can choose which insulation you need, depending on the weather. Down fabric and fleece, are better for colder temperatures and overall warmth, but using cotton can be a good choice for summer time camping.
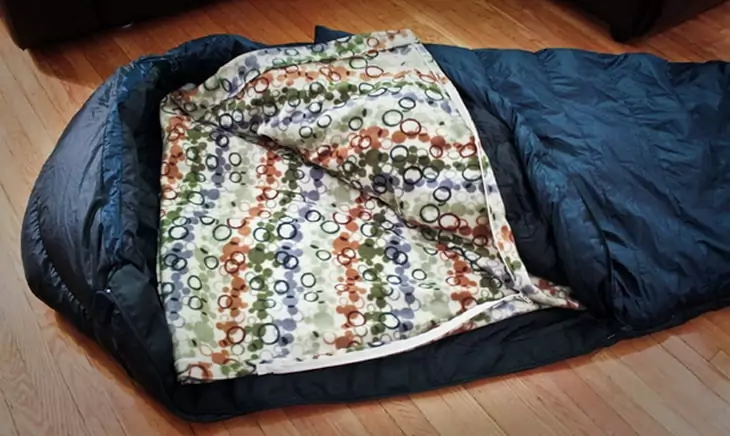
Making your own liner can save you upwards of around $80, and you can also add your own pockets for storage, or even add on a new zipper while you are making changes to your sleeping bag. The possibilities are endless! For more tips and tricks, see our article on how to make you own sleeping liners to save more money.
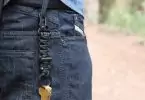
Survival Bracelet
A survival bracelet is also called a para cord and is made of nylon, and can be used for more than one use. For example, you can use this para cord for tying your hammock to a tree, making a tourniquet, and connecting it to important items you have with you. The inside threads can be used for repairing gear, as fishing line, and setting a trap.
To make this item, you need an 8 foot piece of the cord. From there, you can thread the cord through the buckle and loop it through. From there, you will weave the cord until you have about a half of an inch of material left.
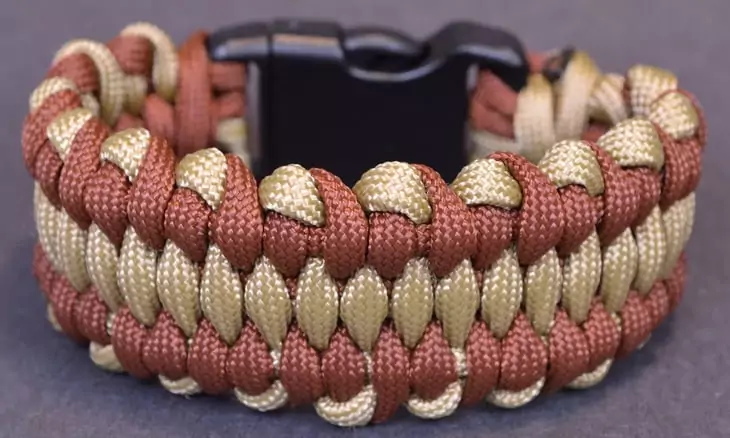
You will cut the end and use a lighter to burn the ends to melt them to the rest of the bracelet. It’s stylish, you can choose which color you like, and its highly useful outdoors! For guidelines on how to make your own DIY paracord bracelets, click the link to find out more.
Dehydrate Food
If you are outdoors and want to dehydrate food without a dehydrator, you can sun dry the food. Sun drying works great with tomatoes and some herbs. You slice up your food and put them on a baking sheet outside under the sun and wait a few days. You will need to cover the food somehow so that it does not go bad or get flies surrounding it. See our article on dehydrated food recipes to give you more nutritious ideas on the go.

When drying herbs, you can make a drying box and use a twist tie to keep the herbs together. Following that, you will need to wrap it in cheese cloth and let it hang in the sun.
Create Maps
If you are creative and computer savvy, you can create maps online of the area in which you plan to camp or backpack. You can make them show topographical areas, which gives you much more than just plain old directions.
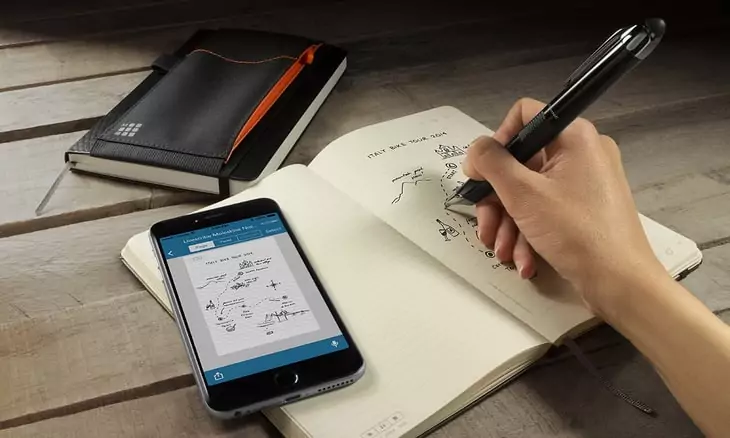
You can make your maps and guides specific to show altitude, type of land and more! Plus, you have less of a chance of getting lost with the maps. Print these out and take them with you on your adventure!
Lantern Candle
If you need a little light while you are outdoors at night, you can make your own lantern candle with just a few items! Simply take a baby food jar or small mason jar and add a wire around the neck in a loop, so you can carry it later.
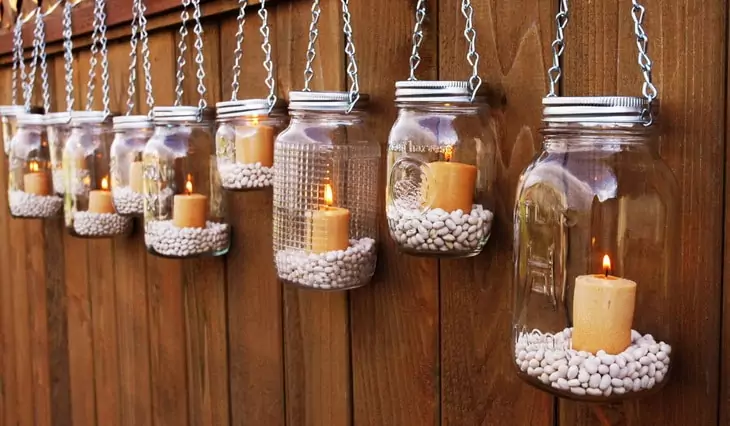
From there you can add a tea light candle and have enough light to guide your way. Just be sure to bring along a lighter or matches, as well as extra tea light candles, as they are small and you will need more than one.
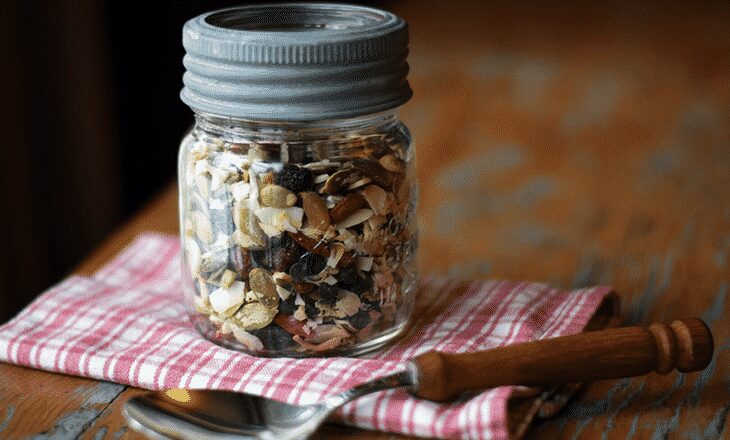
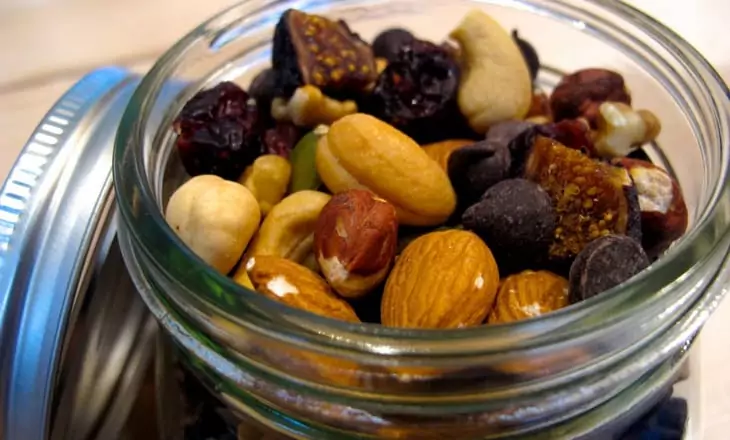
Trail Mix
Making trail mix is fun anytime, not just for camping or backpacking. The best part is you can add whatever you like to your mix, tailoring it to your taste. You simply can not get that with store bought trail mix! Trail mix is a fun and easy snack to make that offers protein and extra vitamins and minerals your body needs, especially if you are hiking or getting active outdoors. Simply gather the foods you want to add to your mix and follow a recipe.
For example, get 2 kinds of nuts you like and add 3/4 cups of each to a bowl. Then gather 2 types of seeds you like and add 1/2 cup of each. From there, choose 2 dried fruits and add 1/2 cup of each to the mix. You can add sea salt, nutmeg, and cinnamon if you wish, in just small teaspoons to taste.
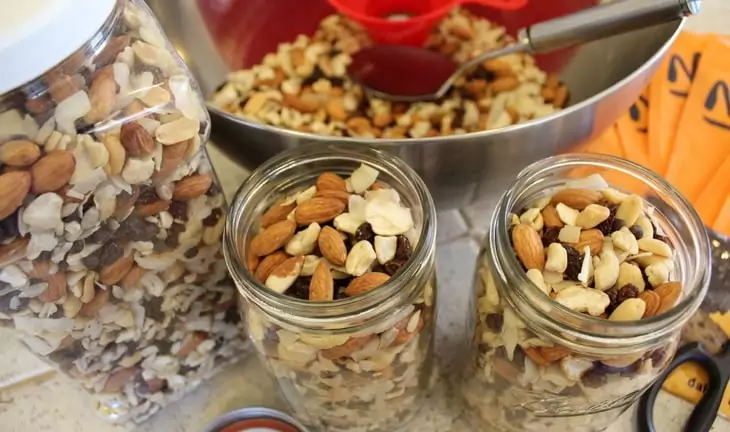
Examples of foods you can add to your trail mix includes cashews, almonds and pecans for nuts, as well as pumpkin seeds and sunflower seeds. For fruits, you can find bananas, raisins, cherries and more! See more ways on how to make homemade trail mix by clicking on the link.
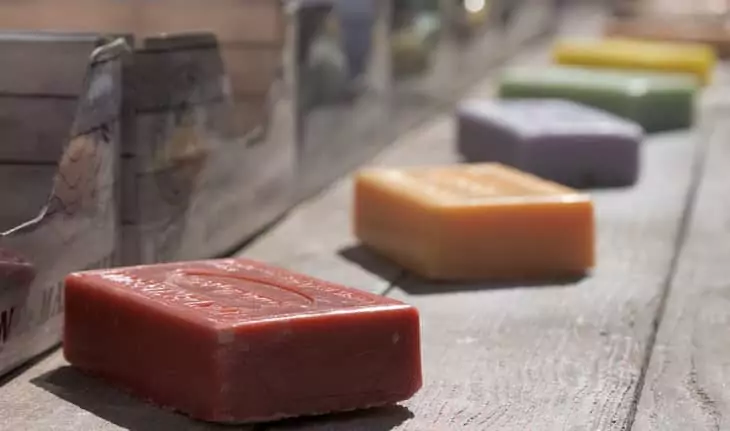
Soap
Making your own soap can be an all natural way to cleanse your body anywhere. Using 2/3 cup of coconut oil, olive oil and almond oil, as well as 1/4 cup of lye and 3/4 cup of cold water, you can make your own soap!
First, you will add your oils and heat them up for a minute. You will add the lye and mix for a few minutes. From there, the herbs will go in and be stirred and the combination can be added to the soap bar mold. Leave them for 24 hours and check them for firmness. If not firm, leave them for up to another 24 hours, and let the bars cure for a month.
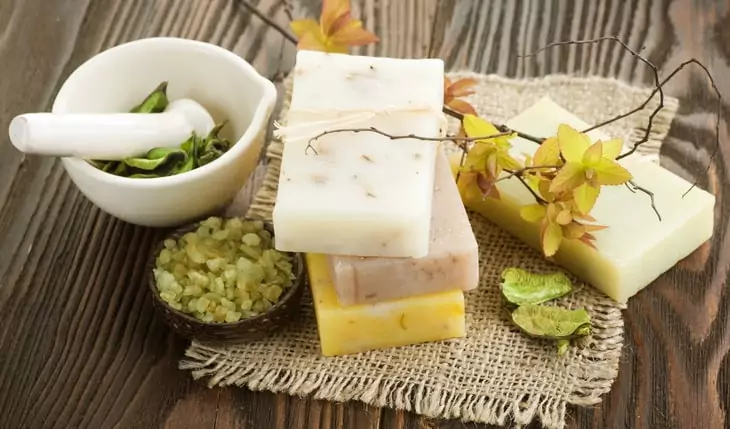
Once they are ready, you can wrap in wax paper and put it in with your backpacking gear and go!
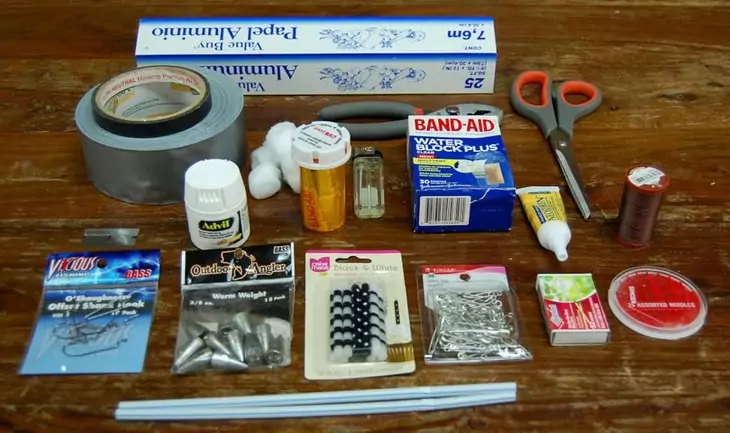
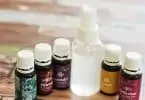
Bug Spray
Homemade bug spray can help you use all natural ingredients, which are safer for your skin. DEET is a repellent that can be hazardous, and is dangerous for your body. You can make your own safe bug spray in mere minutes for a relaxing time outdoors, bug free!
First, you want to choose which essential oils you will use. This can include Lemon Grass, Mint, Lavender and Eucalyptus. Grab some Natural Witch Hazel, water and vegetable glycerin. Using an 8 ounce spray bottle, fill it half full with boiling water and add the witch hazel to fill the bottle. From there, add 1/2 tsp of vegetable glycerin and up to 50 drops of the essential oils.
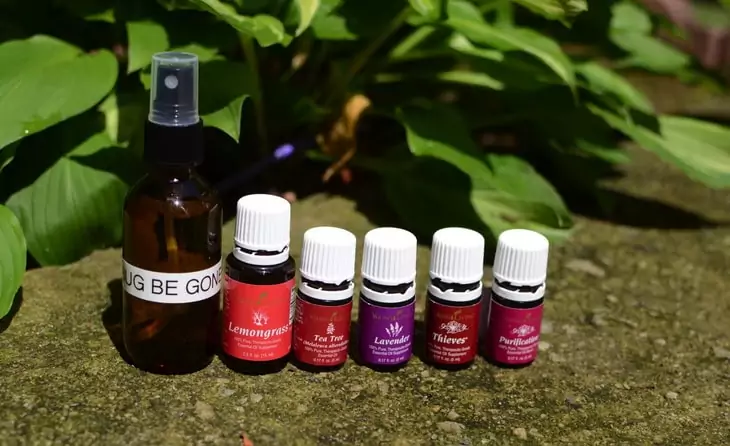
Shake up the combination and spray for a bug free time!
Backpack
You may want to find a pattern for making a backpack so you have something to go off from. You will have to decide how big you want the backpack and what fabric to use, plus what features you want it to have. This is a big project, but it does not have to be complicated. You will have to measure and cut fabrics fro the front, back and sides, as well as the shoulder straps and pockets, plus anything on the inside. You will probably use nylon and ripstop nylon to create your backpack. You can also use mesh lining for any outside pockets you want to add.
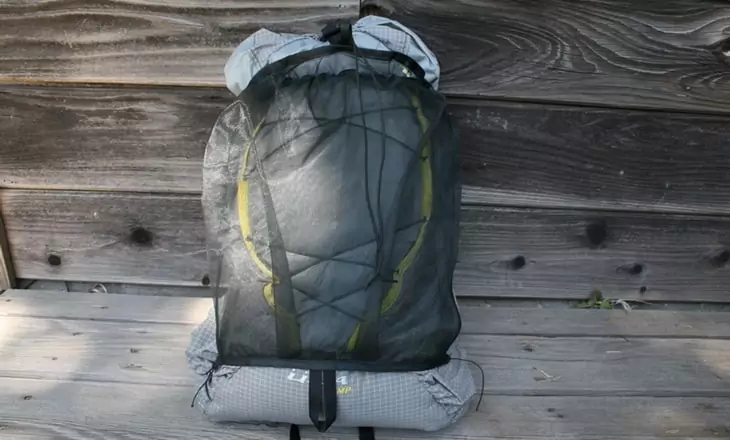
There are many types of backpacks out there, so like we said, you will want to find a pattern, get the correct materials and begin sewing your new backpack together, adding features you like, and choosing color options that suit you.
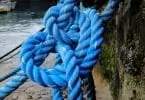
Hammock
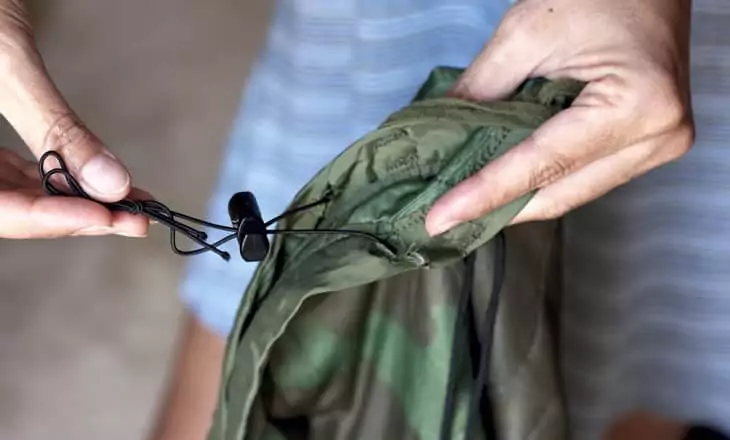
Having a hammock to use on your backpacking trip can be a great way to relax after a long day of being outdoors. They are easy to hang and do not take up too much space with the rest of your gear. You can even sleep in them if the night is warm and there are no bugs around! When making a hammock, you will need just over 3 yards of ripstop nylon, as well as a para cord and 2 carabiners or clips that will hold the weight.
You will need to sew up the edges to look even and nice, and the fabric will not fall apart as easily. Fold part of the fabric over and sew it together, making a space for the para cord to hold up the hammock on each side.
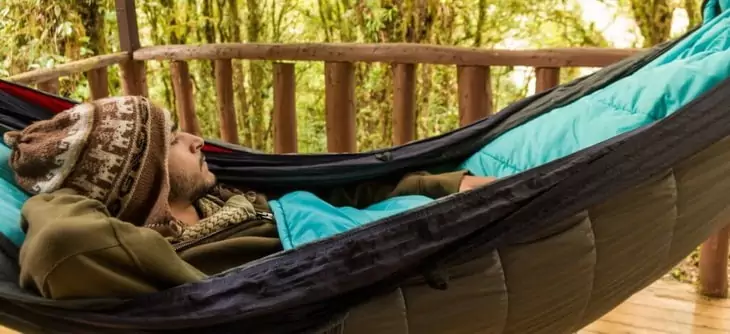
You can put the rope in on each side and cinch it up. Then find two trees and attach the ropes and use the carabiners to secure the hammock to the ropes. From there, enjoy the nice day in your handmade hammock!
What Do Others Say About DIY Backpacking Projects?
While most people agree there is not only a huge savings, but also fun to participate in DIY projects for outdoor gear, there are some who think it can take too long to create.
They may also think that they simply do not have the knowledge or patience to create something like this. Sure, it can be hard to create something that is a necessity when you are on an outdoor adventure, but having this product can mean saving lots of money and feeling proud of yourself.
Overall, people think it is a great idea to make your own gear and many have even tried with a few items, like the survival bracelet, or making their own sleeping bag liner. These things are not that difficult, and do not cost a lot to gather the necessary items. While some items might seem more complicated, like making your own backpack, using a pattern and following the steps can be extremely helpful.
Pros And Cons
There are definitely positives and negatives when it comes to making your own outdoor gear, so below we are going to give you the good and the bad when it comes to crafting these items.
PROS
- Cost effective
- Sense of accomplishment
- Can make items how you want them to be
- Choices are unlimited
- Fun way to be creative
- Items are extremely useful when backpacking or camping

CONS
- Takes a lot of time
- Can get complicated
- Some people do not have time to make such projects
- People who are not creative may shy away from this
Concluding Thoughts
Now that you know what you need in order to make your own outdoor gear, and have a few ideas of what items you can make, you can now run to the store and start your own creations! With a little bit of creativity and work, you can make your own sleeping bag liner, lantern, backpack or anything else you need for your backpacking trip! Hopefully, your creation will last you a long time and make you feel proud because you created something so useful!
What do you think about creating your own gear? Is it something you think you could do? Have you ever made your own gear? Tell us all about your creative ways in our comments section and let us know what ideas you have come up with! We hope your next outdoor adventure is exciting with something made by you!

Creating a DIY map is definitely something that I would like to do because I think it helps a person master the trail well before a hike and that way, a person becomes more relaxed while going about his or her trip. I think other things on this list (like soap and backpacks) are best bought so as to save time and the risk of the DIY item backfiring on you in the wild.
We couldn’t agree more!
I have tried making a hammock before, on a hot summer afternoon. I was, however, quite simpler than the one on this article. I just hang it between two trees and swung in it until it was almost dusk. Had it not been for the mosquitoes that began terrorizing me, I would have stayed there overnight.
In most cases, success outdoors depend on your DIY skills. Personally, I have made different gears during my camping and hiking adventures, including a hammock and a hunting bow and arrows. So, be proud of what you made, even though the biting insect were annoying.