
Nowadays tents can be rather expensive, with a backpacking tent costing you several hundreds of dollars. And since you are generally out in the wilderness while camping, that new tent may have a run in with some rocks, branches or other material that might not play nicely with your new tent.
Sometimes, you will take out an insurance policy known as a footprint for your tent. Most all the major camping companies are willing to sell you one that matches the size, shape, and color of your tent.
The thing is that that small piece of material can be quite pricey. Luckily, there are some ways to craft a DIY tent footprint of your own, for a lot less money.
If you are looking to go down this route, you’ll want to at least spend a touch of time thinking about savings. Most likely you will be able to save some money based on materials, but also consider the time that you will be putting into making this.
While neither option that we put forth is really time-consuming if you already feel that you don’t have any free time you may find it worth purchasing a ready made piece. Of course, some of you will be drawn to making your own just for the reason of making it. At that point, there is no real regard if you end up spending as much, or possibly even more, on materials as you would have on the company’s offering.
Why use a footprint?
The main reason is for the protection of the floor of the tent. If, as always seems to be the case, a sharp rock where to grow under your tent in the middle of the night, it would first have to go through your footprint. Since this is a separate piece of material, it is much easier to swap out the footprint than the floor of the tent or more likely the entire tent.
Additionally, the footprint gives you another layer that can help keep moisture from the ground working its way through the floor of your tent. And some people will tell you that even though it may be thin it is one more layer of insulation between you and the cold ground at night to keep you a smidge warmer.
What materials to use?
When you have decided that you will be crafting your own solution, the first thing to consider is what material you should use. Since this is a layer of defense, you will want something that is strong and durable. It would be good if the material would stop some amount of water coming through the bottom of your tent as well.
Before you run off to get a steel plate, consider that you also need to move this item with your tent. Your particular camping style will come into play with this last one.
While the material should be portable, a heavier choice that doesn’t fold down quite as easily, would be an all right pick for car camping. But, if you are going backpacking, you’ll need to choose something that is lightweight and probably fold down to fit in the bag with your tent.
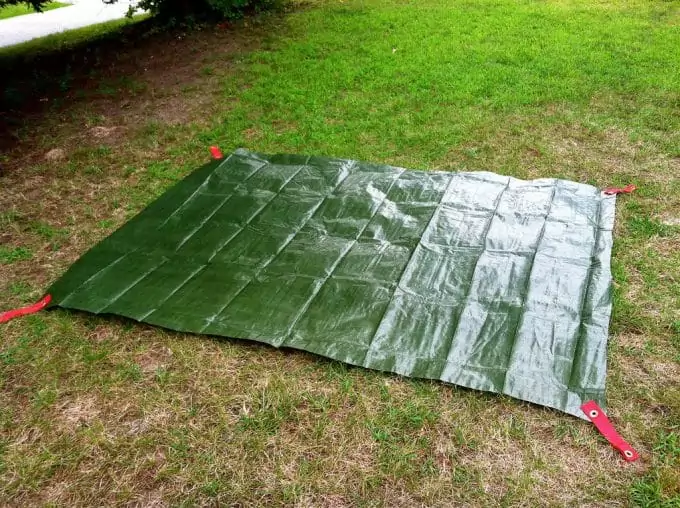
Now, there are any number of materials that can fit the needed qualities. You’ll have to poke around and see what you can acquire or have about that will fit the budget you are looking to put into this project. An easily acquired option is using a heavy duty tarp.
This will cover everything you need and can be found in most hardware stores. If you are in your hardware store another option might be a painter’s drop cloth. The thin plastic ones might not last as long, but they will be cheaper to replace. A canvas one will definitely add more weight, but should last you a good long time.
Some people head to the garden section and use weed cloth to craft a barrier for camping. This could work, but it may be hard to find a piece wide enough for your tent. This means you’ll be putting some more effort into the project.
Tyvek is a choice that many DIY’s go for, it is lightweight and still rather durable. The main downside to going this route is that it can be expensive. There are plenty more options if you use your imagination, even the floor of an old tent could work.
Method 1: Quick and Easy
If you suddenly find yourself setting out on a camping trip and realized that your footprint has been lost or is destroyed, fear not. You don’t need to place an order and cancel your trip Follow these 3 simple steps to a tent footprint. It might not be the most beautiful or elegant solution, but it will get the job done.
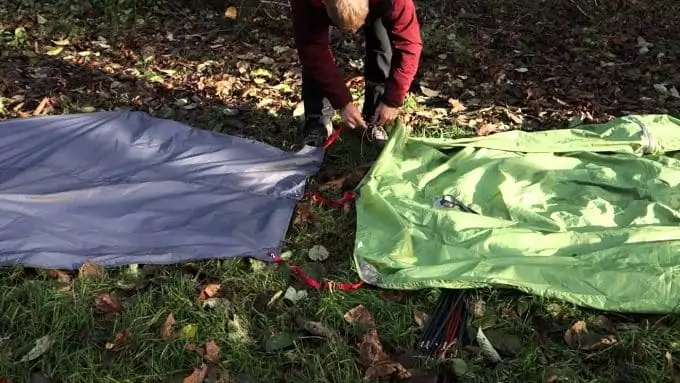
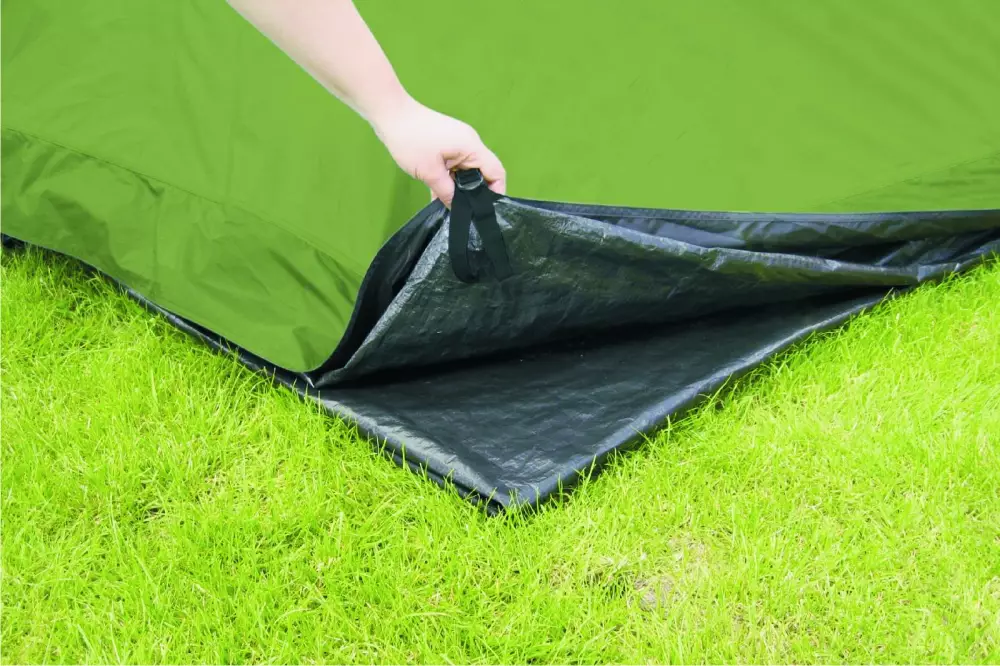
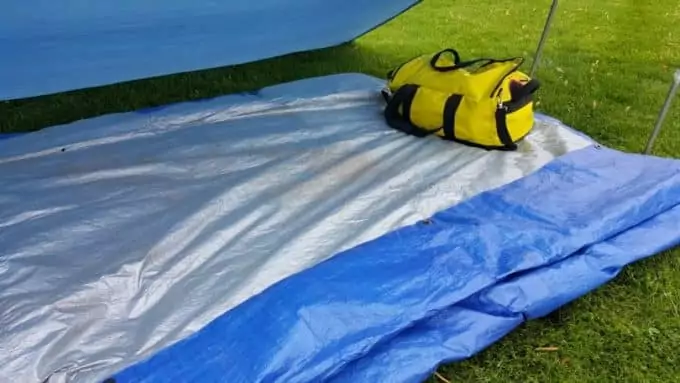
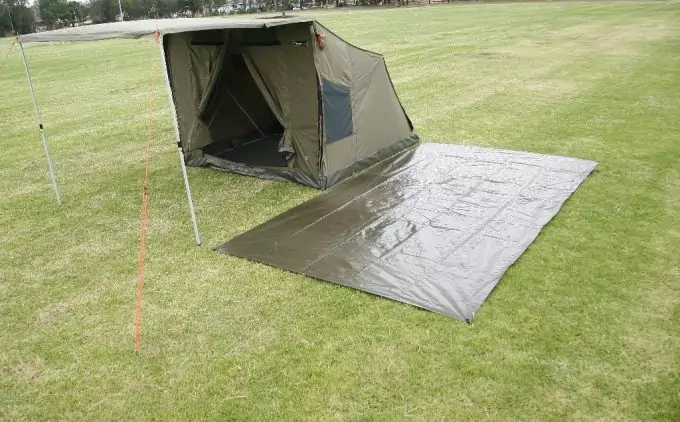
Acquire a medium to heavy duty tarp. Try a hardware store or a garden supply store. You might even already have one laying around a garage or shop. When setting up your tent, put this on the ground first. Set your tent up on top of it.
Tuck the sides under your tent. Some people may even choose to leave a little bit untucked by the door of the tent to give you a “front porch”. Your main concern is to not have a lot sticking out to catch any rain that may fall overnight. If that happens, you might have crafted a lake to camp on.
There are some people that feel this is enough of a solution and never go with any other option. It will work with any tent (so long as your tarp is big enough). You don’t need to worry about any special suppliers. On the downside, it can be a heavier option, and it wouldn’t collapse down much beyond the size that you picked up when you were in the store.
Also, you will have possibly a very large item to fold up each time that you want to take the tent down and move it. Hopefully, you’ll have some help to get it packed up. For more tips on the best tents, see our article on this.
How big should it be?
If you want to craft something a little bit more purpose made than just a sheet of material under your tent, you’ll have a few more questions to ask. Just how big should this thing be? There are at least two schools of thought on this subject, but if you spend enough time looking you can undoubtedly find a few more opinions.
One group would tell you that a footprint should match the size of the tent exactly. This will keep the entire floor of your tent covered and protected. They will tell you that going any smaller will wear out the edges of your tent. The other group will say that you should make your ground cloth a few inches smaller than the actual tent size.
The argument here is that the edges don’t really come in contact with the ground. Also, this keeps you from tripping over the ground cloth when moving around the tent.
You’ll see that both of these groups don’t think that you should have your ground covering larger than the tent itself. Extra material will end up catching water between the footprint and the tent. Even if you have a good waterproof tent floor you’ll end up colder when doing this and the bottom of the tent will stay wet, with is not the way that you want to pack it up.
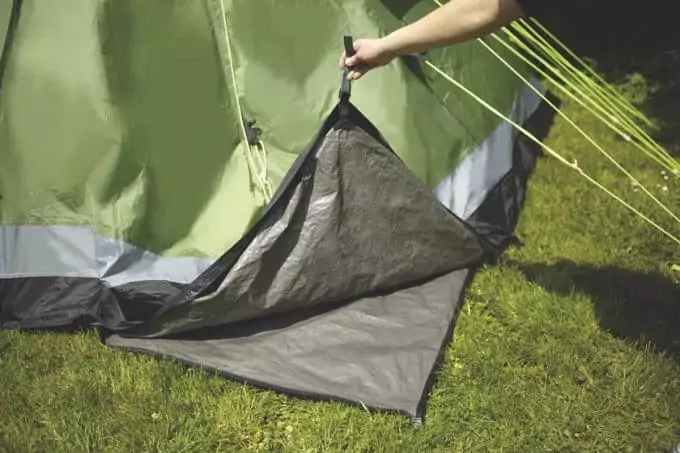
Regardless of if you feel that your ground cloth should meet the edges exactly or be a touch smaller you have options for shape when making yours. Many tents that are on the market today have the rainfly expand out over a door to form a vestibule area.

This makes a great space to take off your boots and even store them while you are in your tent. If you are crafting your own footprint for your tent you can decide whether or not you would like to add a ground cover to this area as well.
Method 2: More Crafting
This method will call for more time and energy to be put forth. In the long run, you’ll have a footprint that is more crafted for your particular tent and you can decorate it any way you see fit.
You’ll need to secure a few supplies before you start off. You’ll need:
- Your chosen flooring material (Tyvek is recommended)
- A grommet set
- Contact Cement
A few tools will be rather useful as well.
- A tape measure
- Scissors
- Hammer
- Something to flatten edges, like a rolling pin
You’ll want to start off with some measurements. First get good measurements of your tent and make some determinations if you would like your footprint to be the same size or somewhat smaller. It may help you to draw these measurements out on paper so you get a good feel for what you are doing.
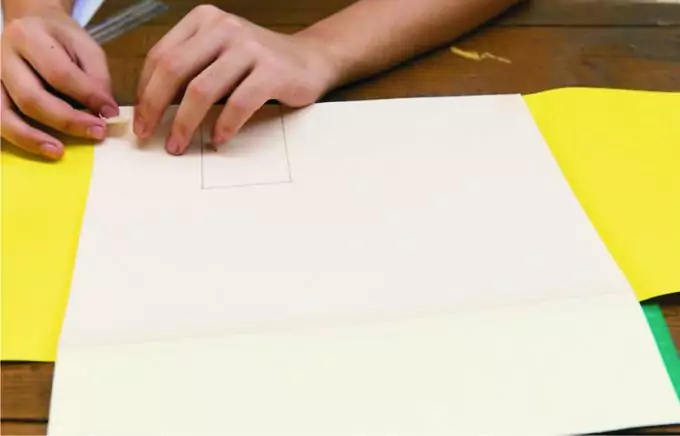
Whatever dimensions, you chose to go with, add about 3 inches on all sides for the edges. Lastly, you’ll want to mark both the line for the size of your footprint as well as the line that you will be cutting.
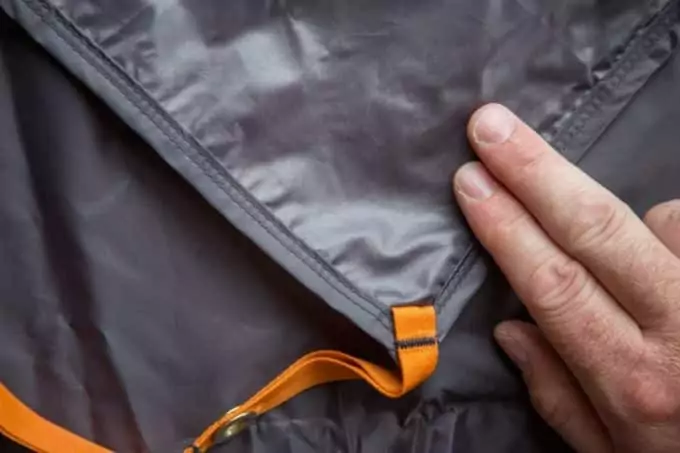
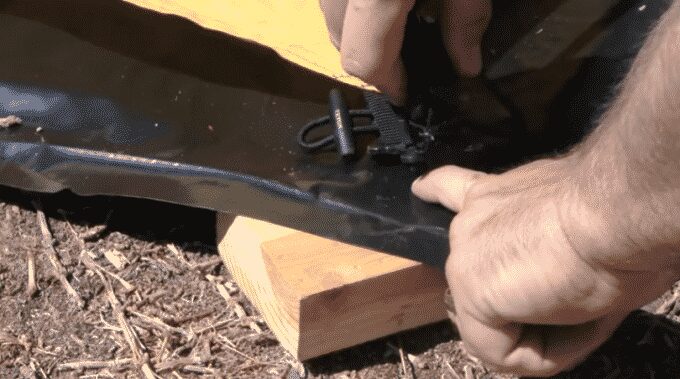
Now you’ll be preparing the edges and corners. First, go to each corner. Instead of leaving them as a square, you’ll want to trim them to a triangular space, that will fold into itself more easily. Once all your corners are cut, it will be time to fold the edges over.
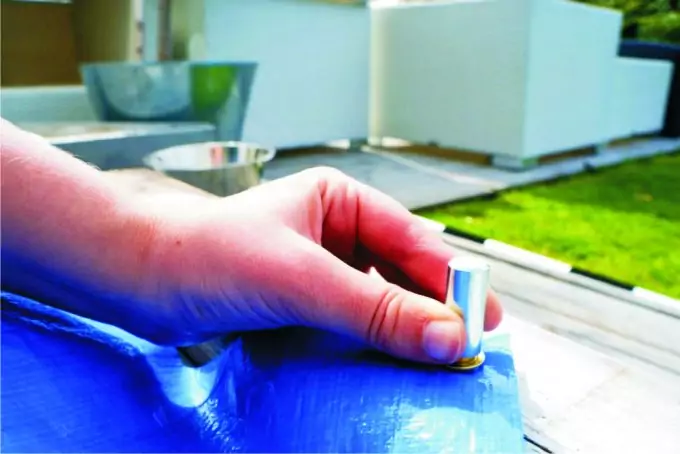
Use some of the contact cement and fold at the line you have left. Use your rolling pin to flatten out these edges so you aren’t left with creases or air pockets. You will want to let your project dry completely before moving on. This gives your edges, and your corners, in particular, some reinforcement. You will be adding grommets to the corners next and an edge folded up in this manner is less likely to start a rip.
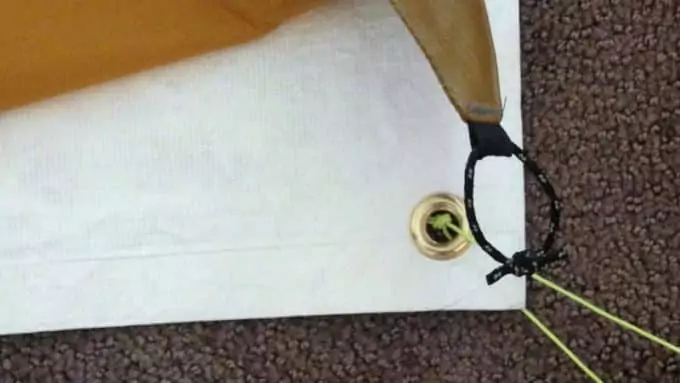
Use your grommet kit and hammer to add grommets where you would like them. The corners are natural choices, but you should look at where you normally stake the tent that you are making this for. Well, places grommets will keep the footprint decidedly under the tent all night long.
At this point, you are done, but you can add a few extras if you like. Some people will add some cord, sized to meet the staking loops for their tent. Since this is your creation if you have an artistic side and want to adorn your footprint with some color to match your tent now would be the time. Make sure you have the correct tool once, see our must-haves multi-tools for you needs.
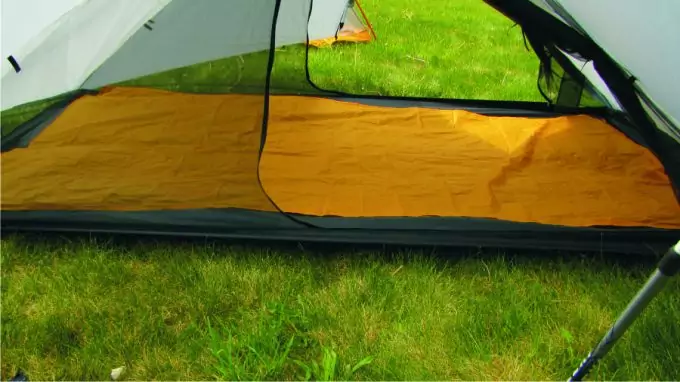
Finally, you’ll want to do a fit check to make sure it covers what you want of your tent. If all went well and you chose a thin material, you can most likely even it in the bag that the tent originally came in.
This method has the upside that you have a custom-made piece, especially for your tent. You won’t need to worry about folding things over to conceal the extra material and you won’t need to consider if you got those extra folds flat enough so they are comfortable to lay on. This does mean that if you use several different tents, you will need to craft one for each tent, though.
Inside or Outside
No discussion of footprints can be made without someone bringing up the debate over whether you should put a lining on the inside or the outside of your tent. The argument for it being inside, is more about the waterproof and insulating features, since inside it will not be adding any level of protection of the tent floor.
Additionally, if your ground cloth is inside your tent you will not have to worry about any water pooling between your tent and ground cloth unless you are quite messy with your water bottle. And inside you will be offering more protection to your inflatable sleeping pad.
You will have to make the call for yourself when you set out on your next camping excursion. It seems that most people like to have the footprint outside. There are times on camping trips that are forecast to be cold or wet that you may want to use not only the footprint under your tent, but a survival blanket, or similar item, inside your tent to provide more comfort for you.
Final Thoughts on the Topic
At this point, you should be able to craft your own tent footprint without any issue. You will want to consider your own camping styles and goals before you begin. It will be critical that you determine the features that are most important to you prior to coming up with any plan.
If you need something durable but lightweight and folds down to not take up space while you are backpacking your best tent footprint may look rather different from someone that only camps in a campground with a parking spot at each site and leaves their tent up for a week at a time.
While a footprint can be an extremely simple thing to make, you can also put some more effort in to form a custom made piece. This will also give you a chance to experiment. If you have always thought, why don’t any of the tent footprints in the store have a given feature you can play around with making yours have that.
Perhaps you could show how useful your idea is for companies, and they will start folding that into the next generation of ground covers that they make.
One of the beauties of crafting your own ground covering is that you will end up feeling more comfortable to use it for just about anything while camping. It might get pulled out to be a place to sit down for lunch. Perhaps it will find itself being a makeshift rain covering when a storm blows over and you want to try to keep you and your gear dry.
Since you made the piece, you will be able to use it with the confidence that should it rip, tear or otherwise come apart you won’t be forced to head to the store and see if they have the right one in stock. Once you get home, you’ll be able to easily craft a replacement. You might even be able to use a bit of extra material and some more contact cement to just repair the current one depending on what happened to it.
Are you wondering whether to use tarp or tent footprint? No, worries, just click on the link to our article for more.
Now it is your turn to do some writing. Is there anything that we missed in the article, some other nugget of wisdom that people should be aware of? Or have you made or own and want to let others know how simple or difficult it was? Let everyone know by sharing your thoughts in the comments section below. And be sure to share this piece out on social media, you never know when one of your friends will be looking for something similar.


Among the skills that are most useful to campers, making a footprint is extremely important, simply because it helps to prevent wear and tear of the tent.
Method 1 is usually the easiest and most suitable for a novice camper, but you should settle for Method 2 for a more rigid DIY tent footprint.