

We live in a world of convenience where most people do not have much experience in the great outdoors, and don’t have the basic skills needed for outdoor survival. Many of us will hopefully never encounter a situation where we will be put to the test in an extreme survival situation. Having a bit of knowledge behind you truly can make the difference between life and death.
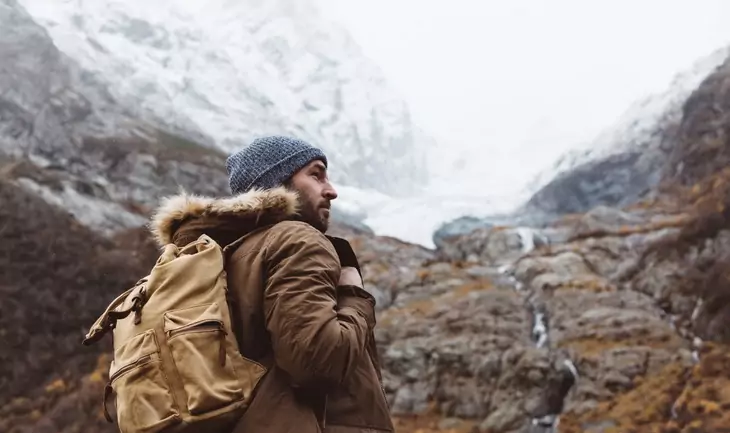
The most common reason people find themselves in life or death situations in the great outdoors is either because they lost their way while hiking, or have had an accident whilst out hiking, camping, climbing, skiing, etc. The great outdoors can be unforgiving and you must adapt and react fast to ensure your safety should an emergency arise. Your first 24 hours can be crucial to your survival.
Outdoor Survival Situations
First and foremost, you should check your situation, where you are and what immediate supplies you have (equipment, food and water). If you have had an accident, you will need to assess physical condition. Do you have any serious wounds, sprained muscles, broken bones or have suffered a serious concussion? If you have, you must attend this first, before undertaking any further action.
If you are fine, ask yourself, can you detect any immediate and present dangers that you need to be aware of or react to? Your exposure to the elements must be considered and you must evaluate the risks posed by wild animals or the terrain itself. First advice, assess your situation and stay where you are, before taking any further actions.
In an emergency, your focus should be on staying safe, finding shelter and sourcing food and water until a rescue party locates you. The further you move from your original location the harder it may be for a rescue team to locate you.
You should only move location if you absolutely need to. The only reason to move should be:
- To avoid immediate danger.
- Seek a more advantageous location to establish where you are.
- Look for shelter and food and water, if there is an immediate need to do so.
Once you have taken the time to assess all the above, then you can decide what line of action to take. Also, remember that energy is precious and the less distance you cover, the better. Remember, stay calm, do not panic and do not make rash decisions.
Ideal location
The ideal location is one which provides safe shelter, food and water. Seek an area that can provide shelter or the materials needed to construct a shelter.
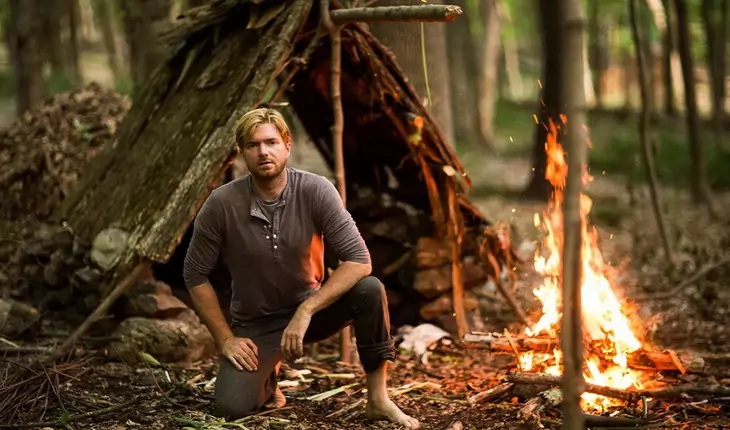
Constructing or finding adequate shelter
The shelter that you fashion or find, will vary greatly depending on the environment that you find yourself in. Your shelter will provide you with protection from the elements be it rain, snow, wind, sun and hot or cold temperatures. It will also serve to keep you safe from wild animals.
Trees
Trees are a great source of shelter and can be a ready supply of decent shelter making materials. A tree can provide you with a natural area of dry ground. You want to maintain and enclose a dry area as a sleeping space and protect it from the exposure.
- Felled Tree Shelter: A felled tree offers a great base to start building your shelter from. Severed branches and bows can be propped against the body of the fallen tree trunk. By layering up the branches and leaves you can create walls providing protection and insulation. Search for a well weighted and sharp-edged rock and you have a crude axe. With such a tool, you can cut branches to size. Having a stone axe or the use of a hatchet will help you in your construction and is useful for collecting firewood.
- Standing Tree Shelter: Standing trees also provide a great existing frame from which you can support beams from and build a shelter around. If you can find four well positioned trees you have four pre-made uprights from which you can then build your shelter. Standing tree shelter video: https://www.youtube.com/watch?v=GL_3PFDYxk4.
- Free Standing Wooden Shelter: It is also possible to create a bender or a stone age hut by creating an X frame like that of a frame found in a standard tent design. You must lash the support beams together and bury the foundations, then construct the walls using branches and leaves. Trenches can be constructed to help secure foundations. Use a strong stick as a makeshift shovel and it is a good idea to dig up and compress your floor. Free standing wooden shelter video: https://www.youtube.com/watch?v=Reav7ZnOrw8.
- Creating Rope or Lashing with Roots: Green tree bark or tree roots make effective lashing material and can be used to secure joins in a structure. Make sure you peel the bark from well sized branches so they will be long strips. Willow is also another great flexible material that is great for lashing. You want to create strong joins. How to make rope from tree bark video: https://www.youtube.com/watch?v=yhKOSAd_Jng.

Caves and Rocky Outcrops
These natural formations can provide you with a great form of shelter from the wild. The smaller the space the greater the heat retention, this is important to keep in mind if you want to stay warm and equally so if you wish to stay cool. For instance, a large cave will not provide much warmth meaning a fire would have to be lit if you find yourself in a cold temperature zone.
Snow
In winter and in some parts of the world, snowy conditions can present a real challenge and are a threat to your safety. However, it is also true that snow can provide you with the perfect shelter to ensure you are warm enough to keep you from freezing.
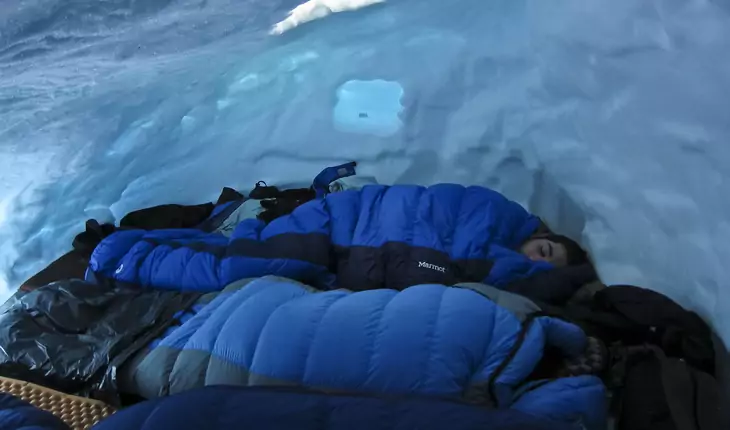
Here are some snow shelters to consider:
- Snow Caves: Snow caves are excellent shelters and are easy to construct. They don’t take much time or energy to make. A snow cave should be constructed in a well sized snow drift. Ideally you are looking for snow of a good compactable consistency, this quality is important as it ensures structural stability. First, locate a snowdrift, the larger the better. Always dig your entrance tunnel at a rising incline, making sure to build your habitation area at a higher level than that of the entrance. This design will create a heat trap and stores warm air in your habitation area, meaning you will not freeze. When digging out the habitation area, construct it in the shape of a dome. The dome shape stops the ceiling from caving in.
- Tree Den: In deep snow conditions, it may be possible to locate fir trees that provide a natural shelter under the branches. Once you have located a tree, it is then possible to excavate a circular area around the trunk, digging downwards with care. Make sure the snow doesn’t pile in as you dig, compact the walls as you descend. Pack the floor with fir branches and fashion yourself a makeshift lid to create an insulated environment that will be free from snowfall. Tree dens are a great way of staying warm and safe.
- Igloo: The classic snow structure, igloos are great and provide excellent protection from the cold, as well as being spacious. It is important to consider the validity of constructing an igloo as they are time consuming and often a snow cave will suffice. Building an igloo first requires the creation of a mound of snow, this has to be sited on relatively flat terrain. It is important to make sure the mound is sizable as you will be burrowing into it. As a rough guideline, it is recommended that you make the mound at least 1.5 meters in height and two meters wide. Once the mound has been completed it is important to let it sit and set for a period of two hours, conditions permitting. To create the inner chamber, you need to begin by tunnelling into the centre and slowly begin your excavation. Use the removed snow and loosely throw it onto the outside mound, this will keep the walls at an even thickness. Remember, you want to aim to construct the igloo in the classic circular shape. Hollow out the inner chamber in an even and methodical manner, making sure to go at a slow, steady and safe pace. Use a circular arcing motion when hollowing out the chamber, you are looking to produce a dome like interior. Feel free to fill in any holes as they appear with compact snow and make yourself a comfortable space that fits your needs adequately.
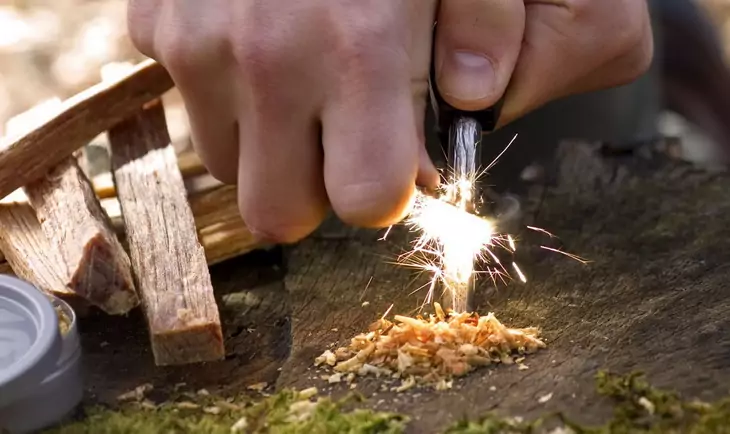
Making a Fire
Learning how to make a fire is a crucial skill that is a high priority. Being outdoors in the cold can be fatal. Hypothermia can set in quickly and being able to create a fire and generate warmth is a sure way of avoiding such dangers. Food preparation can also require the use of a fire and fire can be helpful it warding off unwanted creatures.
How you go about making a fire will depend on the resources you have available. Most importantly, it is good to have a source of dry fuel, in the form of tinder, kindling and then larger longer burning pieces of wood. Tinder can be made from a variety of flammable substances. For example, dry fungus, dry wood fibers or cotton work well. These are the first materials that you will use to start your fire. Check out our article on how to build a campfire, which can be quite useful in any survival situation.
You should then have an ample selection of kindling available. These should consist of small dry sticks that you will then add to your burning tinder to build on the existing flame. Lastly, it will help to have a pile of larger pieces of wood, or dry branches, are great and can be snapped by hand into segments. If you will be in the wilderness long term, it helps to have a dry store of fuel for fires saved for future use.
- Starting a Fire with Rocks: It is possible to light fires using two pieces of rock, or a rock and the blunt side of a steel blade. The technique is the same as the one you would use when striking a ferrocerium rod. Quartz and flint are the ideal stones you want to look out for, they are great for starting fires. You must use the quartz or flint strikers in accompaniment with a larger piece of stone or the blunt side of a high carbon steel blade. If you fail to have a knife handy the stone that you will be striking the flint or quartz against should ideally be a stone containing some iron content. You can experiment with different rocks to see which combinations work best. Also, make sure your quartz or flint has a good sharp edge, as this ensures a good spark.
- Starting a Fire with Sticks: This method of lighting a fire is well known, but can require a large amount of effort. The stick method requires the build-up of friction between two pieces of wood. There are three different variations that are commonly used: Hand Drill, Bow Drill and Fire Plough. Do check our article on using fire starter kits to start a fire easily.
- Hand Drills & Bow Drill: The hand drill and bow drill are practically the same, the only real difference is the use of a bow which will save your hands from blistering. Hand drilling is not for the faint hearted. These techniques are energy intensive in comparison to the other methods, but work effectively if done correctly. You need a stick with a sharpened point which you will spin to create the friction and a piece of wood that you will drill the sharpened point into. It is possible to create variations on these methods and the video below is an excellent example of this: https://www.youtube.com/watch?v=ZEl-Y1NvBVI.
- Fire Plows: For the fire plow, you will need to create a channel in one large dry branch using a stick and drag a smaller stick along the channel, rubbing it vigorously backwards and forwards. This creates friction which creates heat and eventually smouldering coals How to make fire plows video: https://www.youtube.com/watch?v=0iI-eF84ctg.
Drinking Water
Keeping hydrated is crucial and you will not last very long without having access to a supply of freshwater. Most people can last for around 3 days without water, so locating clean drinking water should be a high priority. It is recommended that you drink water at regular intervals if possible to prevent dehydration. However, if you do not have a constant supply of water, it is important to ration the water that you have available, try and strike a balance between regular consumption and water rationing.
Rainwater is the best source of clean drinking water. If your water is sourced from anywhere else always look for clear water and try and drink water as close to its spring as possible.
- Catching Rainwater: If the situation gets desperate, it is possible to drink rain water off non-toxic plant leaves and it can help to create rain catching pits. Rain catching pits can be constructed easily, you must dig a small hole in the ground and use either a waterproof coat or some leaves to line the hole. When it rains the water will collect in the hole and you should have a decent supply of water to quench your thirst.
- Getting Water from Plants: Plants not only provide food and shelter, but they can also offer a source of water. If you are lucky enough to have a small plastic sheet or bag on your person, it is possible to use this plastic to capture water from plants. This method requires you to wrap the plastic around the green leaves of a tree or shrub and bind it to the branch. Through transpiration the plant will release water, which the plastic bag will collect, this is a neat trick and can be effective in generating some much-needed purified water. Getting water from plants video: https://www.youtube.com/watch?v=avZtD4gkM84.
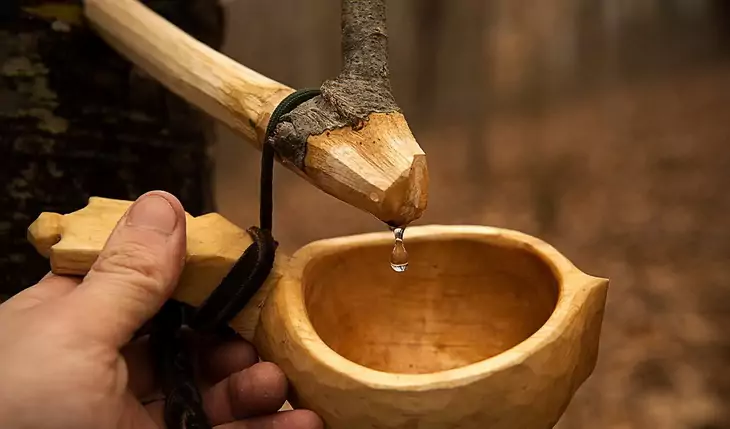
- Tapping Birch: Tapping birch trees is another means of sourcing water and a birch tree can supply you with a good amount of liquid. This method involves removing an area of the bark on the tree, fashioning a wooden stake and piercing the exposed trunk at a steep upwards pointing angle. Make sure you insert your steak no more than an inch into the trunk as this will ensure you won’t damage the tree. The water retained in the tree will then drip down the stake and can be harvested for your needs. Tapping water from birch trees video: https://www.youtube.com/watch?v=UW1LV6D3oLU
- Solar stills: Are a fantastic way of purifying salt water and can also be used to collect fresh water from streams or lakes, as well as source water in a desert. These stills work using the process of evaporation. To construct your still you will need some plastic sheeting, a vessel of some description and ideally a piece of tube, although you can do without it. The process involves digging a small pit in the earth. Dig a pit that is roughly 3 to 4 feet wide and to a depth of about 3 feet, or until water starts to appear (if near an existing water source). You will then need to place your vessel in the pit, making sure to secure it if there is water present, rocks will help secure the vessel if needed. The next step, if applicable, is to place your tube in the vessel. Then proceed to cover the pit with your plastic sheet. You can secure the sheet around the edges using sand or dirt to create a seal. The final stage involves you placing a small stone in the middle of the plastic sheet above the vessel. The water will evaporate on to the underside of the plastic sheeting and be channelled towards the lowest point, collect and drip into your vessel. If you have a tube remember to tie the end so you don’t lose any moisture.
- Purifying Water: Having pure water is of huge importance, waterborne diseases can be life threatening and you want to avoid any chance of becoming ill. The easiest way to prevent this is to boil your drinking water, it is recommended that you do this for a minimum of three minutes. Our piece on how to purify water in survival situations will help you a lot, so check it out.
Sourcing Food in the Wild
Finding adequate food is a real problem in the wild, especially if you do not possess a good knowledge of edible plant species. The average human can survive for around three weeks without food, so be aware of this fact. If you get hungry do not make rash decisions, if you do not know if a plant is edible, it is best to avoid, many plants can be poisonous so try and stick to foods you recognize. It is always a good idea to do research into your environment before entering it, so if possible you will have an awareness of edible and easily foraged food stuffs. Take a look at our article on how find and cook edible bugs that can help you survive in the wild.
However, generally, if you spot a bird or mammalian animal consuming a fruit, nut or type of vegetation it will probably be edible. There can be exceptions though, so be wary. It is also possible to hunt. Animals can be a great source of protein and if you are lucky enough to find one and capture one, remember to cook it thoroughly. However, the task of hunting an animal if you have no training can be hard work and physically draining.
Wrapping it up
Always be well prepared when heading into the wild as the more equipped you are and the greater the knowledge you possess, the greater your chance of survival should anything happen. Always inform people of your planned destination in case you need to be rescued and stay calm and remember the first 24 hours in a survival situation can be critical.

Please feel free to share and comment on this article, any advice, ideas and suggestions are always welcome.


I have provided you with the most essential tips for surviving the wild or the unknown. However, it is always wise to let people know where you are going or to have some kind of communication device.
If you are new to outdoors, you need to learn as much as you can on how to survive the wild. The tips will prove helpful, especially under extreme weather conditions.