
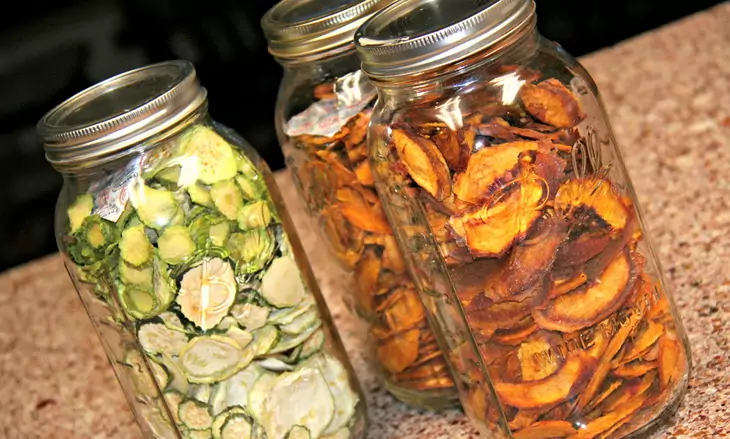
Drying food, or more specifically, dehydrating, is one of the best ways to preserve it while planning a camping or hiking trip and it is lighter than canned options. Therefore,today, we’re bringing you lots of dehydrated food recipes, and while for most recipes you’ll need a dehydrator, we’ll provide options for those of you who don’t own one. Both ways will provide useful food to stock up a storage of meals, that you won’t need to cook while outside in the wilderness.
By following simple steps we will provide in this article, you will have prepped meals that can easily be restructured by adding a bit of hot water or simply heating it above the campfire or a rocket stove. Let’s start!

What you will need to dehydrate food
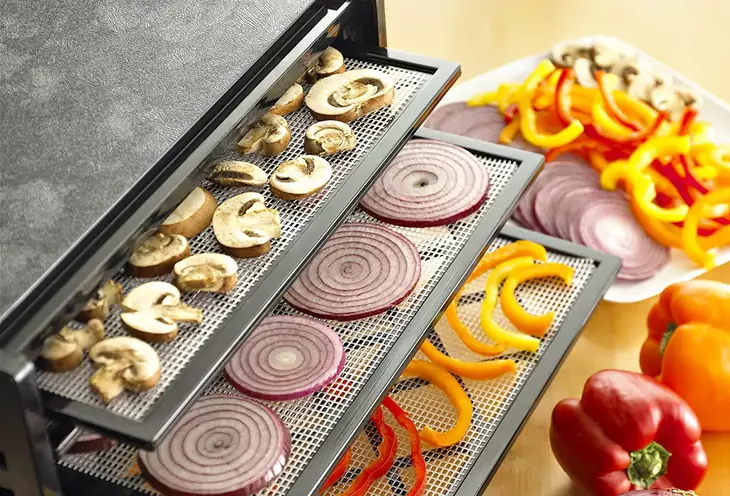
- Dehydrator – There are various types and brands of Dehydrators out there on the market and you don’t need to be a chef or an expert to know which one to buy, just keep in mind that you choose a dehydrator that has a different temperature system in order to set the air heat based on the type of food you’re dehydrating. To help preserve your food, here’s our list of the top food dehydrator to jump start your preparations.
- Oven – Almost all food can be easily dehydrated in an over, just keep the temperature at minimum and open the oven door just enough to let the air flow (tip: use a ladle between the oven door and the oven, it will provide enough space for air to run smoothly in and out). Dehydrating food with oven will be faster than dehydrating with a dehydrator due to the higher temperature, but you can prevent food to “bake” if you keep the oven door open
- Hook – Most of the herbs don’t need to be dehydrated, but simply hung on the hook and left to dry in the air
- Mandolin or a knife – Mandolin is a great tool to cut veggies and fruit because it’s really important to cut food equally when it comes to size. If you don’t have a mandolin, you can use a sharp knife.
How to dehydrate food using the oven
There are many methods that are really efficient when it comes to dehydrating vegetables, fruits and meat, and using the oven, is surely one of them and is the most preferred method for all beginners in dehydrating food and “old-fashioned” folks, who are still doing everything the old way.
Dehydrating in an oven will safely dehydrate, all the food you want to protect from insects and dust. Although, buying an electric dehydrator is not a big investment and uses less power energy than the oven, we would suggest starting with the basics and experiment with dehydrating in a conventional oven.
How to do it:
- Use a thermometer to test the temperature as the optimal temperature for drying food in a conventional oven is 120 to 140 F (any temperature above can cause food to become scorched and untasty)
- Use a measuring tape to make sure your cooling racks and drying trays fit in your kitchen oven. Make sure that there is one and a half inch between the oven and racks and trays in order to ensure air circulation and at least three inches between the first tray and the top of the oven and two and a half inches between racks.
- If planning to dehydrate food in an oven you need to do it the same day you harvested vegetables and fruits. Make sure you use only fresh produce.
- Slices need to be cut evenly to the same size in order to dry thoroughly
- Wash all freshly harvested food before dehydrating it
- Jerky takes around 4 hrs to dehydrate
- Vegetables take approx 8 hours to dehydrate
- Fruit takes approx 4 – 5 hrs to dehydrate
Extra tips:
- Preheat your oven to 150 F and then lower the temperature accordingly to the food you’re dehydrating.
- Prop open the oven at least 4 inches so that the air can circulate properly
- Always cover your trays and racks with baking paper, cheesecloth or net-nylon. This way you will more easily remove the dehydrated food
- Rearrange racks and trays every 30 – 45 mins in order to keep food dehydration even on all sides
- Examine dehydrated food carefully, especially when the time of the process is near the end
- Use only the bottom (lower) element.
- You can dehydrate four to six lbs of produce at one time
List of food you can dehydrate
- Frozen vegetables – Green onions, onions, jalapeno, green beans, leek, lettuce, peas, onion, pumpkin, potatoes (all types), scallions, rhubarb, Swiss chard, spaghetti squash, all types of tomatoes, turnips
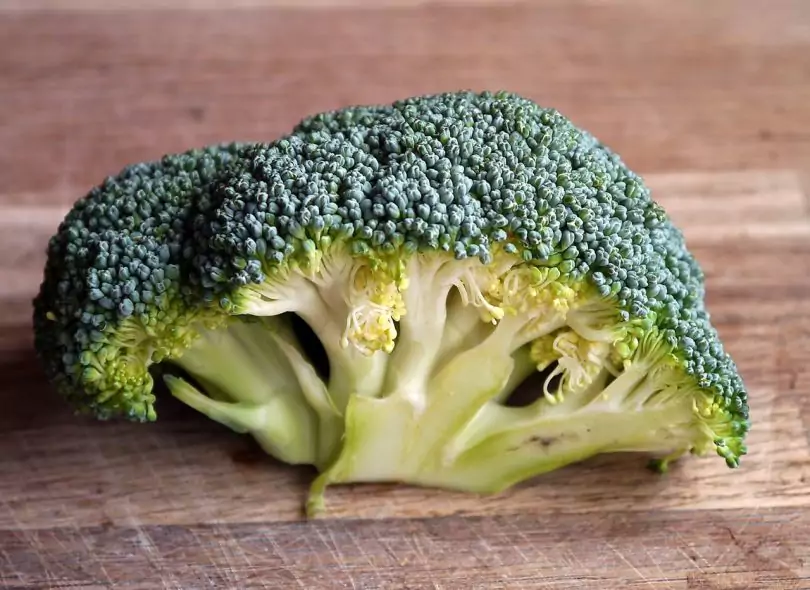
- Fresh vegetables – Asparagus, Broccoli, Beets, Beans, Butternut Squash, Celery, Corn, Carrots, Chives, Cucumbers, Coleslaw, Eggplant, Edamame
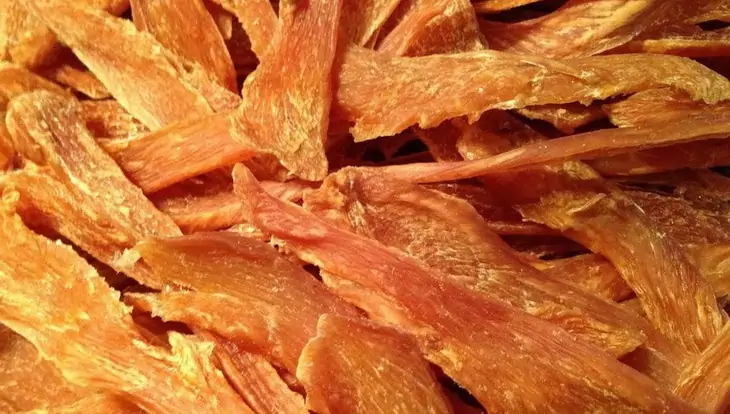
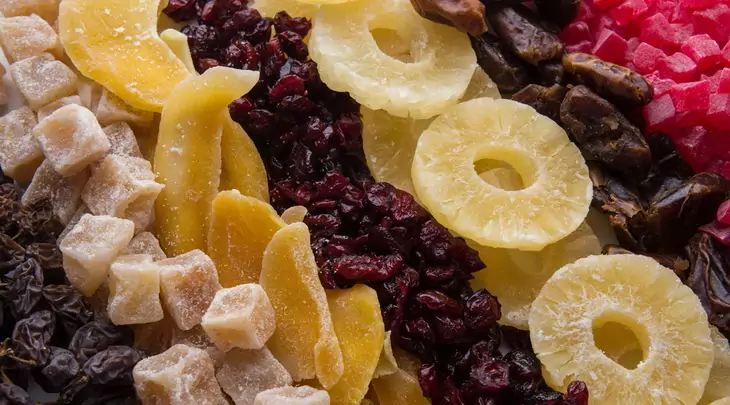
- Fruit – Apples (all types), banana, muskmelon, blueberries, citrus fruit, cherries, cranberries, kiwi, grapes, papaya, mango, pineapple, watermelon, strawberries, raspberries.
- Meat – Chicken, fish, beef, biltong, all types of ground meat, lamb, pork, turkey, venison meat
- Spices and Herbs – Lavender, ginger, rosemary, stevia, spearmint, all herbs that can be hung and left to dry naturally in the air
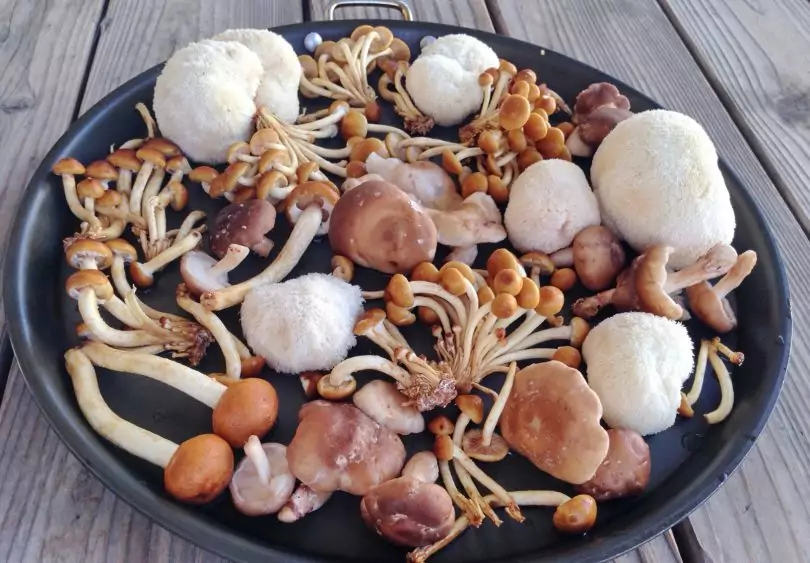
- Other – Broth, cheese, eggs, bread crumbs, bean bark, gourds, kimchi, mushrooms, marshmallow, nuts, milk, rice, oatmeal, whole grains
For more dehydrated food recipe tips, see our previous article on this all-important topic.
Beginners guide to dehydrating
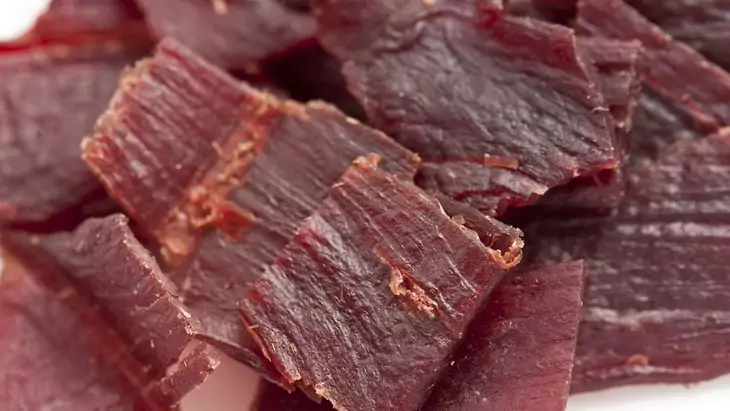
Meat
While veggies re-hydrate well, it’s not the same for meat. You might experience somewhat “chewy” texture than you’re used to but we have to say that it is better to have at least something at your hand when out in the open than not having anything to eat, especially meat. You can experiment with longer re-hydrating time in order to get the meat that suits your taste, but here is some basic info on how to dehydrate meat to start with.
It is best to dehydrate previously cooked meat, cut into small pieces at 160 F and to use tender cuts. This way you’ll possibly get tender, not chewy meat. Choose meat with less fat as it is fat that makes the meat sour.
Dehydrated meat is great for use in soups and stews, slowly cooking on the campfire and it can last up to two to three weeks kept at room temperature.
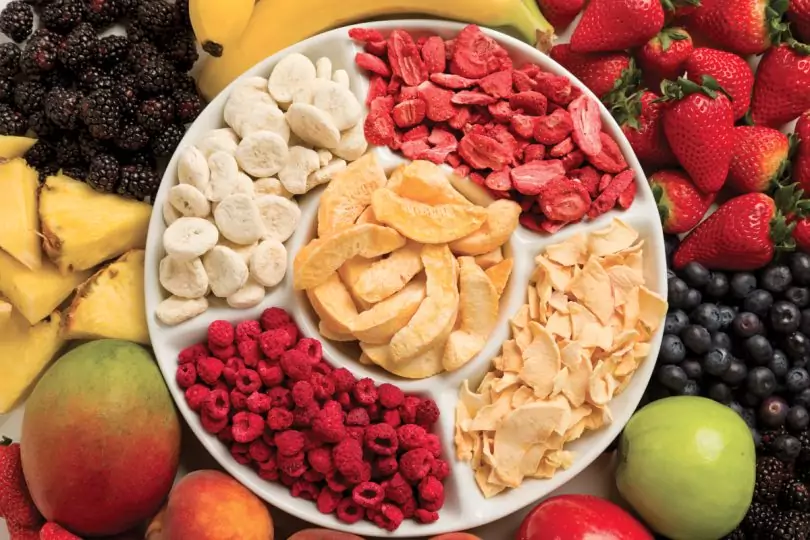
Fruit
It’s best to dehydrate food at the peak of the season because this way you will save money and the fruit is ready to harvest, although it is possible to dehydrate frozen fruit as well. Fruits are best dehydrated at the temperature between 125°F and 135°F in order to prevent fruit getting crusty or baked, so don’t risk by turning your food dehydrator on higher temperature to speed up the process, you will only ruin fresh fruits.
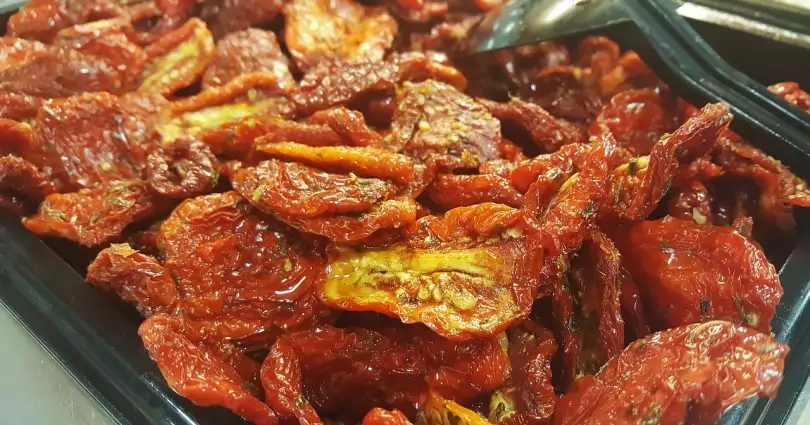
Vegetables
Same as with fruits, dehydrating vegetables is best done when freshly harvested. Just wash them and dehydrate it right away. Dehydrating vegetables is a pretty easy process and pretty similar to the one that is used for dehydrating fruits.
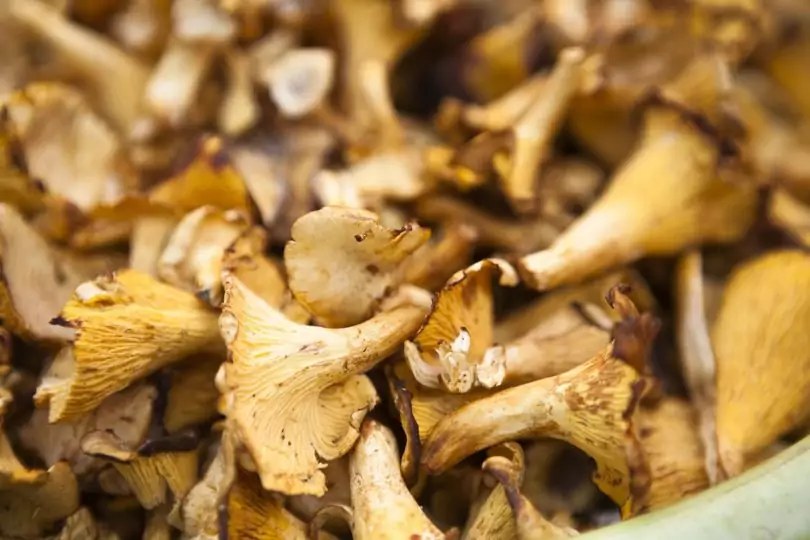
Almost all veggies are best dehydrated at temperature between 125°F and 135°F. Avoid higher temperature as it can create the crust on your veggies and make them baked instead of dehydrated. The only vegetable that needs special attention is mushrooms. They can’t be washed as this will make them too wet and the best practice is to dehydrate them on two different dehydrating temperatures (see instructions in the recipes section below).
Frozen Fruit and Vegetables
All you need to do with frozen fruit and vegetables is to place it on trays without any preparation. The only thing you can do is to throw it down on the table or a counter top just a few times before you open the bag. This way you will separate food that has been clumped during the freezing process. If you can’t get fruit to separate and still have clumps you can simply put them under cold water (just for a few seconds) and you’re good to go.

Some fruits and veggies such as fresh carrots, strawberries, bananas and apples require some lemon juice spraying because it will prevent bacteria to grow during drying and fruits from darkening. Lemon juice is considered completely acceptable natural replacement for ascorbic acid.
Interesting snack recipes
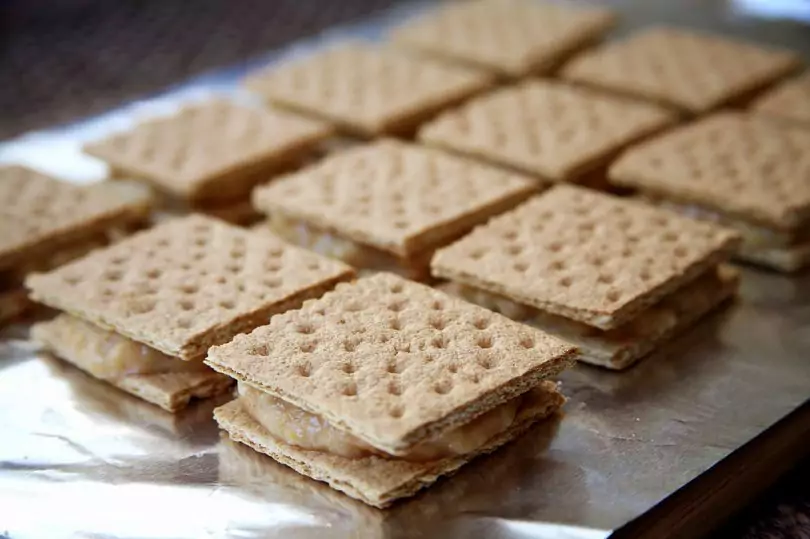
Banana Graham and Peanut Butter Crackers
Ingredients:
- 3 sliced bananas
- ½ cup of peanut butter (cream)
- 1 cup of peanuts (grounded)
- 2 ½ cup of Graham cracker crumbs
- ½ tsp of cinnamon
Process:
- Mash bananas in a large bowl and mix in a peanut butter cream
- Add peanuts, Graham cracker crumbs and cinnamon and stir it until it’s blended well
- For a dough ball.
- Use a big piece of baking paper and shape the dough into a rectangle.
- Enclose the paper firmly around the dough and leave it to cool down for four to six hours (you can leave it overnight too)
- Use a toothed knife to slice the dough into four slices.
- Place on dehydrator sheets and dry in for four to six hours at 145º (when firm, take them out of the dehydrator). They need to be soft just like cookies.
- With this recipe, you will get approx. 50 crackers.
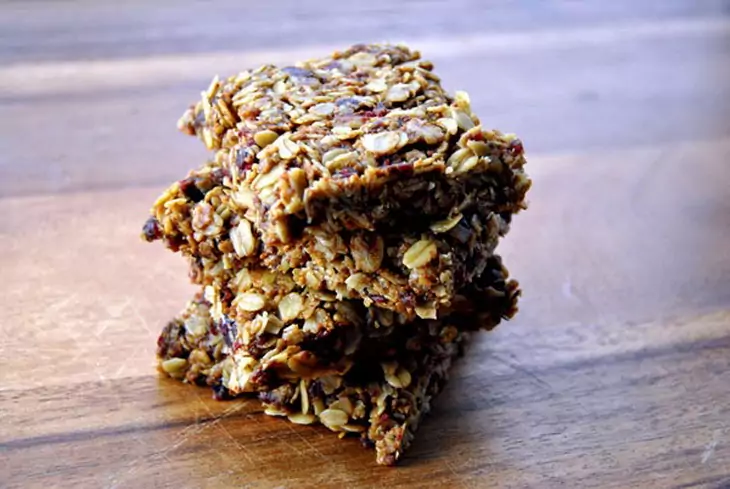
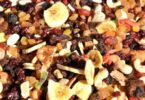
Dehydrated Granola Bars
Ingredients:
- 1 cup of almonds
- 1 cup of dates
- ½ cup of dehydrated grapes or raisins
- 1 cup of mixed dried pumpkin and sunflower seeds
- ½ unsweetened coconut (shredded)
- 2 tbsp of sesame
- 1 tbsp of cinnamon
- 1 tbsp of vanilla sugar
- ⅓ cup of flax seed
- 2 tbsp of honey
- 2 tbsp of tahini
Process:
- Soak almonds and dates in water for 1 to 1 ½ hr (90 mins)
- Drain water and mix almonds and dates with dehydrated grapes or raisins, coconut and pumpkin and sunflower seeds in a food processor (you can divide it into thirds to overpower the food processor)
- Scrape the sides and continue mixing in a large bowl
- Add sesame seeds, cinnamon, flax seeds, honey, tahini and vanilla sugar and stir well with a spatula or a spoon.
- Form little balls (around 2 Oz sizes) and shape it into bars with a baking paper
- Place them on dehydrator trays and dehydrate for about 2 hours at 135°F and then turn the dehydrator temperature down to 115°F and continue drying for ten to twelve hours.
- These bars can be eaten raw too, just skip the dehydrating process and after the mixing, place the shaped bars in the fridge.
Pizza-Chini (Pizza Zucchini)
Ingredients:
- Thinly sliced zucchinis (to replace the pizza dough)
- 3 tsp of tomato paste (can also be prepared in a dehydrator)
- 1 tsp of vinegar (apple cider)
- 2 cups of water
- 1 tbsp of onion powder (can be prepared in a dehydrator)
- 1 tbsp of garlic powder (can be prepared in a dehydrator)
- 1 tbsp of oregano (dried, can be dried on a hook)
- 2 tsp of salt (you can add 3 if you like saltier meals)
- 2 tsp of paprika
Process:
- Use a large bowl and mix spices and tomato paste until the mixture is nice, add the water and stir again.
- Coat squash and zucchini slices with the mixture you prepare (thoroughly) and leave it cool for a few hours in order to squash and zucchini intake all the flavors of the mixture and marinade.
- Place zucchini and squash slices onto the dehydrator tray and coat them with the remaining mixture/paste.
- Place trays into dehydrator and dry at 105 degrees for 10 hours

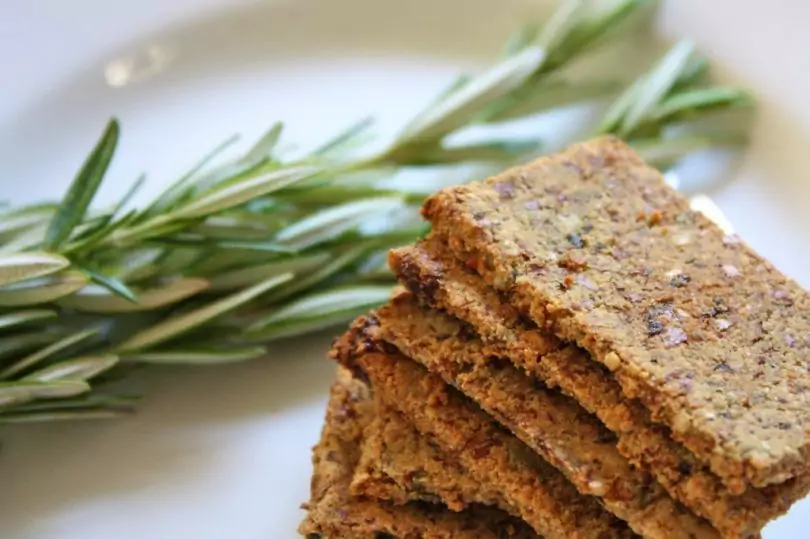
Rosemary and Almond Crackers
Ingredients:
- 1 cup of water
- ½ cup of Chia seeds or (ground golden flax)
- 3 cups of almonds
- 2 tbsp of finely chopped rosemary
- Fresh ground pepper
- Salt
Process:
- Soak almonds in water overnight, then rinse and drain
- Stir chia seeds (or ground flax) in water and leave for 30 minutes
- Process almonds in the food processor
- Mix processed almonds with chia seeds (or flax), salt, pepper and rosemary
- Spread it in a thin layer on a baking sheet and place another sheet at the top of the mixture.
- Roll out the mixture by using a rolling pin and cut into rectangles.
- Put in the food dehydrator for 45 minutes at 145 F temperature, then lower the heat to 115 F for approx 8 hours.
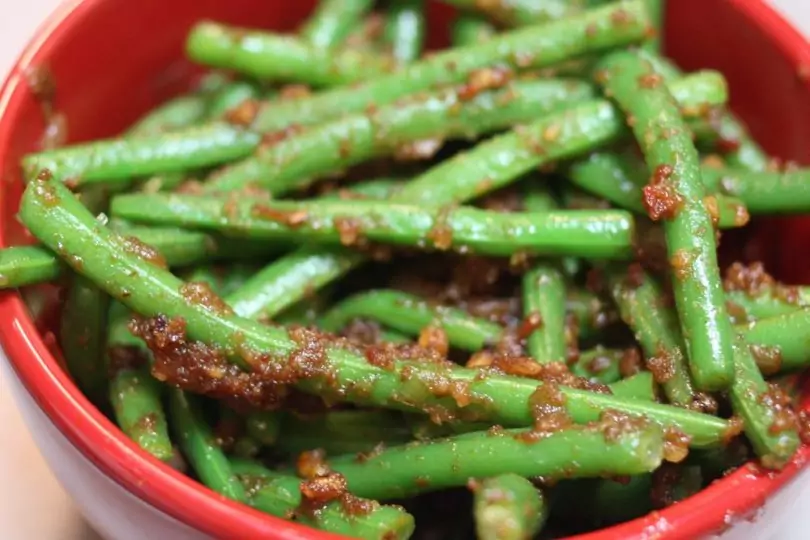
Spicy Green Beans
Ingredients:
- 1 tbsp of olive oil (extra virgin)
- 1 lb green beans
- ½ tsp of spicy mix (cayenne, black pepper and salt)
Process:
- Boil water in a saucepan and add green beans
- Blanch it for around three minutes
- Remove the saucepan from the stove and put green beans under cold water in order to stop them from cooking (like you would do with pasta)
- Dry green beans and spice them with a spicy mixture and extra virgin olive oil.
- Place them on a tray and let it dehydrate at a temperature of 125 F
- Store in baggies or jars
Dehydrating chicken for camping trips
Ingredients:
- 6 chicken breasts (large)
- 3 tbsp of salt
- 2 l of water
- 4 tbsp of sugar
- 2 cloves
- 1 bay leave
- ½ tsp of peppercorns
Process:
- Marine chicken breasts at least 24 hours, choose seasoning and spices you like
- Mix all the ingredients (except chicken) in a pot, stir it and boil until salt and sugar dissolves
- Remove the pot and leave it cool
- Once it has cooled off you can leave it in a fridge for 12 – 24 hours until completely cold before adding chicken breasts.
- Smear chicken breasts with the mixture and leave it in a fridge for 12 hrs. The mixture needs to cover chicken breasts completely.
- Pressure cook the chicken for about 12 mins until completely cooked.
- Let the chicken breasts cool and then cut them into small and thin slices. The thinner you slice the meat the quicker it will dehydrate.
- You can either dehydrate it in an oven or a food dehydrator. If dehydrating in an oven, don’t forget to leave the oven door opened a bit. The temperature of the oven should be 122 F max. If using a food dehydrator you can adjust the temperature a bit higher.
- Dehydrate it for 8 to 12 hours. When the color of the meat is darkened and is easy to break it’s done.
- Store it in a container (possibly airtight) in a cool and dark place.
Woodsy snack – Mushrooms
Process:
- If you don’t have freshly harvested mushrooms we suggest buying pre-sliced ones as this will save you some time with slicing and preps plus they are sliced almost evenly.
- If you have fresh mushrooms, then use a damp cloth to gently wipe the dirt. This is all you need to do.
- Slice them to ⅜ inches through the steam and arrange slices on trays. Make sure that they don’t overlap.
- Turn the dehydrator to the low temperature around 90°F and dehydrate mushrooms at this temperature for about 2 to 3 hours
- Then increase the temperature to 125°F until they are fully dried (around 10 hrs)
- Spread out trays in order to get even drying
What have we learned?
Dehydrating food for your hiking and camping trips is a great idea. If you never tried dehydrated food, then it’s the perfect time to jump right in and start dehydrating and trying new things. There are so many good ingredients and food that can be dehydrated that it’s almost insane. Hopefully, our recipes will encourage you to start trying new things and keep you full with a diversity of yummy meals on your adventures. Don’t forget about wild animals, so make sure to read our piece on the best bear canisters to keep your food safe.
If you’re already a true dehydrating master please share your stories, tips and recipes with us. If you found out something that works better than something we suggested in our article, we would love to hear it too.
For beginners who want to learn more about food dehydration, see our article on how to dehydrate food for newbies.
Feel free to comment below or share our delicious recipes with your friends and family on Facebook, Twitter, G+. Post your delicious, dehydrated meals on Instagram and tag us. We can’t wait to hear more recipes. Good luck with dehydrating, stay full and happy hiking/camping!


Very interesting, I’m going to taste test some of these recipes that you provided. Is there a taste difference between dehydrated produce and regular?
There should not be any difference in taste, unless you are very sensitive. There may be a food preservative added.
The food is something we can simply manage in a hike or camping if have the best experience. While reading this article I felt like I can use these in my next hike. And I have one thing to clarify, can we use pre cooked items in a camping or hike?
Yes!