
Eating on the trail is both similar and different from eating at home. While you are hiking and backpacking your body is burning a lot of calories. In order to remain healthy and active throughout your trip, your food will have to replace the calories that you are losing. The best hiking food guides suggest eating foods that are high in good fats and proteins. Make sure and consider this when packing your gear. Eating enough calories will help you avoid headaches and lethargy.
Studies also show that sufficient eating allows us to focus and concentrate better as well. You do not want to adhere to a strict diet while on the trail.
How Much?
Some experienced hikers suggest packing enough food to allow for 2,500-4,500 calories per day per person.
These estimates are, of course, going to vary according to your weight and individual needs. As you gain more experience yourself, you will become more familiar with how much food you will need for summer hikes, winter hikes and anything in between.

The most important thing to be aware of is to make sure you will not run out of food. It is always better to have a little more weight in your pack than to run out of food before you get home. So in the beginning, always pack more than you believe you will need.
Good Types of Food
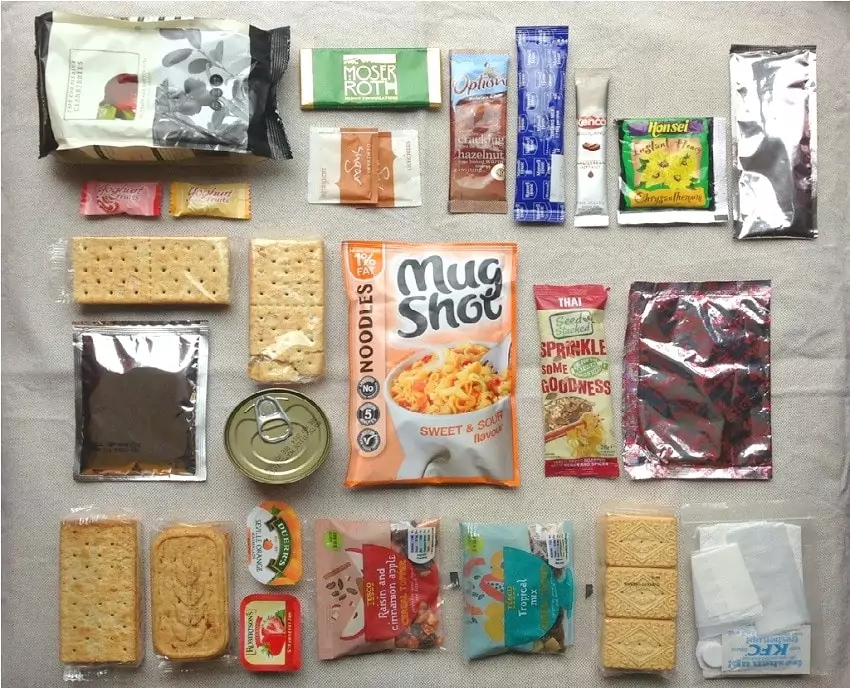
When deciding what kind of food to take with you on your hike, you need to consider a few things before throwing it in your pack.
- Durability: How well will this food do when being shaken around in a backpack for days on end? Bananas are a great snack, however, they bruise and ruin easily. Unless you only pack one or two for the first day, chances are they will not do any good.
Peanut butter, on the other hand, is not affected by temperature or being shaken and tossed around. This makes it a perfect candidate for hiking food. - Prep time: How long will it take to get this food ready to eat? We will be discussing cooking on the trail in a little while, and a hot meal is always welcome when you are working hard, but everything should not have to be cooked.
For breakfast, lunch, and snacks, you should choose a food that is quick and always ready. You do not want to have to spend 30 minutes cooking every time you get hungry. You simply need food to replace the calories that you are burning so your body remains healthy. - Trash: What is the trash that comes along with this food? Remember, you are in the woods, on the trail, far away from a proper trash can, you must choose a food that does not produce a lot of trash that you will have to keep with you for a week.
- Weight: Basically, you need to consider the calorie to weight ratio. If your food for breakfast each morning adds 1 lbs for each day, but you only receive half of the calories you need, it is probably not a wise choice for food.
Again, peanut butter is a good choice. An entire jar may weigh a pound or two, but it is packed with protein and calories that are extremely beneficial. - Taste: Do you like the food? Do yourself a favor: Don’t try a plethora of new foods that you are not sure you will like while on the trail. You have two choices; Try the foods before you leave OR Only pack one or two foods to try while you are out. If you force yourself to eat foods that you discover that you hate for a week in a row, you will be miserable. Don’t do that to yourself.
There are a ton of choices and combinations for great hiking foods, what you enjoy and what is best suited for your type of hiking will determine which choices you will make. Most experienced hikers tend to agree on the best types of food to take along on your trip.
Peanut Butter
The versatility and durability of this food make it perfect for the trail. Having 94 calories, 3 carbohydrates, and 4 grams of protein per tablespoon makes it extremely beneficial. Some places offer peanut butter in a squeeze tube that makes it even easier to carry along.

If you are unable to find those convenient packs, don’t fear. A small jar of peanut butter will serve you just as well while you are hiking.
For a variety of snacks try smearing the peanut butter on crackers, apple slices, celery and other foods to mix it up. Each of these, are healthy and fairly easy to take along the trail. If you really need a quick pick-me-up, eat a tablespoon or two straight out of the jar.
Tuna
Tuna is not for everyone. Personally, I do not touch it with a ten-foot pole, however, it is a great food to take on your trip. At only 179 calories per 154 g of tuna, it is not a high-calorie food. What it brings to the table is the amount of protein it carries.
There are 39 grams of protein in that 154 grams of tuna. These proteins are essential in keeping your muscles functioning properly. In case you did not know, muscles are the only thing keeping you alive. Your heart, lungs, and other organs are muscles. The proteins will allow them to work at their full potential.

There are several suggestions when making tuna on a mountain. The favorite can of tuna is one that is small and has a pop top. When you choose the can that has a pop top, it eliminates the need for a can opener.
Most hikers simply put the tuna on crackers or bread as a snack. Some even bring individual packages of mayonnaise to add a little flavor. Again, experiment with different combinations before you go. See which options are the tastiest and the easiest to whip up.
Energy/Granola Bars
Energy bars are packed with calories and are as simple as you get. For example, Cliff Peanut Butter bars have 240 calories and 11 grams of protein. This is a perfect replacement for the calories that are burned while climbing the trail.

These bars are not meant to entirely replace meals or other foods while hiking. However, they are a very light, easy and efficient snack to keep you moving forward and to keep you healthy. You can even make your own bars. See our article featuring instructions on how to make your own homemade energy bars – it’s so easy!
Dried Fruit/Jerky
Dried fruit and jerky are also great options for the trail. They are sturdy enough to withstand the abuse of the backpack and can stand the heat on summer trips. Calories are included in each and they make a great snack.
There is one issue with packing dried meat and fruit. Make sure and take in plenty of water while snacking on them. Dried fruit and meat will absorb water from your body while it is being digested, if you do not take in extra fluids you can easily become dehydrated.

Jerky does not provide enough calories to truly replace burnt calories, but it does make for a nice treat when the there is a lull in the trail. Many hikers prefer to dry their own fruits and meats to avoid any added chemicals that companies may place in their products. There are tons of simple recipes to get you started online and a dehydrator can be purchased for a reasonable price from most super or outdoor stores.
For the best food dehydrator, see our article on how easy it is to dehydrate meat, fruits and veggies in your own kitchen.
Fresh Fruit
On the flip side of dried snacks, there are fresh fruit options. We have discussed that bananas may be appropriate for day trips and possibly two days on the trail, but will not withstand the abuse that the trail offers on longer trips. Apples, oranges, and pears are all decent options for a healthy snack while hiking.
While they are not exactly the most efficient snack because of the lack of calories for their weight, they do have the ability to replace water in your body naturally. Several seasoned hikers suggest apple slices, hard cheese and crackers for an afternoon snack in the mountains.
Cooking on The Trail
Snacks and easy meals will most likely contribute to the majority of your diet while hiking for several days. However, after eating several meals for calories and not necessarily enjoyment, you may crave a nice hot meal to finish off your day.
Packing cooking utensils for a weeklong backpacking trip can be daunting and take up a lot of space. Thanks to many helpful hikers before you, there are tons of tips and suggestions to help guide you along the way.

There are basically three different types of cooking that you can manage on the trail.
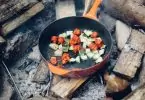
- Real cooking-involves actually cooking raw materials
- Cold meals- prepackaged meals that require no heating or cooking
- Rehydration- using dehydrated food and hot water to “remake” the food
Now, while these options are all completely feasible while hiking, there are major opinions of each of them.
Real cooking is usually not a good option due to the number of supplies needed to make it happen. You would need to bring all of the raw ingredients, with no refrigeration, in order to make the meals. After packing each ingredient, you must add in pots/pans and a stove.
Finally, after you are able to stuff all the materials in your bag, you will need to allow extra time for cooking.
Cold meals are a great option. They are quick and satisfying and do not need any preparation. The food is ready to go whenever you want. If you are on a short trip these are the perfect solutions. However, if you are on the trail for several days, it will begin to get very monotonous.

Rehydration seems to be the favorite for most backpackers. Some hikers even dehydrate and prepare their own meals before leaving and simply rehydrate it on the trail. These recipes and meals can be as simple as macaroni, or noodles and as complex as a rehydrating cake for dessert. It is amazing how versatile this method can be.
When deciding to rehydrate food you will need very basic materials. Most hikers prefer “one pot meals” which means that only one pot is used for cooking the meal. This eliminates having to scrub or clean several pots or pans.
When preparing your own meals to rehydrate there are two options. You may dehydrate the food yourself or buy already dehydrated ingredients. After gathering all the ingredients for the recipes that you choose, it is best to combine them all into a single bag for less trash while hiking. Be sure to include a note on each bag detailing which meal it is and how much water is needed to rehydrate it.
Utensils
Cooking on the trail can be overwhelming and depending on the type of cooking you decide to use, it can be very bulky and heavy. Real cooking will require a few more pots or knives or utensils, but using this basic list will get you started.

You may come to find that you can manage real cooking with very few materials as well. Rehydration can be very minimalistic and often you will only use one pot.
You will also need to consider a heat source, of course. Stoves are the most popular choice as open fires are sometimes prohibited and stoves are quick and easy. See our article featuring reviews of the best camping cookware for you .
Stoves
There are benefits and downfalls of each type of stove. Most hikers have different preferences based upon what type of hiking they will be doing.
- Canister stoves are great and double as a pot and a stove. They are simple to use, reliable and because some are a mix of propane and butane, they are fairly stable and able to be carried in lightweight containers.
There are drawbacks to using a canister stove as well. The added propane allows the stove to work at colder temperatures, but it is possible for the propane to burn off quickly and leave you with butane that will not function at cold temperatures, rendering it completely useless.
There is also the fact that while the containers are lightweight they are also very small. One container has been suggested to be able to last for 2 people on a trail for 2-3 days.
You will need to pack extra containers of fuel and also carry around the empty containers as well. - Alcohol stoves are also a popular choice among hikers. They can be homemade and are very simple. You can also transport the fuel in any plastic bottle or other containers.
There is the possibility of having extreme problems with this type of stove if you are not familiar with them. If these stoves get tipped over while burning, the fuel will spill out and can cause a bigger fire. It is recommended to use extreme caution when using these stoves. - Multi-fuel or white gas stoves are also a great choice. These are probably what most novice hikers will be the most familiar with. These stoves are exactly what the name implies, multi-fuel.
Hikers can use white gas, propane, gasoline, kerosene or diesel fuel. This is extremely convenient if hiking for long periods of time. You can fill up your fuel at any trail stop along the way. - Solid fuel stoves are an extremely popular choice among single hikers. These tablets are easy to store, carry and relatively inexpensive. Most tablets burn for about 10-12 minutes which would be long enough to heat water for rehydration meals.
This would probably not be a good choice for real cooking. The time that it would take to prepare the meal would be too long for the tablet to last. However, if you see that you are done cooking before the tablet is gone, you may extinguish the tablet and save it for later. This will help you to never use more than you truly need.
Each of these options has been proven effective on the trail. Again, stoves are recommended to take on the trail due to the fact that open air fires are prohibited in some areas, especially during dry spells. Keep in mind when and where you will be going hiking.

Cold temperatures and lack of refilling options often will be able to help you determine which stove will best suit your needs. For the best alcohol stove for camping, see our must-read article.
Eat Up!
Using these tips from the experienced hikers is a great way to get started. Always remember to pack enough food for your trip and to hydrate as much as possible when eating dried fruits and meats. There is no reason to compromise great snacks and great meals just because you are roughing it on the trail!
If you found this article helpful or have any questions, please feel free to leave them in the comment section below! We would be happy to answer any questions you have! Bon Appetit!


The first time I went backpacking, I packed so much wrong food but I did not realise it until I was out on the trail. I wish I had read this article before then because I would have known what food to pack. This is a must read for all new backpackers and seasoned campers too.
I think all campers should be proactive – plan ahead of time and learn from other campers, as well. I’m glad the hiking food guide made you aware of what to bring…and not! Enjoy the outdoors and don’t let past mistakes bother you too much. I’ve done much worst! 🙂
Thank you for this article. I think now I have my guiding list for when I am packing food and cooking items for the next camping trip. I always pack several energy bars to eat on the trail without the need to slow down. They keep me going until we reach the camping site or until we stop for a meal.
You are welcome and thanks for dropping by and sharing your thoughts. Those energy bars are great and they keep us nourished when trekking – convenient to take, too.