
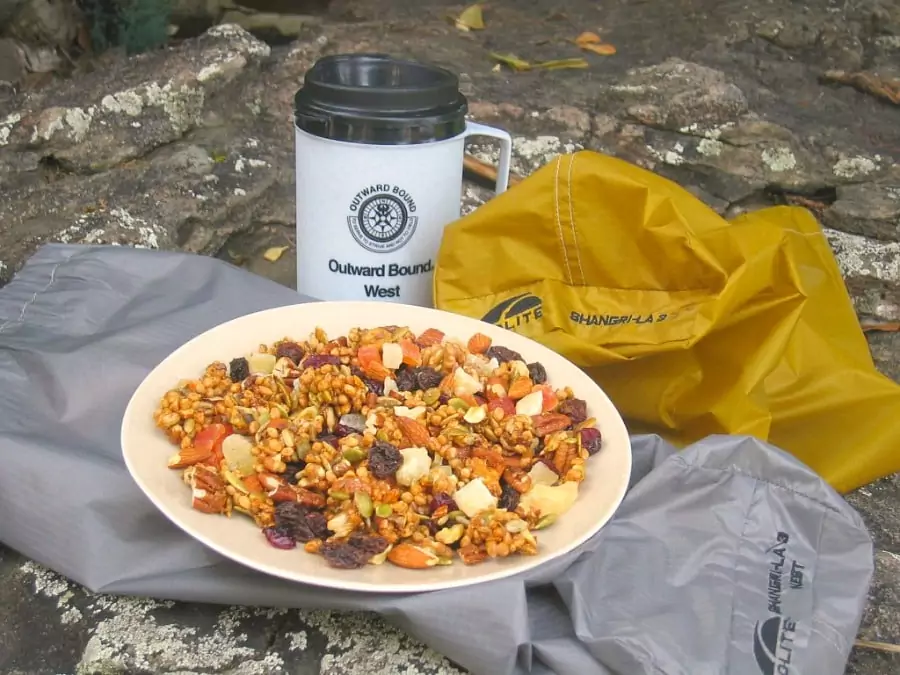
Imagine getting to enjoy meals free from preservatives and additives throughout the year, minimize the size of your backpack, create additional storage space, and have nutritious meals at your disposal? All these components can be achieved as long as you have your dehydrated food recipes with you. Dehydration is one of the ancient, yet healthiest forms of food preservation which can be useful for your backpacking of camping trip.
Dehydration is a technique that involves the removal of moisture from food components, preventing bacteria and mold from forming and making them more durable for consumption. Most people may be worried that dehydrating food affects their nutritional value, but this is not necessarily true. Dehydrating ensures the flavor of the food is locked so it remains darker and richer and with more fragrant. In some cases, dehydrated meals become even sweeter to the taste.
When utilizing this technique as your cooking tool, you may decide to become as creative as possible. This will make it possible for you to benefit from the in-season vegetables, fruits, nuts, meats, and herbs. Buying these foods in bulk and dehydrating them for later can be beneficial for your outdoor survival.
Is Food Dehydration The Best Technique?
As much as you may enjoy tending and gardening fruits and vegetables, you will always be keen on the time associated with the production of food. People have been disappointed when they find mold and other signs indicating their preserved food has perished.

While there may be no absolute technique for preserving food, one may agree that dehydration has its place when it comes to matters of outdoor survival. Have a look at how this technique stacks up to other common methods of preservation:
- Canning and Pickling: Dehydrated and canned meals both have a common demerit in the sense that low salt, low oxygen, low acid food can result in botulism. However, unlike the canning process, dehydrations lead to the reduction in volume, which makes the food to occupy less space.
Although dehydration may result in food that is not as tasty as those in cans, they are still edible and can sustain your survival for a longer time.
When you are planning to can meals in a post-crisis situation, you should also consider using fuel as well as the cost you would incur in obtaining supplies.
Alternatively, you can dehydrate the food using the sun in locally made Dehydrators. Considering canned meals lose their nutritional value, dehydrating food is a much easier and reasonable option. - Freezing: Although frozen meals do not lose their taste and do not need to be dehydrated, they can only be preserved in the freezer. Ones the electricity is lost, or you lack an alternative option to fuel the freezer, you can opt for salt and ice to continue freezing the food for more days.
Since dehydrated fruits and vegetables do not need to be frozen, they can remain in excellent condition as long as they are stored in dark, dry, and cold areas. Frozen foods can only last for a maximum period of one year, while the dehydrated ones last three to five years. - Smoking: If you want to preserve your meat for months, smoking will be suitable, as long as you use a recipe that would be ideal for the meat under consideration. Although dehydrated meat is long-lasting, smoked meat tastes better.
However, with dehydration process, the amount of food that would go to waste is quite lower compared to smoking. - Vacuum Packing: Since this technique also minimizes the content of oxygen in stored meals, they may also hide botulin toxin. Additionally, vacuum packing is not as durable as dehydration, and it’s difficult to leak or break open over time.
When comparing the two, dehydration process is much better since the number of wasted meals is lower than vacuum packing. - Salting: When this technique is combined with smoking, it can extend the shelf life of food to about a year. Salt can act as an anti-bacterial and has a drying effect on any food, particularly meat and fruits. Additionally, salt is a shelf life extender for any food preservation technique.
- Fermenting: Apart from making alcoholic beverages and wines last for an extended period, this technique is also essential for dairy products. The soft dairy products may take months to perish under refrigeration while milk only takes a few days.
Moreover, at room temperatures, cheeses are able to last months and years without going bad.
With wine as an exception, most fermented products do not last longer than the dehydrated ones. Nonetheless, fermented foods contain high levels of moisture which makes them suitable in situations of inadequate water.
Basic Tools And Supplies
If you have ever dehydrated products before, then you can agree that the process does not require a lot of supplies or tools when dehydrating food.

In many cases, these tools can either be purchased at a low cost or constructed using the locally available materials.
- Tongs: Since your hands can easily harbor bacteria and other harmful microorganisms, it is recommended to using tongs for grabbing food and placing them in containers.
- Dehydrator: This is a cheap item to obtain. Making a dehydrator is an easy process that would require the use of locally available materials. You may decide to use wood or any other material.
If you construct your own dehydrator, you may decide to utilize a design that uses no fuel but only heat from the sun. - A scrubber and disposable latex gloves: A scrubber will be used to wash your hand before handling food. An excellent hand scrubber and a good pair of latex gloves create an additional line of defense against bacteria and other harmful microorganisms which could hamper the effectiveness of the dehydration process.
- Salt: This is the cheap and readily available resource. Although adding salt to dehydrated food may not guarantee longer shelf life, it can still be beneficial.
- Oxygen Absorbers: If you want to minimize the risk of bacteria, oxygen absorbers are a suitable option. However, it is not recommended for use in dehydrated food due to the issue of botulism.
- Other Preservatives: Herbs such as Rosemary can be used in helping extend meat and vegetable life. Since a good number of these herbs have medicinal value, they are an excellent dual-purposes to the dehydrated food products.
Get Started With Fruit Dehydration
Pears, apples, grapes, citrus fruits, strawberries, and other fruits do not last longer than dehydrated vegetables.
Nonetheless, these are all important if you are in need of a well-balanced diet. The following guideline is essential for dehydrating fruits for your survival diet:
- Begin by selecting fruits which are somewhat ripe and not in the brink of rotting. Avoid using the ones with bug bites or marks that may indicate their skin is compromised. If no fresh fruits are available, you can decide to dehydrate the frozen ones.
- Make sure the temperature of your dehydrator is between 125 and 135o When using the solar dehydrator, ensure the temperatures remain at that level for about ten to twelve hours depending on the type of fruit and the number of trays used.
- Make sure your hands are thoroughly washed. You may decide to use latex gloves, but they are optional at this stage.
- Wash the fresh fruits thoroughly. If you bought them from a farm, be certain to wash off the pesticides and waxes. Unless they come from your farm and you are sure you did not spray pesticide on them, make sure they are carefully and thoroughly washed.
- Remove the core from the apples, pears, and pineapple. Core enough fruits for a tray in the dehydrating equipment.
- When drying peaches or plums, make sure you remove the pits. Additionally, you may want to remove the skin from fruits you would dry without skin. However, it is recommended that you leave the skin for most fruits as this is where the nutrients are found. As long as you are confident there is no wax or pesticide on the skin, peeling them off would not be a good idea.
- Fruits will dry properly if they are cut into slices of about 1/8 or ¼ inch. You should only cut whatever you would need so the slices can fit into the tray.
- After the fruit is cut, it will start oxidizing. Although this effect is apparent in apples (which usually turn brown), other fruits undergo the same process. To minimize this effect and decrease the impact it has on the nutritional value of fruit, spray the fruit using lemon juice.
- When loading your dehydrator, ensure there is an adequate flow of air around the pieces of fruits and in the ventilation zones.
- After drying has occurred, remove the trays. Wash your hands using the scrubber and put on the latex gloves. Using clean and sterilized tongs to put the fruits inside the bags and do not vacuum seal them.
Keep them open until they are completely cool. Sealing the bags quickly will lead to accumulation of moisture, which could hamper the dehydration process. Depending on your fruit, it could take a day or a few to condition. - After the fruits are cold and easy to tear, it will be possible to put them in air proof container. You should also note that some fruits such as oranges can become brittle and could crack with ease.
Examples Of Dehydrated Fruit Recipes
Apart from making great backpacking or camping foods, these recipes could be suitable for children, the elderly, diabetics, or people who cannot eat tough or brittle foods.
- Apple Chips: This is an excellent recipe for anyone who is in love with crunchy foods and cinnamon. You can also use different fruits, sugars, and spices to create other crisps or chips.
- Fruit Leather: You could already be purchasing this in supermarkets without knowing it. Why not come up with your “fruit rolls” and include your prepping skills
- Candied Fruit: You may try this recipe to make dehydrated fruit that has a higher sugar content. In case you require a calorie dense meal or a lot of carbohydrates, this would be an ideal way to go about it.
Dehydrated Vegetable Recipes
If done the right way, dehydrated vegetables will be soft when boiled or fried.

For a fast bug out food, you may use these recipes to combine dehydration with pre-cooking processes.
- Cauliflower Popcorn: You may also decide to utilize other herbs and spices to suit your tastes.
- Tomato Sauce Leather: As is the case with fruits, some vegetables create a pliant, rollable “leather” when mixed and dried in small slices.
- Sweet Potato Chips: This recipe may be utilized in making potato chips. There is no need for putting up with chips soaked in oil when you can obtain excellently seasoned chips from a dehydrator.
- Starchy Food Bark: Foods rich in starch such as pumpkins and potatoes will not make leather as they will become brittle when dried. If they come into contact with moisture, they will rehydrate and regain their original flavor. It is possible to combine different types of ingredients to come up with tasty barks which act as gravies, sauces, and other nutritionally dense foods.
How to Dehydrate Meat
Although dehydration can extend the shelf life of meat for a period exceeding one year, salting and smoking is a much better option when you want to retain the taste and flavor of the meat.
Additionally, you should note that the hydrated meat can be hard or tough to consume. That said, here is how you can dehydrate your meat:
- When dehydrating, you may decide to use meat acquired from the store or an animal you hunted. Ensure the meat is prepared and ready for cooking. When handling it, follow the same hygienic steps used when dehydrating fruits. If you will be dehydrating various types of meat, remember to scrub your hands between every kind of meat.
- Unlike the fruits, you will need to clean the meat thoroughly before you can begin the process of hydration. Cleaning will help to get rid of fat, oil, and grease since they rot quickly.
If you broil, fry or bake the meat, make sure you remove the drippings once the meat is cooked completely. Put water into a vessel and allow the meat to boil. Fat and oils will begin to form at the top layer. Take out the top layer and discard it. You may decide to add more water about three or four times to ensure all the out and fat is eliminated. - To improve tenderness, try using pressure cookers as this conserve more heat energy, allowing the meat to cook more.
- While it’s cooking, add rosemary since this product will help in stabilizing ant fat and oils still left in the meat.
- Once the meat has cooled, cut it into small, one-inch strips. Before doing so, do not forget to wash your hands thoroughly. It is not recommended to put various types of meat together in a tray during dehydration.
In addition to that, do not dehydrate meat, fruits, and vegetables together as the oils and fat from the meat could come into contact with the vegetables and fruits. In turn, this will make the fruit and vegetables go rancid faster than you had expected. - Dehydration of meat needs to be done at 160oF for six to ten hours.
- After the meat has been dehydrated, give it time to cool before you can seal them into bags.
- Remember that dehydrated meat will not last more than two weeks without refrigeration. You will need to freeze it if you expect it to last longer.
- As a cautious step, try and avoid including meat to dehydrated vegetables and fruits. Although these products are sweet when rehydrated, the meat will reduce the shelf life of all products in the bag. Adding meat to fruits and vegetable is suitable when you are preparing for immediate consumption.
There’s nothing like homemade food, so our article on DIY food you can eat on your camping trip is timely, check it out.
Recipe for Dehydrated Meat
- Dehydrated Chopped Beef: You may modify this recipe to make bits of bacon or other combinations of meat from chopped chicken, deer, or turkey.
- Beef Jerky: You can also decide to modify this recipe using other seasonings.
- Fish Jerky: This is suitable for any fish and seasoning combination. Do not forget that some fish species have a lot of fat and oil. In such a case, it will be suitable to take the necessary steps to get rid of the oils and fat.
For more dehydrated food recipes, we have written an interesting piece on this, so check it out!
What Have We Learned?
Since dehydrated food takes way less space in your backpack than regular or frozen food, it is actually a much better solution for hikers, campers, and backpackers.

You will leave more room for other pieces of your gear, and you will still have a nice, nutritious meal. Hopefully, our recipes will help you the next time you start preparing for your outdoor adventure. Do check out our article on the best food dehydrator to make it easy for you to dehydrate food.
Let us know if you ever made dehydrated foods for outdoor survival, and what were your experiences, your tips, and advice by commenting in our comment section below. We would also love to hear more about the recipes you used and the precautions you took to ensure your prepared food is tasty and safe for consumption.


I always use my Presto 06300 Dehydro Electric Food Dehydrator to dry and preserve different foods ahead of my camping trips. It is good to know the different preservation options I can use in case I can’t use the dehydrator. The methods shared here, like salting, look quite easy and healthy too.
Right! It beats having to cook frequently during a camping trip. Great choice of picking the Presto 06300, it’s a stellar brand and durable, too.
Great article on food dehydration John, thank you for sharing. Just because you are in the wildness and eating dehydrated foods does not mean that your meals have to be boring. I love playing around with different recipes and this article has given me some good ideas.
It also pays that you have a good friend who’s a great cook, if I may say! Haha.
But you know, a dehydrator is quite a useful tool and there’ a lot of options open for you when you have that gadget in your kitchen.