
Modern technology has given us the GPS to help us stay on track in unfamiliar surroundings.
However, you may one day be in an area without cell phone reception or without your GPS, and will need basic navigation skills to get you back to familiar surroundings. Learning how to use a compass is a great outdoor skill.
What Can I Do with A Compass?
- Most hikers will venture off marked trails at some stage, and then you need to know how to navigate using a compass and map.
- If you know how to use a compass and a map, you can accurately plot your way in even the most inhospitable wilderness.
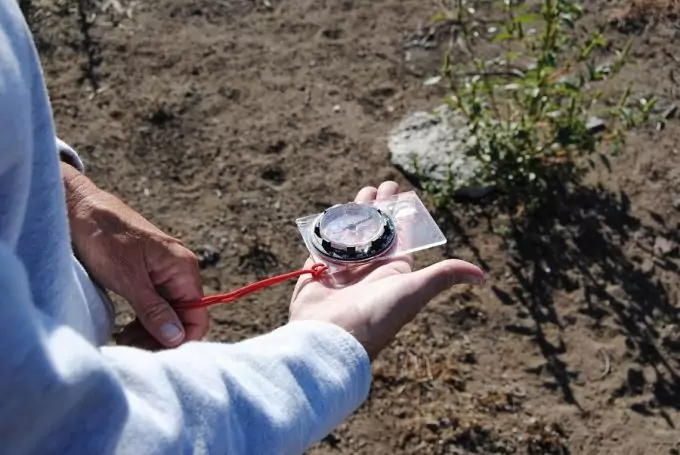
- In an emergency, a tiny thumb compass such as those commonly attached to EDC-gear will provide a bearing and enable you to find a general direction in which to travel.
- You can find out which direction the wind is coming from, by turning until the wind is blowing straight into your face. Now use the compass to determine which way you are facing – that is the direction where the wind is blowing from.
What Can A Compass Not Do?
In wilderness survival, going into the unknown without a good orienteering compass and a topographical map is a very bad idea. It is not possible to see your latitude and longitude by just looking at a compass, but you can triangulate your position given a map, compass and a little time. Unlike a GPS, a compass only points out direction, it does not provide a location.

For example, you cannot just choose a random direction, hike a few miles into the woods, and then try to use your compass to find your way back to where you started. However, if you followed a particular compass heading (e.g. 25 degrees for 1 mile), you can turn around and then follow a heading of 205 degrees for 1 mile to get back to where you started from; the terrain and natural drift could push you slightly off your course.
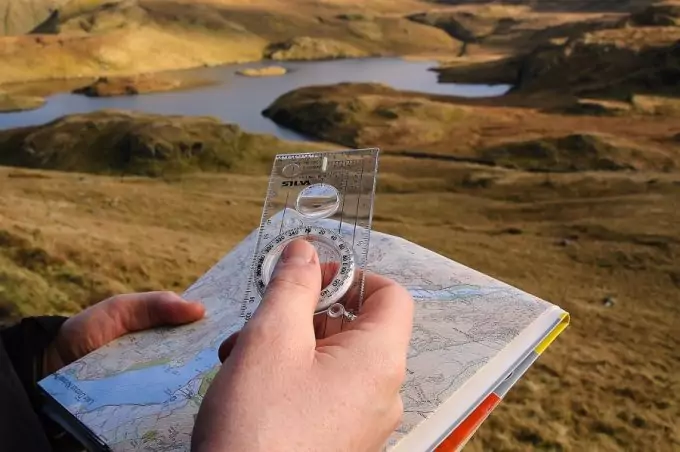
We have put together some easy steps to get you started on how to use a compass, and then we will progress to learn how to use a compass and a map for navigation in the outdoors. We will discuss a basic orienteering field compass, also called a “baseplate compass” which is the standard tool for outdoor enthusiasts.
Compass Basics
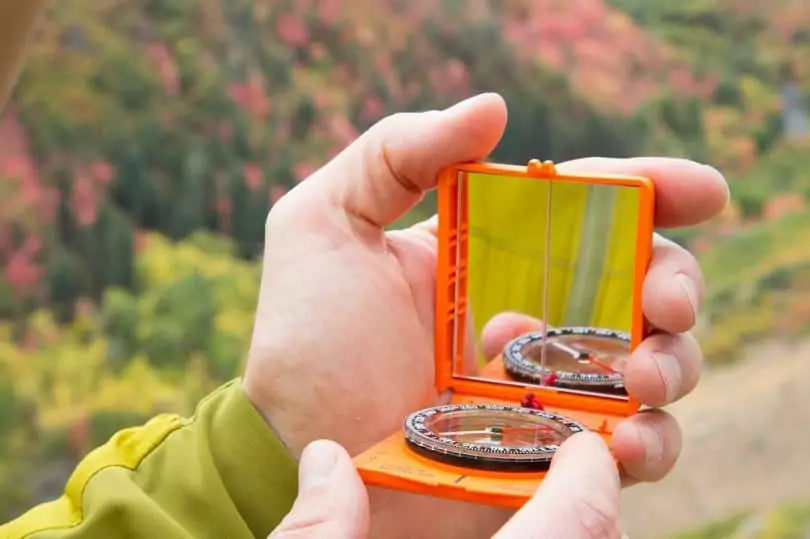
All orienteering compasses have a magnetized needle, marked in red or a bright orange with or without fluorescent markings, set into a compass housing and mounted on a baseplate.

Some models have additional features for advanced navigation and specific uses, which we won’t cover in this article.
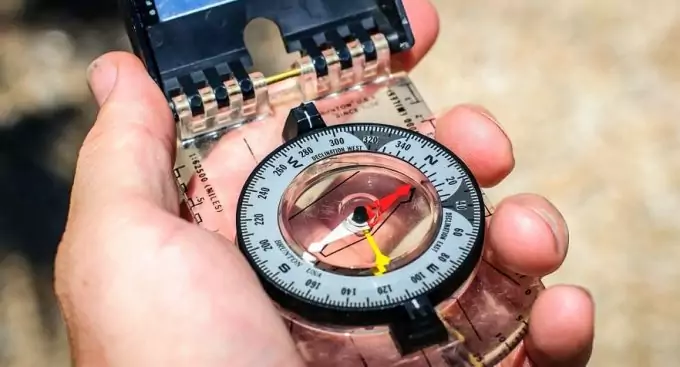
- The base plate is made of clear, hardened see-through plastic and is marked with scales and orienteering lines which you will use in map navigation. You will learn to match these lines in parallel with grid lines on a map to accurately align the compass with map north.
- The compass housing is a clear, hardened circular plastic housing for the compass needle, mounted or embedded on the baseplate. Various markings, including Meridian or declination markings, can be seen inside the housing.
- A freely moving magnetized needle, bright red or orange. It is fixed to a central pivot and floats in a liquid so it can freely rotate. The red end points toward magnetic north.
- A rotating dial, also called a bezel or graduation ring, surrounds the casing which contains the magnetic needle but is not a fixed part to the housing, which allows it to be rotated easily. The bezel is marked with the 360° of a circle. The bezel is a “degree dial” and can be rotated around 360 degrees.
- A direction-of-travel arrow – clearly marked, sometimes with a fluorescent material. This arrow will indicate the direction in which you need to go after taking your bearing.
- The orienteering arrow is a non-magnetic arrow marked on the floor on the inside of the compass housing. It rotates with the housing when you turn the degree dial (bezel) and is used to align your compass on a map.
- Index line or bearing marker, which is either a fixed black line within the bezel or an arrow on the base plate. This mark is used when you take a compass bearing.
You Will Need:
- A good, recent topographical map. Use a laminated pouch to protect the map in the outdoors.
- A baseplate compass.
- Knowledge of the declination of the area where you will be navigating. Although this information can be found on maps, the real declination frequently changes. Always use information that is no more than a year old. Use the declination tool provided with the compass to compensate for declination before you start navigating in any area.
- Pencil or map marker to mark triangulation or direction lines (optional).
Step 1 – Understand The “North’s”.
There are three ‘norths,’ and for all practical purposes of navigation, you can ignore the first one which is Geographic North – the North Pole.
The second north is Grid North or Map North. You are probably well acquainted with the lines that run across all maps (grid references) – and all maps are standardized with north marked the top of every map. Try to picture a spinning globe on a stand in your geography class, with all those ‘north-to-south’ (longitude) and ‘east-to-west’ (latitude) lines. Map North is the exact meeting point for all longitudinal lines at the North Pole.
TIP: Map or Grid North is often referred to as True North. For navigational purposes, this is an acceptable phrase and can usually be taken at face value.
The third north is Magnetic North. Because of tiny variations in the magnetic field, the magnetic arrow in your compass does not point to Map (True) North; it points to Magnetic North. Picture that spinning globe on its stand in your geography class again: The North Pole is not right in the middle and on top. Instead, that free-standing globe is tilted and shows the North Pole off-center, at roughly eleven degrees from the axis.
Magnetic north refers to that difference in the tilt of the earth’s magnetic field which varies depending on where you are. In some places in the world, there can be a difference of up to 20 degrees between Map or Grid North, and Magnetic North. The difference may seem trivial, but traveling just one degree off the mark for one mile will push you nearly 100 feet off track. You could completely miss your mark and end up totally lost in the wilderness.
Step 2 – Deal with Magnetic Declination
If one mile can take you 100 feet off your true course, just imagine how far off you will be after ten miles. It is critical to compensate for this difference by correcting for the magnetic shift (declination). Declination is a ‘setting’ on your compass which you do once as a reset function in preparation before you start navigating in a specific area. It is not common to have to do this ‘on the fly’ in the field.
Declination is the number by which Map North and True North differs on your compass. In the US, a line of zero declination runs roughly down the Mississippi River through Alabama, Illinois, and Wisconsin.
If you are to the east of that line, declination orients West. This means that Magnetic North will be a few degrees west of True North. In an area with an east declination, you have to subtract the correct dumber of degrees.
If you are to the west of that line, Magnetic North will be east of True North. In an area with West declination, you have to add the appropriate number of degrees.
You can find the declination of the area you will be traveling to easily on a map, and will need this information to prepare your compass for navigation. Keep in mind, however, that inclination changes regularly and that you should not use the information from a map older than a year when you compensate for any area.
For more tips and guidelines on how to adjust your compass to avoid getting lost, check out our previous article on this topic.
Step 3 – Holding The Compass
The magnetic compass needle is influenced by any metal objects nearby. To get an accurate reading, remove metal objects like keys, a keychain, flashlight or camera from your person and stand well away from tables, chairs and other objects that contain medal.
When you consult a map in the later steps, you will be placing the compass on your map on top of a level surface, but if you take a reading while you travel, hold the compass in your open palm in a level, flat position. Keep the compass as level as you can. If you tilt it, the magnetic needle will make contact with the casing and will not move freely, giving you an incorrect reading.
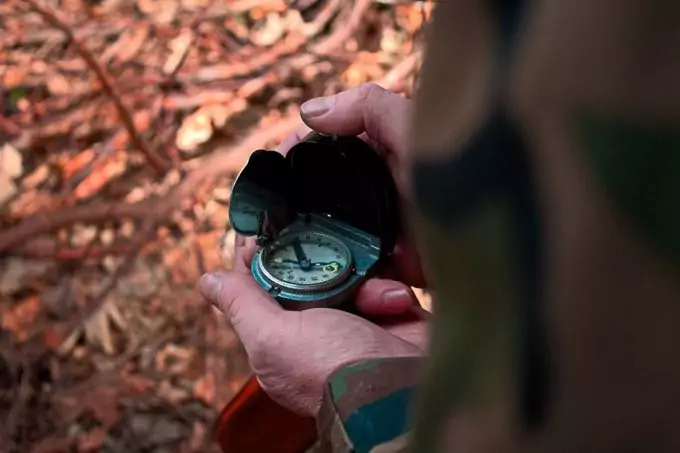
The direction-of-travel arrow must point straight away from you. Hold your palm in front of your chest, about halfway between your waist and face. See our article on tips on how to use a hiking compass in order to find your way home safelty.
Step 4 – Finding Your Bearing (Azimuth)
Look down at the compass. Find out which direction you face by looking at the magnetic needle. It will move on its own and swing to one side or another. If it does not swing at all, you are facing directly north. Test this by turning to the side and check if the needle holds true.
Next, turn the degree dial in the appropriate direction until the orienteering arrow in the housing lines up exactly with the point of the magnetic needle (arrow). This is called “putting it in the box” and you will see why when the two markers overlap precisely! Both of these markers (the needle and the degree dial arrow) will now be pointing north.
Next, look at the direction-of-travel arrow. The travel arrow shows the direction you are facing. If the travel arrow points somewhere between N (North) and E (East), you are facing Northeast. Find the exact degree at the spot where the travel arrow intersects with the degree dial (bezel). If it crosses at 22, you are facing 22 degrees Northeast.
By simply turning your body, compass held steady, use the N-E-S-W markings to get a good idea of your position relative to landscape features such as mountain ranges in the distance or unusually large trees nearby. This may be all you need from your compass. When you need to find your way from one particular place to another, you need to use the same technique to find the bearing to that remote place. The direction you are going is called your heading.
Step 5 – Triangulate Your Position
Look around and choose the first of three prominent landmarks that you can also find on your map. Point the travel arrow in the direction of the first mark to move the magnetic needle to the north (unless the mark is directly north of you).
Turn the bezel (degree dial) until the orienteering arrow lines and the magnetic needle are in the box (lines up perfectly). Once they are aligned, check the figure on the bezel directly on the direction-of-travel arrow. That number is a ‘degree’ – your bearing.
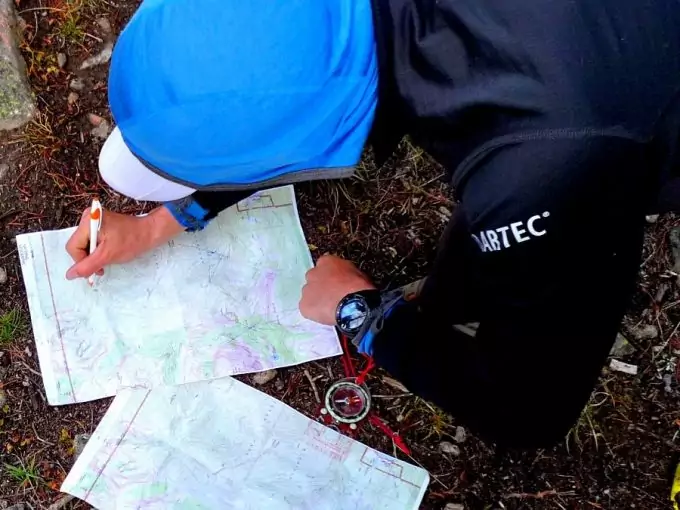
Note the landmark on your map. Spread the map on a level surface and put the compass on the map with the orienteering arrow pointing to true north. Move the compass until the edge passes through both the landmark you have marked down on the map and your supposed position. The orienteering arrow is still pointing north. Draw the first of three lines along the compass’ edge and through your approximate position. Find two more landmarks and repeat the procedure.
You should end with three lines forming a triangle with the 3 lines intersecting at your approximate position on the map. The more accurate the bearings, the more precise the triangulation.
Step 6 – Get from Point A To Point B
You will need a good topographical map, your compass, and a flat surface away from any metal objects (including metal legs). Find out where you are on the map (your point A) and locate the spot where you want to go to (your point B). If necessary, first do a triangulation according to step 5.
Put the compass near your current position on the map. With the edge of the compass serving as a ruler, line up points A and B by placing the compass edge to create a straight line between your current map position and the point where you need to go.
The orienteering arrow must point to map north, and the travel arrow must point in the direction you want to go (towards point B on the map).

Next, line up the meridian lines in parallel with the north-south grid lines on the map by turning the bezel. Put it in the box: Turn the bezel (degree dial) until the “N” on the bezel and the orienteering arrow both point to grid (map) north. Note the new bearing as indicated on the bezel in degrees.
Now that you have the exact compass setting, you can lift the compass off the map. Point the direction-of-travel arrow you to your destination. Turn your body until the magnetic needle, and orienteering needles overlap, and you’ll be on course toward the destination on the map.
TIP: Unless you want to walk due north, follow the direction-of-travel arrow, not the compass needle. The travel arrow does exactly what it says – it indicates the direction you want to travel in!
Step 7 – Walk Along The Bearing, Keeping Your Heading
Look along the direction of the travel arrow and focus on a highly visible and immovable point in the middle distance to use as a guide. Start walking towards your mark, in the direction indicated by the traveling arrow. Keep the magnetic needle and orienteering needles “in the box” (precisely aligned). Once you reach your mark, use the compass to find another mark and keep following the direction-of-travel arrow.
TIP: Be careful not to accidentally turn the degree dial from the proper position when you take another bearing.
Great Tips for Beginners
- If bad weather moves in, immediately find your position on the map before you lose the ability to pick out markers. If you don’t know where you started from, you won’t be able to get out.
- Don’t keep your eyes on the compass as you walk. Rather pick a marker a short distance in front of you and walk normally towards it.
- Trust your compass. If you are using it correctly, it will point you in the correct direction. Our innate sense of direction can play tricks in harsh or unknown surroundings.
- Verify your progress from time to time by reversing the compass and taking a bearing back to your first marker. Don’t reset the compass; rather turn the compass until the travel arrow points directly at you instead of away from you. Alternatively, do a simple calculation: first, add 180 degrees to your current bearing (e.g. you are facing 241 degrees. Add 180 to get 421). If the result is more than 360 degrees, then subtract 360 (421 minus 360). The answer (in this case 61) is the opposite direction.
You can also read our article featuring the list of the top compass in the market today to give you more options.
Navigating In Poor Visibility
If you cannot see any distinct objects to use as a beacon, mark your starting spot with a highly visible marker such as a rucksack. Walk along the compass bearing, regularly checking to see that you can still see the marker and stop when it becomes difficult to distinguish. Stop and verify your bearing.

If you are still on the correct bearing, place the second marker at this spot. Fetch the first marker, return with it to the second marker and repeat the procedure. If you are traveling with other hikers, use another member of the party in a similar way.
Practice Your New Skill
Don’t venture into the outdoors without at least practicing using your compass and a map of an area you know well. Do your first navigation in familiar surroundings, incidentally checking your compass to make sure it hasn’t taken a heavy knock and is still working correctly.
You will learn to trust your instruments and your skills. If you need it in an emergency, you will be more confident and have fewer things to worry about. To help you make a safe trip, check out our piece on the best ABC watches to help you stay on the right path.
Once you understand the basics of how to read a compass, using it in the outdoors is not complicated. We hope you found these instructions easy to use and hope you will leave us your tips for good navigation in the wilds in the comments!


Your article reminds me that it’s important to also bring the know-how as well as the compass itself. Having it and not knowing how to use it could be pretty bad. So many remote locations have little or no cell or GPS service. The comments about navigating in poor visibility is especially helpful.
It’s all about the map, too. Not all of them are created equal. Other than being recent, what constitutes good?
I’ve just quickly read this article as I don’t have a lot of time left today, but I will return to it. What surprises me is how much true north and magnetic north can differ!
I have a compass in my hiking kit, but I will be getting it out and practicing some orienteering skills, just in case I may have to need it.
Very helpful article.
With all the new technology around, one might think of leaving it all to “science”- that’s a mistake. Having a basic and working knowledge of how to use a compass and a map are equally important. So, it’s important to learn first hand how to use these tools for navigation. You’ll be surprised that it can actually be a fun experience since your skill will also be tested.
My advice: practice and test yourself. Don’t forget that learning these skills are vital for your survival.
Thanks Tracy! There’s nothing like being equipped for anything! Continue practicing and honing your skills in navigation. Don’t be afraid to ask experts or friends when you need help. Also, remember to enjoy yourself!