
Going backpacking or hiking can clear the mind and leave you feeling rejuvenated when you return to normal life. But if you’re backpacking for a few days or weeks at a time, the weight of carrying your belongings on your back can take its toll quickly. Injuries from carrying too much weight can make it harder to escape to the woods.
Older and younger hikers also struggle more to carry a heavy backpack. If you struggle to carry enough clothing, food, and water for an extended backpacking or hiking trip, find an easier way to carry the weight. Our solution? Build your own backpacking cart!
What are They?
Building a backpacking cart will allow you to hit the trails without back breaking pain. It’s a multi-purpose tool to carry all of your gear, from tents and sleeping bags, extra clothes and hiking boots, to food and water.
A backpacking cart will allow you to extend your distance by making it easier to carry more food and water. This is an especially great tool for youth or smaller adults who struggle to carry a lot.
How do They Work?
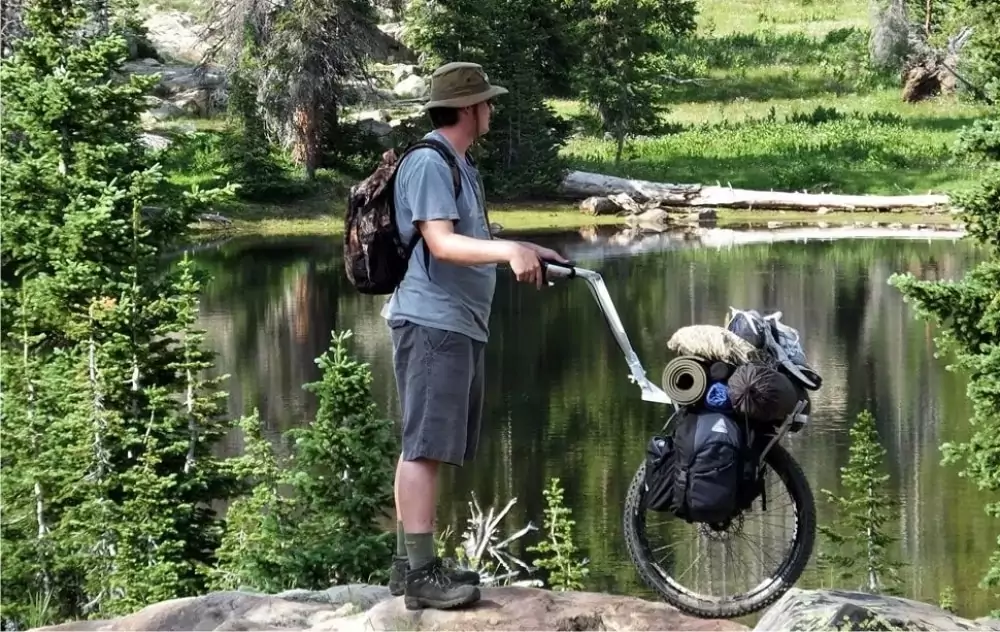
Hiking and backpacking carts use wheels to make it easy to pull your gear through the woods and over trails. All of the weight of your gear is balanced over the wheels instead of your arms so that there is no strain on your body which means you can carry more than you would pack in a backpack. Wheels have been used to carry things for centuries, making it a great technology for carrying your supplies on a trek.
The wheels also make it easy to maneuver your cart on the narrowest trails, or over any terrain, especially if you use tough wheels like mountain bike tires. Without the strain of a lot of weight in your backpack, a backpacking cart also prevents your gear from falling apart in the middle of the backcountry.
Are They Worth it?
Save money on an expensive backpacking cart by building your own! With the help of a backpacking or hiking cart you’ll be able to carry more gear than you can transport on your back, roll heavy loads easily through any terrain, and go further without any strain to your body while carrying enough supplies to hike for longer distances and days at a time. When you’re on a budget, see our piece on practical backpacking essentials for your needs.
We’ll walk you through the steps of a DIY project to build your very own hiking cart which can also double as a bicycle trailer for outdoor activities and running weekend errands. Follow our simple steps below to purchase the appropriate materials and build your hiking cart for your next backpacking adventure.
How to Build Your DIY Hiking Cart
What You’ll Need
- 4 pieces of L-channel aluminum metal
- Clamps
- Center punch
- Drill
- 2 rubber tires
- ½ inch thick metal tubing
- Thick plywood
- Bungee cords
Directions
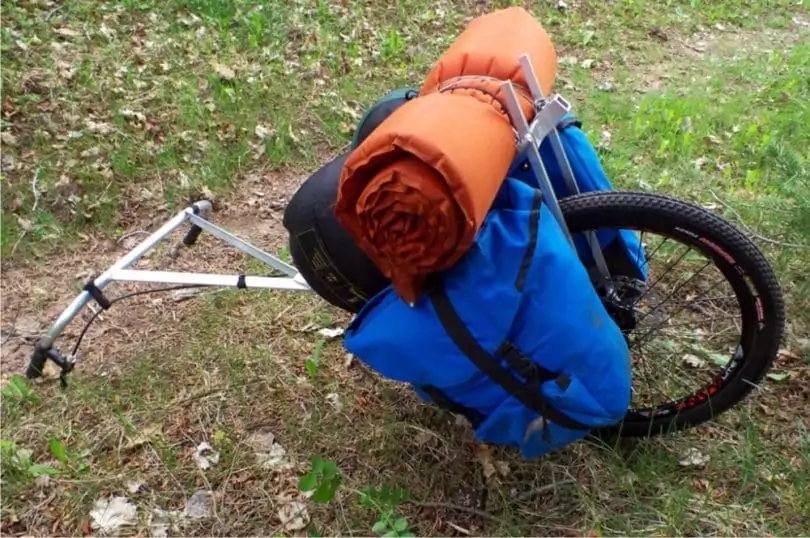
Start by using the four pieces of L-channel aluminum metal to build your hiking cart frame. Use clamps to hold together two pieces of aluminum at a time to create the corners of the frame. Use a center punch to keep the drill bit from wandering as you start drilling through both pieces of metal.
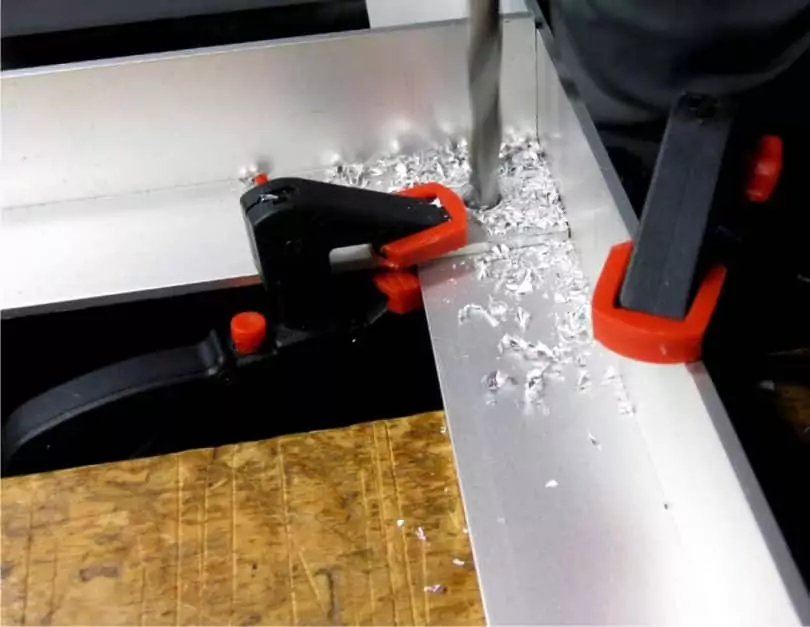
Once you’ve successfully drilled a hole through both pieces of aluminum, use a screw to hold the two pieces together. Repeat on the other three corners so that you have a complete square or rectangular frame.
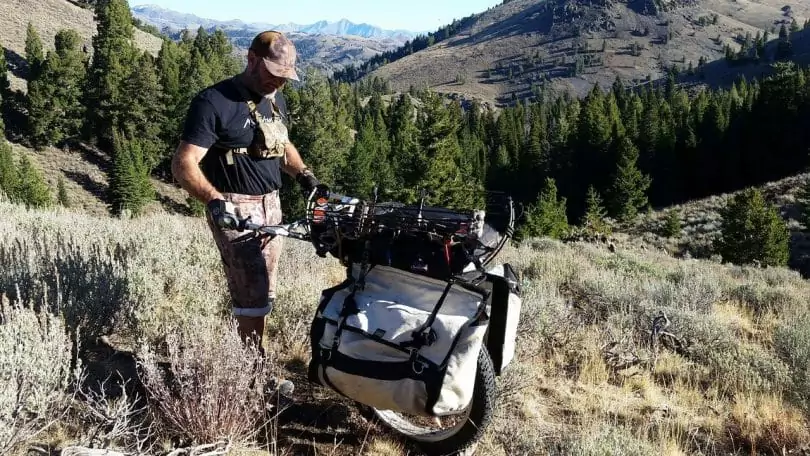
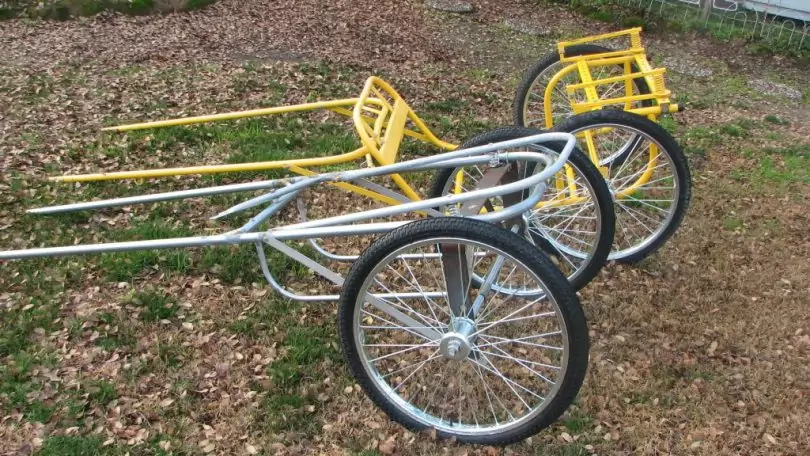
Once your frame is built, attach two tires with a 1-2 ft. diameter and 1 inch thick rubber wheel. Mountain bike tires will work best if you’ll be using your hiking cart on rough terrain.
Use ½ inch thick metal tubing to build your trailer hitch/cart handle. (*Note: The metal tubing will supply a multi-functional tool. You can attach it to a bike trailer hitch to pull your cart behind you or use it as a handle for your backpacking cart if you’ll be transporting it yourself.)
Once the trailer frame is complete, attach the thick plywood over the square metal frame we built first. This will be the place for you to store all of your hiking gear. Attach your gear to the frame so that it doesn’t fall off when you’re ready to start pulling your hiking cart on your first hike or backpacking excursion. We suggest using bungee cords to secure your gear but you can opt for something else like rope to tie your gear to the cart.
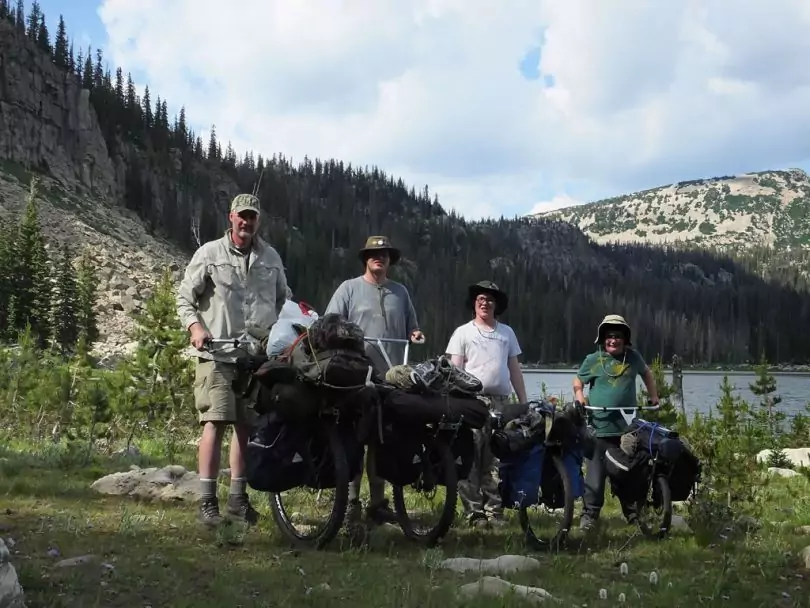
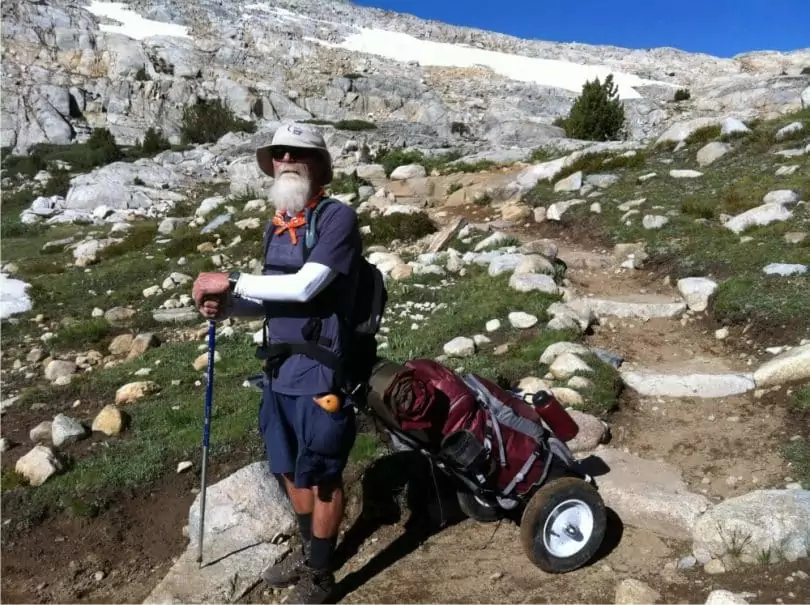
Load up your cart and hit the trails! You can either pull your cart behind you or attach it to a bike trailer hitch if you’ll be biking between campsites or transporting outdoor materials for a weekend project.
Key Takeaways from Our DIY Backpacking Cart Project
With your own backpacking cart taking all the weight off your back when you head out on a trek for a few days, you can escape to clear your mind and go on a relaxing adventure without a heavy backpack weighing you down the whole way. No matter your age, size, or fitness level, a hiking cart is easy to pull and maneuver over the trails by putting all the weight over the wheels instead of on your arms.
Use this multi-purpose tool to carry more gear, water, and food with no extra weight to extend your trip for several more days and cover longer distances. Plan your trip well. See our article on how to plan your backpacking trip for guidance.
It will also store your tent, sleeping bags, cooking equipment, and anything else you might need for a backpacking or hiking trip. Save money by building your own backpacking cart instead of purchasing one from an expensive outdoor company. We’ll walk you through the materials you’ll need and every step to build a hiking cart that will easily roll over any terrain and store all of your gear without fear of a backpack falling apart in the backwoods under the strain of too much weight.
Keep your backpack light. Read our article on ultralight backpacking to show you more options than before.
Did you use our DIY backpacking cart instructions to build your very own hiking cart? If so, tell us about it in the comments!


I’ll admit I was intimidated when I read the supply list for this DIY project, but as I read the directions they turned out to be more straightforward than I expected. I personally haven’t had back issues (yet!) on the trail but I have a friend who would love to push her gear on a cart like this.
We are happy to help!
I’m definitely sending this to my hiking group! We see some of these carts out sometimes and always wonder where people got them. Turns out we can make them ourselves! Sounds like we have a new weekend project to try out soon. Thanks for the instructions!
You are welcome! Good luck!