
There is not anything that is more of nuisance when hiking than lugging around heavy pots and pans. Food is essential on long hiking trips, but most people get tired of the cliché protein bars and trail mix. Freezer bag cooking can help with that!
Who wouldn’t love a nice hot meal half way through that tiring hike? If you hate hot meals, then I apologize. For the rest of us, we have found a perfect way to get a delicious hot meal without the hassle of carrying around pots, pans, and dish washing supplies.
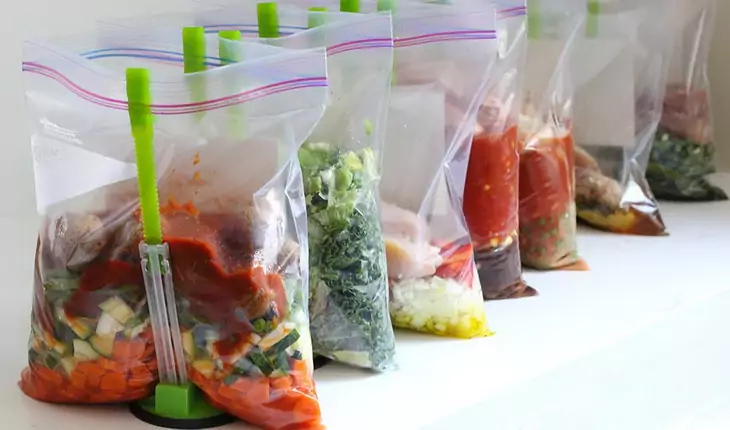
The Solution: A Ziploc Bag
A quarter pound Ziploc bag. That’s all you need! All you do is put your favorite hot meal in the bag, and stick it in your pack before a hike. When you’re starting to get hungry, simply fill the bag with near boiling water, wait a couple of minutes, and dig in! It can even be eaten right from the bag! Before we get into some of the delicious recipes, let’s talk about safety. It is important to make sure the water is near boiling, rather than boiling. Getting it to 180 degrees is perfect. Now comes transferring it to the bag. It is safer to pour it from the pot directly into a cup, then into the bag. Using a cup as the middle man decreases your chance of getting burned by the water.
Stirring is another important step, but using a regular spoon will be nothing short of a chore, and also makes you more likely to get burned. Any spoon that is longer than average and heat resistant should work for stirring, and will also come in handy when eating out of the bag. Many people squeeze the bag to help with stirring, however you must make sure there is no air inside as it could cause the bag to bust open.
A quick note: when eating or adding the water, it is wise to set the bag in a mug, or something similar. This makes it easier to add water and eat out of it. If the weather is cold, using a cozy helps keep your meal nice and warm while also providing ease of access. Don’t forget that you need an excellent cooler. See our article on the best side coolers for backpacking to make your food stay fresh and cold.
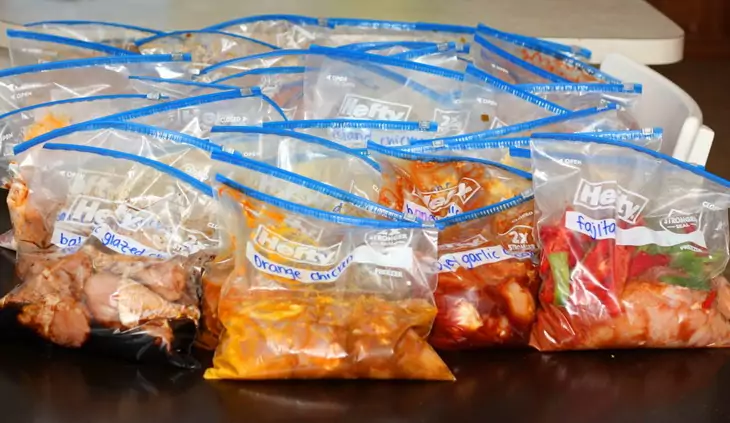
Now, let’s look at some of the best freezer bag meals! These are sure to make eating during your hike a much more enjoyable experience. Another quick note; any meal that is cooked and dehydrated can be a freezer bag meal by just adding the water.
The best freezer bag meals
Nutella and Hazelnut Oatmeal
Ingredients:
- 1/3 cup of oats
- 2 tablespoons of milk powder
- 1 mini pack of Nutella
- 1 tablespoon of Hazelnuts
- ½ a cup of water
For this meal, start out with just the milk and oats in the freezer bag, and bring the rest of the ingredients in a separate container. Once you are ready to eat, boil the ½ cup of water and add it to the milk and oats.
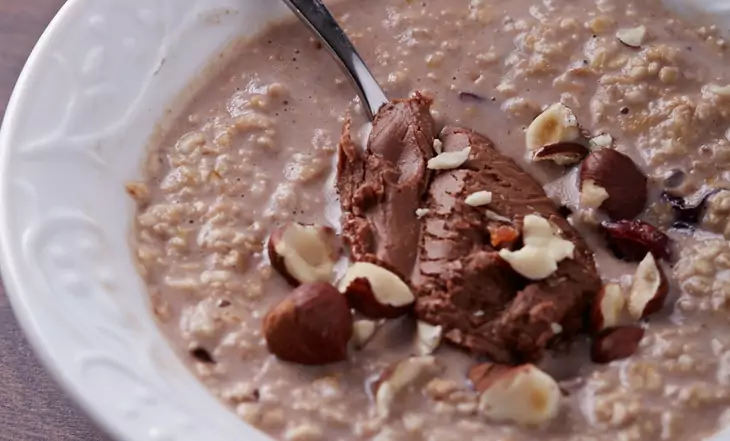
Stir, then seal the bag and let it sit for one minute. After that, add everything else and dig in!
Sweet Coco Couscous
Ingredients:
- 1/3 cup instant couscous
- 2 tablespoons coconut milk powder
- 1 tablespoon coconut (shredded)
- 1 tablespoon almonds (sliced)
- 1 tablespoon dried pineapple chunks
- 1 tablespoon brown sugar
- ½ cup of water
This recipe is a little bit easier than the oatmeal. Before starting your hike, put everything except the water into a Ziploc bag. At meal time, boil the water and pour it in. Stir it well, seal the bag, and let it sit for five minutes.
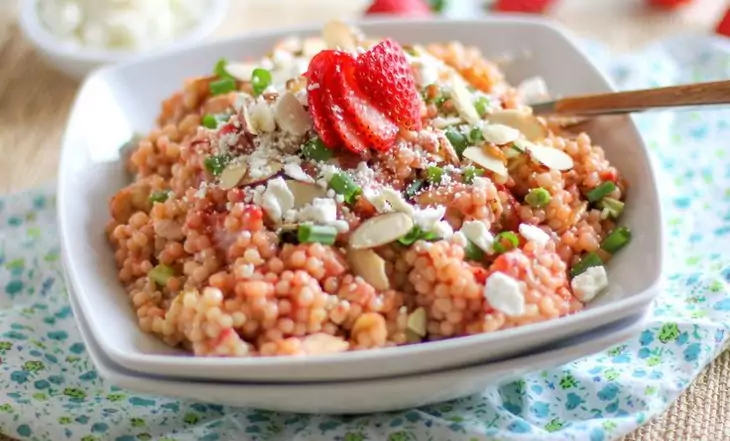
Then you’re ready to chow down!
Wasabi Mashed Potatoes with Tuna
Ingredients:
- ½ cup instant mashed potatoes
- 1 teaspoon dried seaweed
- ½ teaspoon wasabi powder
- 1 teaspoon soy sauce
- 1 can of tuna (in water)
- 1 teaspoon of sesame seeds
- 2/3 cup of water
Before heading out, put the seaweed, wasabi powder, and mashed potatoes in the Ziploc bag. Pack everything else in a different bag, but make sure the soy sauce is in a small container that won’t leak.
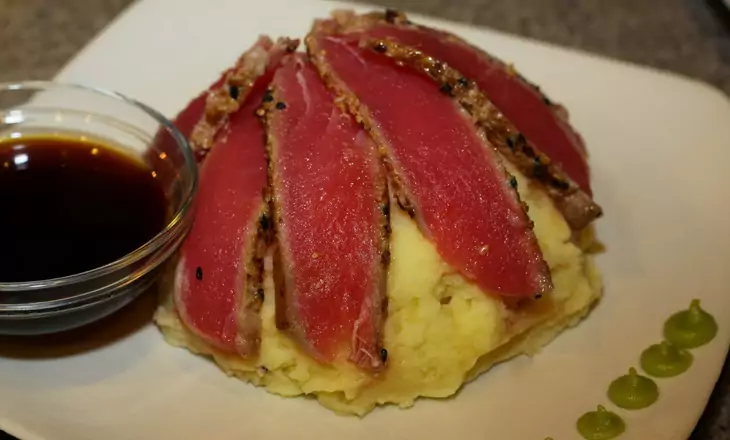
Boil the water, pour it into the bag, mix it up, then stir in all the other ingredients.
Pizza in a Pot
Ingredients:
- 2/3 cup of couscous
- 1 tablespoon sun-dried tomatoes (diced)
- 1 tablespoon dried bell peppers (diced)
- 1 teaspoon dried oregano
- 1 teaspoon dried basil
- ¼ teaspoon dried garlic
- 1 packet of olive oil
- 4 oz. pepperoni slices
- 2 oz. mozzarella cheese
- 1 cup water
Add everything but the cheese into the bag. Once the water is near boiling, add it and stir. Allow it to sit for fifteen minutes, then add the cheese and dig in!

For anyone who does not like meat, you can substitute the pepperonis with veggies, or more cheese!
Chicken and Peas
Ingredients:
- 2 cups instant rice
- ¼ cup freeze dried peas
- ¼ cup parmesan cheese
- 2 teaspoons chicken broth
- 1 teaspoon butter powder
- 1 can 5 oz. chicken
- 2 and ¼ cups of water
Everything but the chicken and broth should be put into the Ziploc bag at home. When ready to eat, add the chicken and broth and near boiling water to the bag.
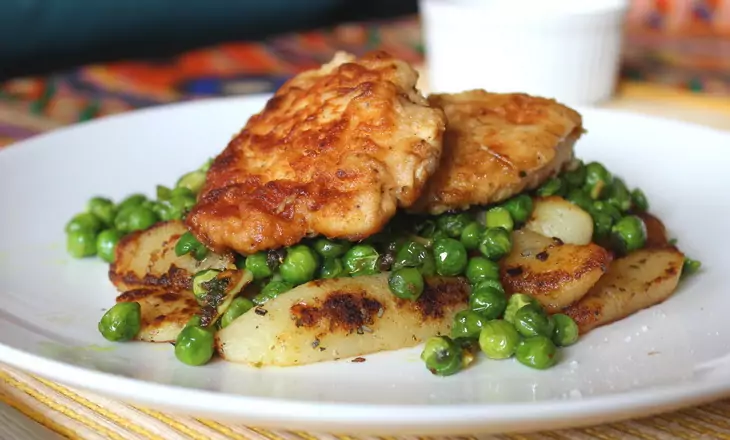
Stir, then leave it be for fifteen minutes before eating.
Veggie Soup
Ingredients:
- 1/3 cup of dried veggie blend
- 2 tablespoons bulgur
- ¼ cup angel hair pasta (crumbled)
- 2 teaspoons vegetable broth
- ¼ teaspoon dried parsley
- ¼ teaspoon dried basil (crumbled)
- ¼ teaspoon dried garlic (powder or diced)
- ¼ teaspoon onion powder
- 2 cups water
All the ingredients should be together in a Ziploc bag. Simply add the 2 cups of near boiling water, and allow it to sit for fifteen minutes.
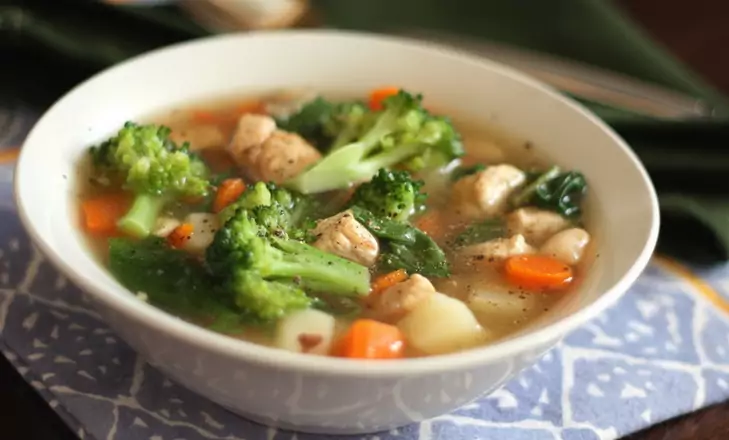
This recipe is definitely one of the simpler ones!
Rice and Beans
Ingredients:
- ½ cup instant rice
- 1/3 cup instant refried beans
- 1 tablespoon dried onions
- 2 packets salsa
- 1 cup water
Everything but the water and salsa packets should be packed together in a Ziploc bag. When ready to eat, add the near boiling water and stir, then leave it alone for fifteen minutes.
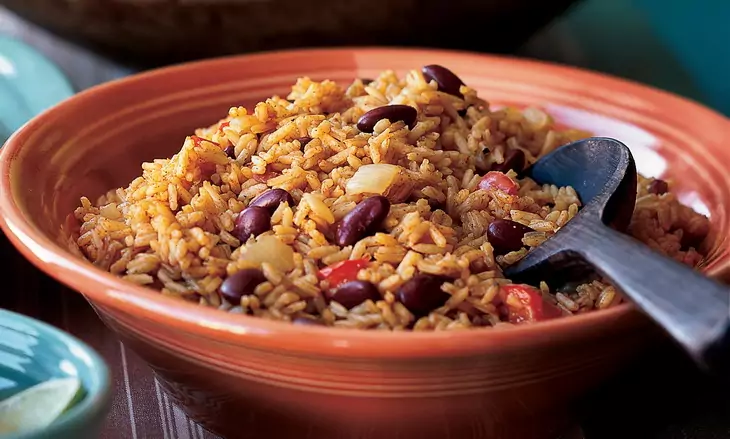
After fifteen minutes, stir it again and add the salsa on top.
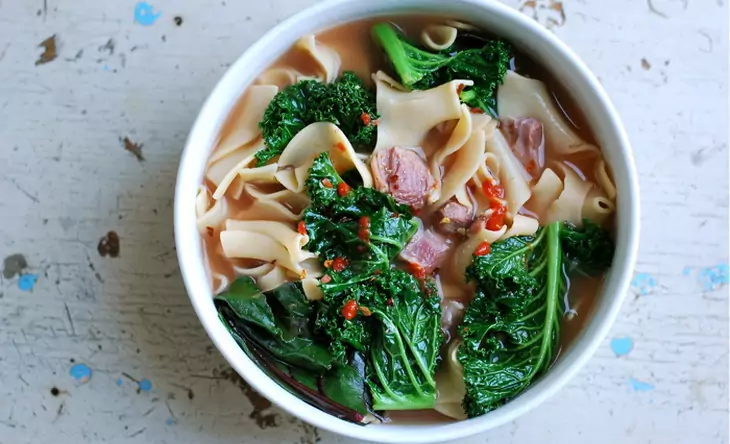
Greens and Noodles
Ingredients:
- 3 oz. baked ramen noodles (broken up)
- ¼ cup freeze dried zucchini slices
- ¼ cup freeze dried edamame
- 1 cup freeze dried spinach (crumbled)
- ¼ teaspoon dried red pepper flakes
- ¼ teaspoon dried rosemary (crumbled)
- 1 packet veggie broth
- 1 tablespoon parmesan cheese
- 1 and ½ cup water
All the dry ingredients, except for the cheese, should be stored in the Ziploc bag. Add the broth and the near boiling water to the bag, stir, and leave for ten minutes.
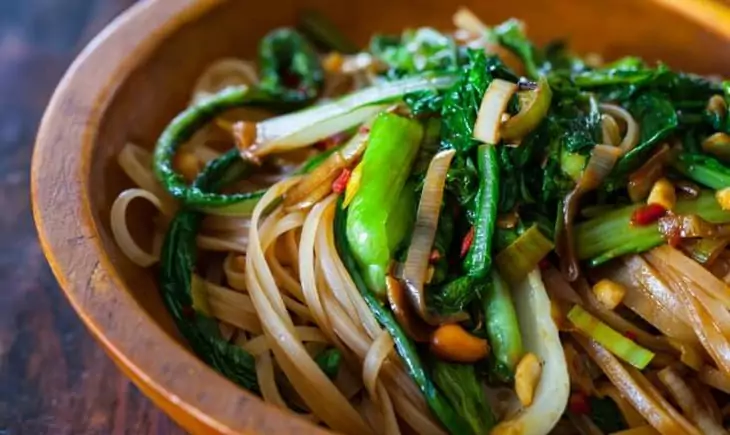
Stir it again and add in the cheese, then enjoy!
Eggs and Taters
Ingredients:
- 1 pack, freeze dried eggs
- 1 pack flavored mashed potatoes
- 1 and ½ cup water
This is another quite easy one, possibly the easiest meal to make. Mix the eggs and potatoes in a bag at home, then add the water when ready to eat and mix it again.
Just let it sit for around ten minutes, then dig in!
Fruity Breakfast Rice
Ingredients:
- ½ teaspoon cinnamon
- ¼ cup dried fruit blend (diced)
- 2 tablespoons powdered milk
- 2 tablespoons brown sugar
- 2 tablespoons butter
- 1 and ¼ cup water
- 1 cup instant rice
Everything but the butter and water should be packed in the same Ziploc bag. Bring the water to a near boil, and add it to the bag with the butter. Stir it and leave it be for fifteen minutes.
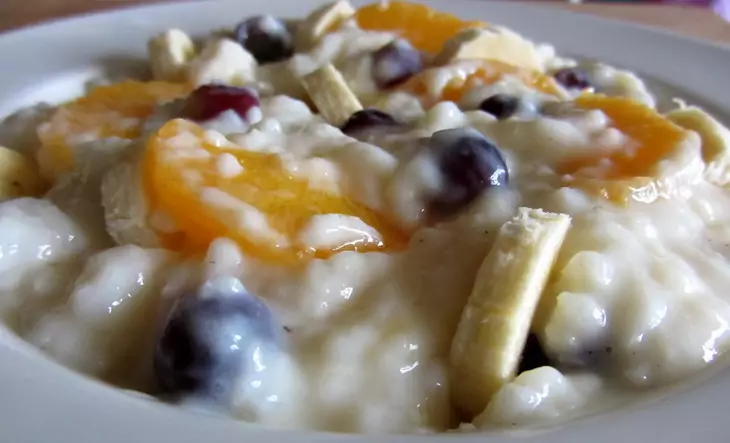
When ready to eat, fluff it a little bit and enjoy.
Carrot Cake in a Bowl
Ingredients:
- ½ cup oats
- 2 tablespoons dried carrots (diced)
- 3 tablespoons brown sugar
- 2 tablespoon raisins
- 2 tablespoons dry milk
- ¼ teaspoon ground cinnamon
- 1 dash salt
- 2 tablespoon coconut (shredded)
- 1 and ¼ cup water
The oats and carrots should be blended, at home, then added to a Ziploc bag with the dry ingredients. Begin to boil the water, then add the dry ingredients. Stir it up, then pour it into the bag (carefully!).
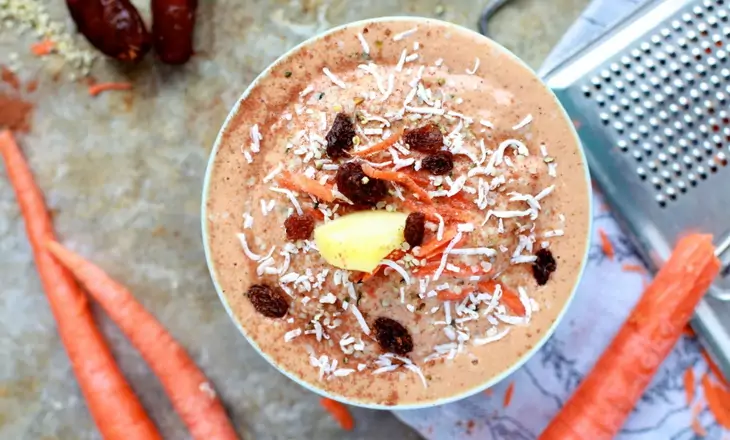
Let it sit for five minutes, then stir again and add the coconut.
Cran-Orange Cereal
Ingredients:
- ¾ cup bulgur
- ¼ cup dried cranberries
- 2 tablespoon dried blueberries
- 3 tablespoon orange powder
- ¼ cup toasted walnuts (chopped)
- 1 and ½ cup water
Everything but the nuts needs to be packed in the same Ziploc bag. Add the cool water to the bag a few hours before you wish to eat it. When you are ready to eat, simply add the walnuts and enjoy!
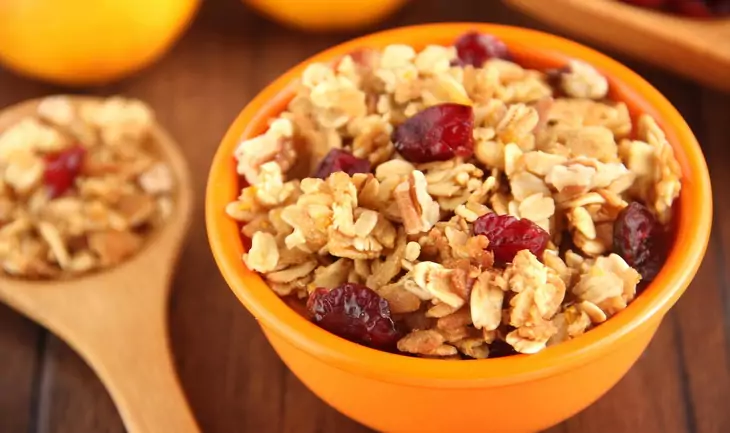
This is one of the few recipes that does not require the water to be near boiling.
Dehydrated Meals
Let us revisit the idea that any dehydrated meal can be cooked in a Ziploc bag. This sounds like the perfect option, but how does one dehydrate food? There are dehydrating machines for this, but what if that is not an option? Any oven can replace it. Dehydrating fruits and vegetables in the oven is actually a surprisingly easy task. You simply cut them into quarter inch slices, and cook them in the oven on the lowest setting for around six hours. Easy, right?!
Toaster ovens can also be used should you not be able to sacrifice the oven for so long. It is the same method as the oven, but the door should be cracked just a little bit. This is just as easy as the oven, and takes much less time! If you have a few days to kill, you can lay out your food in the sun to dehydrate it. Just make sure everything is cut as thin as possible, and that you have a way to keep bugs at bay. While a respectable method, this is definitely the most time consuming.
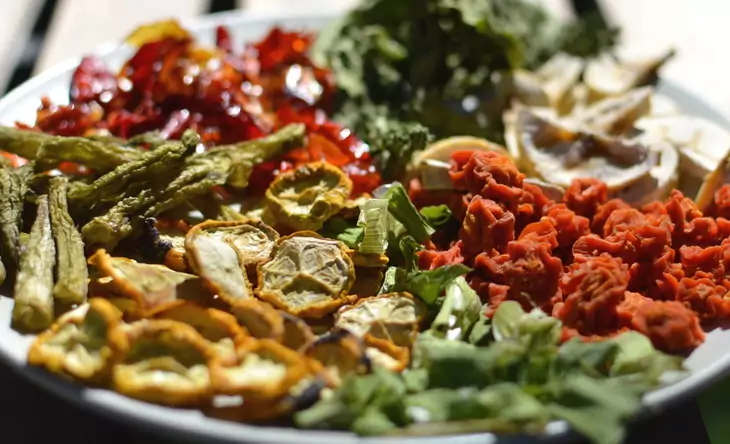
No matter how you choose to dehydrate your food, rehydrating them on the trail is the same. Just add some near boiling water, stir it up a little bit, and allow it to sit for a few minutes. The amount of water and time it needs to sit will depend on the meal itself, and just how much food is in it.
For recipes and tips on dehydrated food, see our previous article on this important topic.
Is It Worth It?
Now that we have explored the essentials of cooking with a Ziploc bag, and some of the most delicious recipes, let’s find out just how worth it this method of cooking is. Absolutely everything has its pros and cons.
When all is said and done, the pros list definitely should have more numbers.
Pros
- Less weight. This way of cooking requires carrying supplies that weigh a fraction of regular cooking supplies
- Much more delicious. Turning to freezer bags will provide you with a warm and yummy home cooked style meal.
- Less clean up time. Cooking your food in a freezer bag keeps you from having to wash several dishes after meal time.
- They have a LOT less sodium than the regular dehydrated or freeze dried meals that most hikers are used to.
Cons
- It does not always cook food faster. At high altitudes, the water is likely to cool so fast that the food is barely hot, and maybe not cooked all the way. This can make it a longer cooking process.
- They can tear easily. Hiking with a freezer bag shoved in your backpack next to several other objects may cause it to rip or tear. This could mean no food, should the freezer bag meal be all that you brought.
It is clear by looking at these lists that the pros outweigh the cons. There are sure to be several hikers out there who prefer the traditional way of cooking in a pot, and there is nothing wrong with that! Hikers that have made the switch are convinced meals in freezer bags are better all around. We agree with that, but it is ultimately a matter of opinion.
Final Words
For those of you who choose to use the freezer bag method on your next hike, we are confident you will enjoy any and all of these recipes. Just remember, safety is always first. As long as you do not get burned, we doubt you will have a bad experience with your delicious freezer bag meal.
To get more tips and recipes on freezer bag cooking and preparations, see our previous article by clicking the link.
If we have not satisfied your appetite for freezer bag meals, then check out trailcooking.com for a plethora of more recipes!


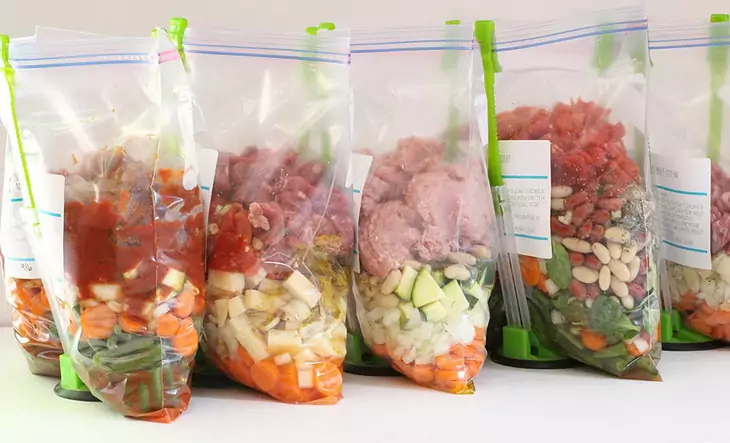
I have used this method quite a number of times in the past and it is a great way to carry and store food. However, one needs to be careful while handling the Ziploc bag because if it bursts open in the backpack, it can make such a huge mess; you will have no clean clothes to wear and no food to eat. I recommend putting the bags in a hard covered container to avoid the spill out.
A freezer bag will not easily become brittle and break, and it offers you a better mechanism of freezing food as compared to a regular bag. Of course, you have to be careful as far as backpacking is concerned.
You are absolutely right about the Ziploc bag. In addition, it helps to preserve the original flavor, and features smart zip plus seal. You are also able to hear and see the bag close from edge-to-edge.