Most of us have heard of paracord bracelets before. Not only are they a fashion statement that ensures you look more outdoorsy, but they may be the thing that could save your life. A twist on the original bracelet is the the creation of a paracord keychain. This is something simple that you can take with you wherever you go and makes a great gift for others. For more tips on how to use the paracord in surviving in the wilderness, see our article on this topic.
Giving you all the safety and versatility that a paracord bracelet does without having to wear it on your wrist all the time is the added value in choosing a keychain instead.
For every inch your keychain measures, it is said to equal about one foot of actual paracord if you were to take it apart. If you find yourself in a bind and need some repairing or tying then unraveling this bracelet is just what you need.
Aside from the practical functionality, these keychains are cool to have and are super easy to make. You don’t need to spend $10 or more on a keychain that you can easily make for yourself. In fact, you could buy 50 feet of paracord for around $10-$15 and make more than 25 keychains!
Follow the steps below and find out just how easy it is to create a multi-functional keychain made of paracord. With a little time and effort, you are capable of making an amazing, great-looking, multi-functional outdoor tool. Let’s get started!
Decisions To Make First
This is often the hardest part of making the keychain. The first step is to choose what color, length, and design you want for your keychain. There are hundreds of different colors and designs that paracord string comes in. They also come in varying lengths. Although the lengths may not matter if you are only making one keychain, but keep in mind that each inch of a paracord bracelet is about a foot of the actual string so be sure you buy it at least 5 feet to be safe. Also, make sure you know the different paracord knots needed for DIY projects as seen in our article on this topic.
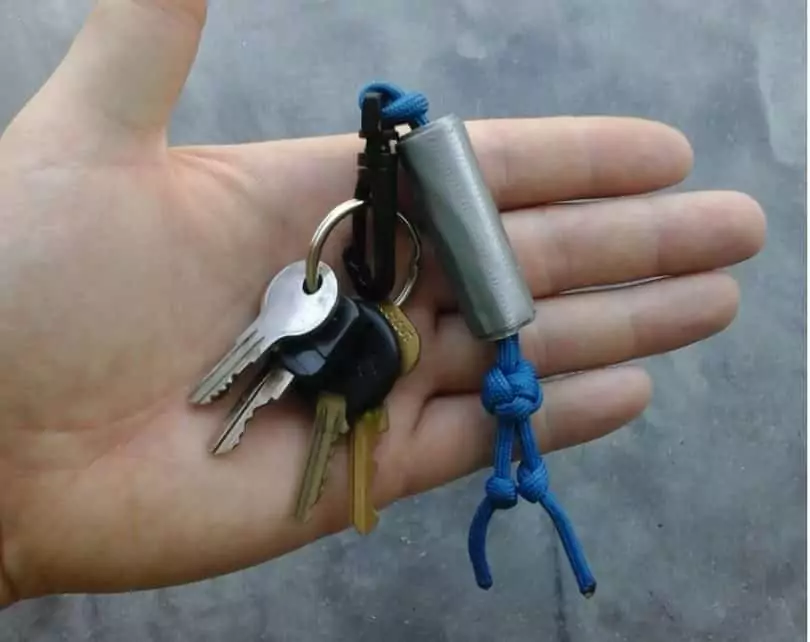
Colors and designs vary and some thought could go into this process. Are you looking for a keychain that stands out? Then you may consider a bright color. Do you want this keychain to blend in with you and your surroundings? Then choosing a more neutral black, brown, gray, or tan color might be best.
Gender can be taken into consideration as well. I don’t think your burly military veteran dad wants a pink and purple keychain! Again, color has to effect on the functions of the keychain, but you still have the choice to customize.
Items Needed:
- Paracord (color & length may vary)
- Clothing Measuring Tape (optional)
- Keyring
- Sharp Scissors
- Lighter
Making A Paracord Keychain In Eight Steps
Step One: Measuring
Measure the paracord according to your sizing pleasure. If you would like, taking your clothing measuring tape, measure how long you might like the keychain to be. Remember, for every foot of paracord you measure, it is almost equal to how many inches your keychain will be. I recommend erring on the side of too long instead of not long enough.
You can always shorten it as we get to the final stages. Cut your desired length from the spool of paracord and set the rest of the pile out of the way.
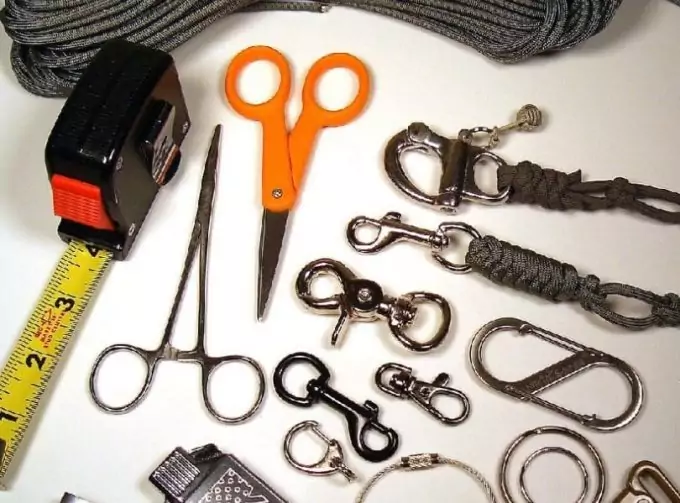
Once you have your paracord measured out in front of you, take both cut ends and use the lighter to burn them. The heat will melt the material and make it hard so it will not unravel during the creation process or while you are carrying it. Be cautious with this step and DO NOT burn yourself. If you are not over the age of 16, I would recommend asking an adult to help you with this step.
Step Two: Attach Your Keyring
For the next step, line up the two ends of your length of paracord so they are equal. Run one end of your paracord through the key ring and place the keyring at the center point in your strings. You should have two equal length strands on either side of the keyring.
Step Three: Where To Start
This is where it may get confusing. You are actually going to be ending your knots at the keychain, not starting there. By turning the strings so that the keyring is at the bottom you will work your way up the two strands a few inches. Some people suggest three fingers, others suggest five. It really depends on how long you want your keychain to be. The distance from where you start knotting to the keyring at the bottom will be the length of your keychain.
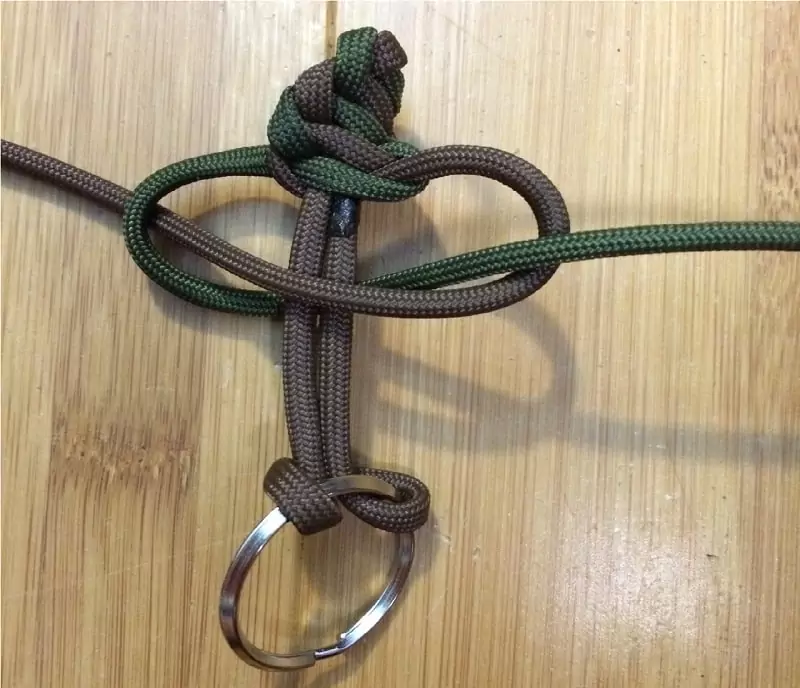
Next, I would find the halfway point of these two strands, which will actually make them into four. The two that are closest to your keyring are going to be the base strands and will not move. You will then begin weaving and knotting the two outside strands around those two inner base strands.
Step Four: What To Look For
Now we are ready to start the actual weaving to knotting. What I will be describing is a standard Cobra Knot or Cobra Weave Pattern. This is the most basic and most popular style. There are many other knot types that you can try and those videos will be shown near the bottom of the article if you are up for the challenge!
The Cobra Weave starts at the point where your two strands turn into four when folded again. You should see 4 separate strands. Two are in the middle and have a direct connection to the keyring and the others are free-flowing on the outsides of the two inner strands.
Step Five: Starting Your Knots
Making the first knot is key to ensuring a clean-looking and strong keychain. We want the weave to be smooth and free of errors or twists. Your starting position should be looking at four strands of paracord. The longer strands need to be behind the shorter strands on either side.
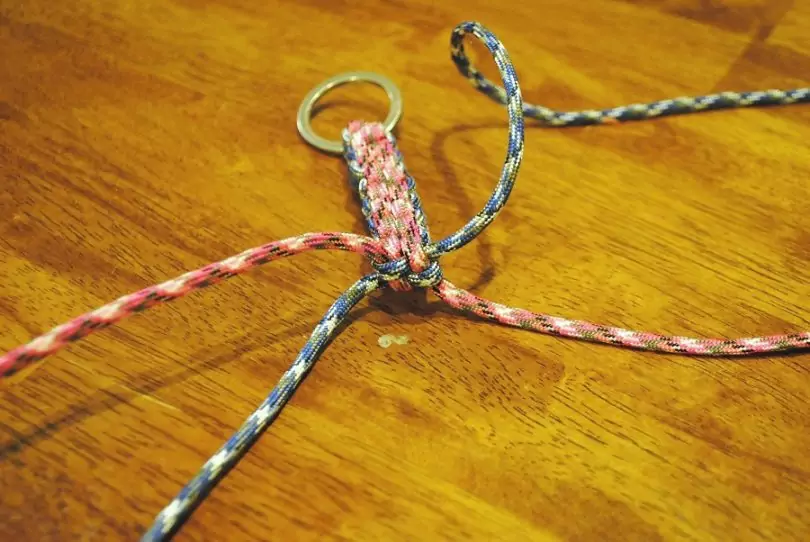
Image Credit: readytribe.com
To begin, make a loop on the left side of the two center strands. This loop should have the loose end crossing over in front of the two middle strands and the loose end will be on the right side now. Taking the right string (not the loose end of the left string), we will make a loop that goes around the strand we brought over from the left and then going behind the two center base strands.
From that right side loop we made, we will take the loose end of that and it will then be used to thread from behind and under the left side loop, up and through it to create the first knot.
You should end up with the left loop string going over and through the right looped string and the right looped string going behind and through the left looped string. This is your first knot and it will be looser than you want, trust me. Pull it as tightly as you can and get ready to make the second knot.
Step Six: Knotting The Rest of Your Keychain
Let’s continue making our knots or weaves through the rest of the keychain!
Beginning with the opposite of what we started with, we take the strand on the right side and cross it over to the left side on the top of the two middle strands and leaving a loop over on the right side. We will then take our left piece over the piece we brought from the right, behind the two middle strands, and up, underneath, and through the loop that remains on the right side. Finish this knot by pulling both strands tightly!
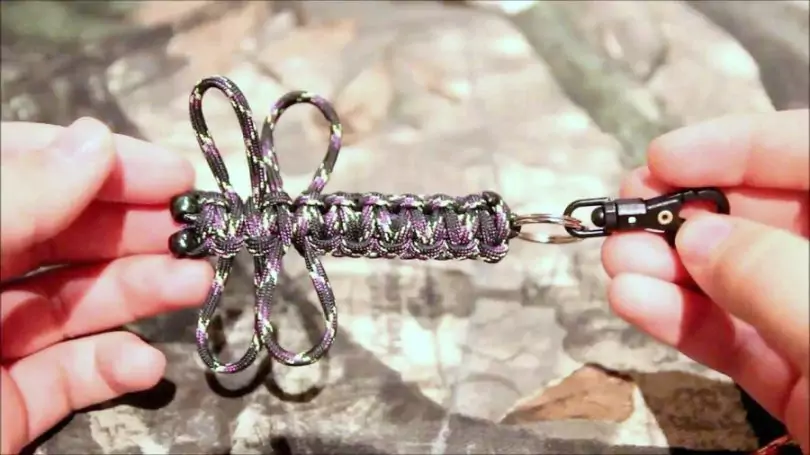
It will seem now that you strands have switched roles. You have accomplished your second knot! You will continue this pattern starting with the opposite side that you ended on.
For the next knot then, you will start with the strand on the left using the same looping over the top of the two middle strands, while the right strand is pulled over the left strand we just crossed, behind the two middle strands, and then up, underneath, and through the loop on the left. Follow this same pattern until you are close to the end of your bracelet.
Note: The two middle base strands of the string should never move. You are simply weaving and knotting the two left and right strand through one another and using the middle two strings as the base of your bracelet.
Step Seven: The Final Knots
As you near the end of your bracelet, you may be running lower on the two outer strands or getting close the keyring, this show that you have almost completed your final product!
You should try to knot and weave all the way until you are as close as you can get without making another knot to your keyring. This will help eliminate any looseness and make sure you have as much paracord on it as possible, should you need to unravel it. Once you have done your last knot and you cannot possibly fit another, give your last knot another good tug to make sure it’s as tight at is can be.
Step Eight: The Last Touches
Finally, taking the loose ends on either side of the bracelet you will use your scissors and cut those off close to the bracelet. I would cut it 3-5 centimeters from the bracelet leaving a very small piece of loose string. Do that on both sides and now you need your lighter.
Note: if you are under the age of 16 or do not feel comfortable using a lighter PLEASE ask an adult for assistance. Do NOT burn yourself or anything other than the bracelet.
You will use the lighter to burn, melt, and harden the end you have just cut off. Once you have singed the ends, wait about 5-7 seconds until they are melted and, using caution, press them into the bracelet so they will mold and almost become one with the rest of the bracelet. This will remove any excess, make the keychain smooth, and will keep it from unraveling after all of your hard work!
Other Uses, Techniques, and Types of Paracord
Congratulations, you have your finished paracord keychain! Now it is free to swing from your keys or attach to a bag or backpack and should never come undone.
As I mentioned earlier, there are numerous ways you can knot and weave a keychain to change how it looks. Each type of knot works just as well as the next functionality-wise, but they do give the design of the keychain a different and unique style. Below are a few videos demonstrating various weave types that you may want to give a go if you are feeling like a paracord keychain master now!
The weave we have just completed is called the Cobra Weave.
This is the standard and most popular type of weaving pattern for paracord keychains and the like. Below is a list of patterns for paracord bracelets, but these can be easily implemented to create yet another awesome paracord keychain.
Bracelet and Keychain Patterns
Another type of weave is a Trilobite Weave. Here is a link of a tutorial on YouTube how to do a Trilobite Paracord Pattern.
For another braid-like style the Fishtail Paracord Pattern is yet another bracelet and keychain type that can be used. Both the Trilobite and Fishtail patterns are similar to the Cobra in that they are wide and relatively thin. The thinness of the bracelet or keychain is usually find but you don’t always want something that is as wide as a smartwatch on your hand or swinging from your keys. Taking a look at each style before you try to create it will give you a better idea of what the final product will look like.
The Corkscrew Paracord Pattern can be found here. This is more of a rounded shape and not at wide as the Cobra and some of the other types such as the Trilobite or Fishtail.
This might actually make a much nicer keychain because it doesn’t have as much thickness and bulk.
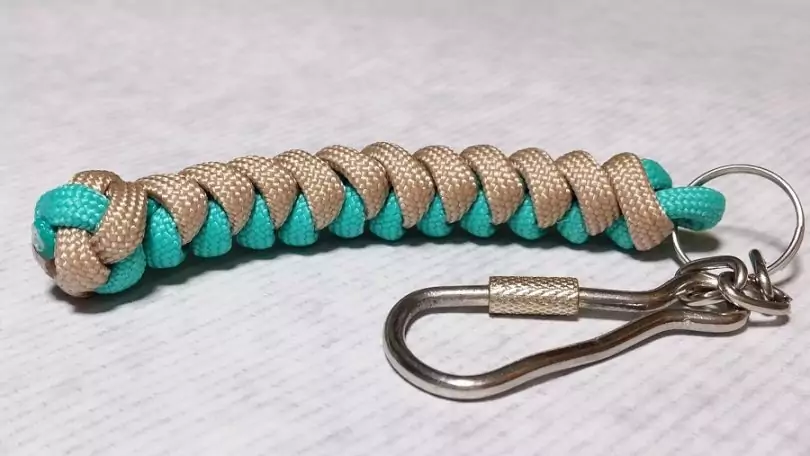
The same is true with the Snake Knot Paracord Pattern in that it’s not as wide or bulky but instead more compact and round.
I think it’s obvious now that paracord can be used for so much more than just a keychain. Keep in mind that the paracord isn’t always just used as a fashion statement, but could be the difference between life and death in some cases. This super strong cord can aid you in any number of situations you may find yourself in when on an adventure. They can clearly be made into keychains and the ever-popular bracelets, but what else can they be made into? There are many types of special knots and different uses for paracord that will help in survival situations.
Above is a Quick-Release Paracord Bracelet that allows you to unravel it quickly with one swift pull in the event of an emergency with a special knot and weave pattern called the Blaze Bar Weave.
This can easily be made into a keychain with allows for even more versatility. Instead of having to take it off of your wrist to use it, it’s readily available wherever it may be dangling! Here’s our article outlining a tutorial on how to make a paracord bracelet, it’s a must-read.
There are also many types of Paracord Lanyards you can create using paracord that will hold things, carry things, or come apart in a time of need as well.
This adds yet another dimension to paracord creativity. Using a smaller version of a lanyard pattern could leave you with yet another super cool keychain with some added flair and strength.
And yet another amazing use for paracord comes in the form of wrapping. Using some of the same simple weaving techniques, you can also learn to wrap and weave paracord around some of your favorite survival tools. Flashlights, hatchets, and even knives.
Above is a tutorial on a Paracord Knife Handle Weave Technique.
Tie It All Together
As you can see, paracord is a survival must. It’s also a no-brainer because it’s beyond just one simple use. Use it to create a splint, tie up your food at night, string up supplies that don’t fit nicely into a pack, as a fashion accessory, and much more.
Paracord is strong, durable, and is specifically built to withstand some immense pressure and pulling. It’s no wonder that many outdoorsmen and women always have some spare paracord with them. Another added bonus is that it’s easy to carry. You can also learn to make a paracord survival belt to take with you when you go camping, check out our article!
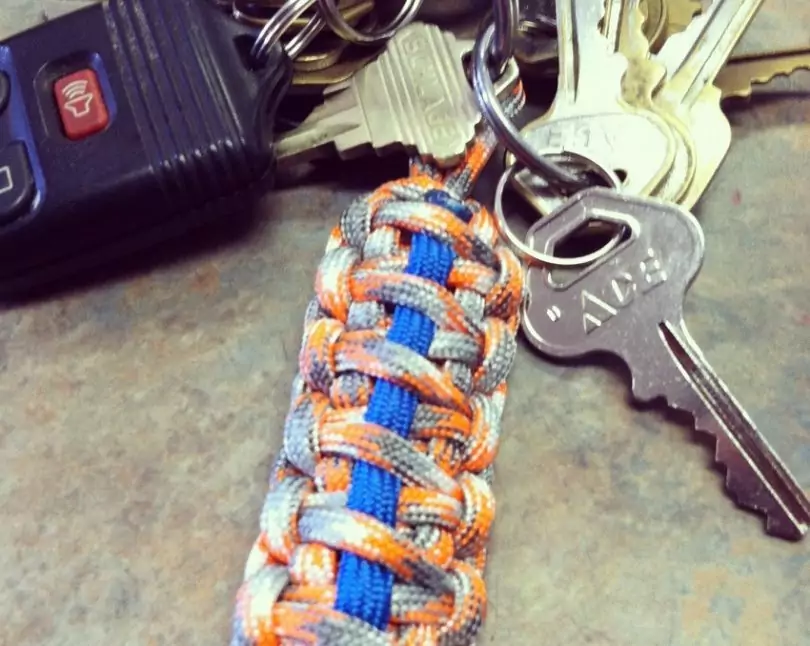
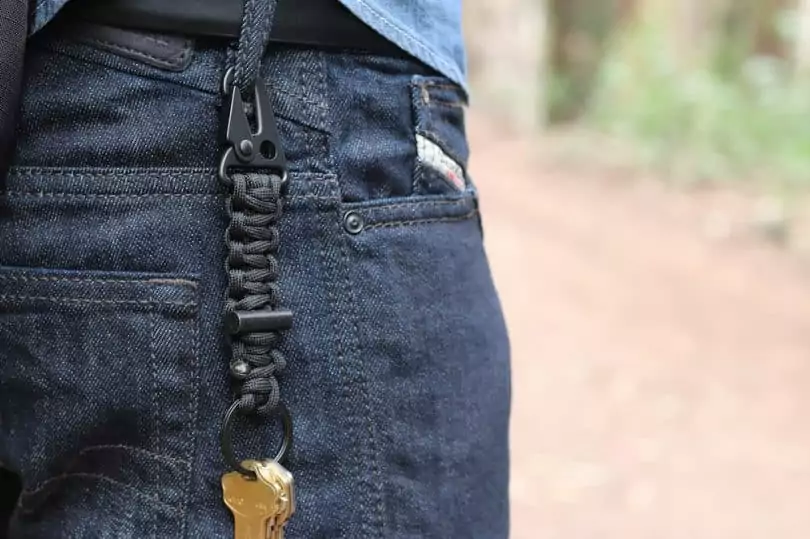
You can carry the whole spool if you want but there are so many ways we have learned that make it more convenient and almost unnoticeable to carry with you. On your wrist, around your knife, or around your neck, or on your keys the paracord is there when you need it most. Give a simple paracord keychain a try by following the steps above and even trying to teach a fellow outdoor enthusiast. It’s fun to make, great brain stimulation, and produces a priceless piece of equipment.
What other types of knots are there out there? We only touched on a few of the popular and relatively simple techniques there are. Have you created any that are difficult? What are your suggestions to make paracord even more versatile! Share this How-To with your friends and start preparing together to, literally, tie the knot on your safety outdoors.





I don’t do much camping but my best friend is planning one so I am checking out some equipment and browsing sites. However, I found this on reddit and this made me laugh. I couldn’t figure out what it was for a minute until I realized a paracord keychain was being used as a lock for public restroom https://uploads.disquscdn.com/images/24becfe5916c06bbd847b2aea2c6aa8483a5541d84d1ffd52aaa8b578a1bda85.jpg Sometimes even the city can feel like a jungle.
I’ve never used a paracord to save a life before but it has been useful for me. I have fixed a broken zipper pull; made impromtu leashes, fixed broken stuff and tied stuff with the use of a paracord keychain! My boyfriend introduced me to it when we encountered a surprise rain shower during a picnic. He used a paracord to make an emergency shelter using a large plastic bag. I am really interested in learning more survivalist skills.
Haha! That is so neat! In the urban jungle, you just got to have the paracord with you. It works in both wilderness, I reckon! And also keeps “wild animals” away for some.
Great shot Dennis – love it!
Hi Stephanie! You’ve come to the right page. There’s a ton of information here that you can use for your outdoor adventures. Feel free to ask and voice your concerns – I might be able to help.
P.S – The paracord is going to become one your best friends, that’s for sure! 🙂