
To take on the learning of a new skill is an art in of itself. It’s always fun to challenge yourself with something new and outside of your comfort zone. Particularly if that skill is something that can be attributed easily to your style of life. Actively outdoors: why not look into how to tie knots?
Learning to tie knots well, can sound like quite an odd skill set to want to improve upon, but having a firm grounding in knotcraft can be quite beneficial to a person’s everyday life. Tying your shoelaces is an everyday occurrence, some of us tie pieces of string around our forefingers to later help spark memories, and we all have had the experience of adding a tie to our formal attire. Why not expand on these miniature habits with their much older siblings?

Understanding the basics of knotcraft is especially a major advantage for anyone who enjoys taking camping trips, hiking, rock climbing (though one would hope that you already have a grounding on the subject), or any other outdoors activity. In this brief guide we are going to look into how to tie knots from a list of essential techniques, guaranteed to be of use to those in search of a foundation in knot tying.
A Brief Guide to the Art of Knotcraft
To make a taut story loose, we are going to look into the most tried and tested knots available and assess their highest practical use for hiking trails and/or camping trips. So we will need durable, dependable knots that quickly fasten as well as loosen, and untie with ease. Knots that keep up with you, maintain when needed, and release on command.
The accompanying collection of knot ties have been curated on exactly this premise: ease and dependability for the user. No pushing you to breaking point by asking you to perform the seamlessly charming yet complicated Double Globe Knot, or the Zepplin Bend, ever reliable in that it will leave you stumped from the word go. No, simplicity and practicality are all to be expected here.
Be you a hiker who wishes to apply knot tying to your trails, a novice climber just starting to brace the heights, or a sailor out to brace the sea – or even if you are just interested in knowing – here is a brief guide as you will need.
Learning the Ropes: the Basics
Before looking into the practice of tying knots efficiently, we must first become accustomed with the different parts of the apparatus used. Yes, the rope or line. Learning the language of knotting will help vastly when the time comes to attempt to tie one, as if we will know what everything is we will know where we need it positioned.
The two main parts in any knot tie are the Standing End and the Running End of the rope. As most of you can guess, the standing end is the part of the rope that stays taut and immovable whilst the running end weaves its way around it, creating the basis of the knot. When the running end has finished doing its job, you are to pull both ends firmly and securely, and then what you’re left with is a knot.
Another thing that should be kept in consider when taking up the art of knot craft is the type of line you wish to use whilst learning. All of us started with our shoelaces for one of the simplest, and important, knots that we use daily, but the types of knots that we are going to look into demand more of a commitment to the craft that materials like laces cannot offer.
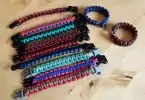
The use of a nylon based rope or paracord is highly recommended in the learning of knotting, as it is highly durable, flexible, provides grip and slack easily when needed, and has many other uses. As paracord is thin, it is easier to tie knots into. The more you progress, the more nimble and competent your fingers will become. To the point where tackling thicker ropes will take the same amount of effort. We do also recommend to never tie ropes made from two different materials in bend knots, when it is needed to carry heavy loads. The stronger of the two will win out making the weaker useless and prone to snapping.
Advanced Rope Terminology: Picking up the Slack
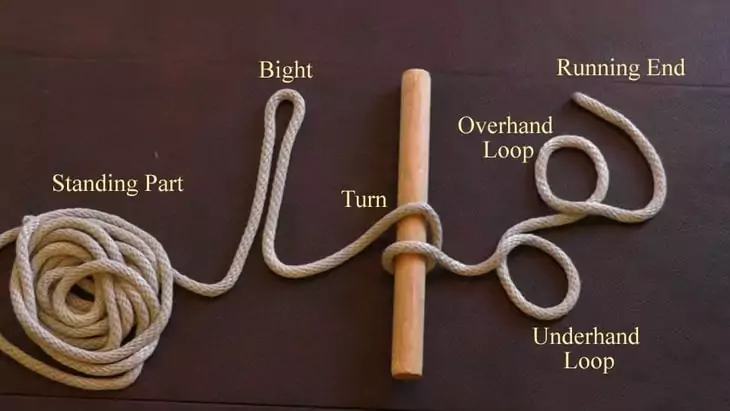
Here is a more detailed look at the terms used for the ropes parts and the knots they make, to aid you in the rest of this article as they will be referenced heavily.
- Lay – Different strands of material twisted together to make the twist in the rope.
- Bight – A slight bend in the rope, that does not cross over itself.
- Overhand Loop – A loop in the rope that places the running end over the standing end.
- Underhand Loop – A loop in the rope that places the running end under the standing end.
- Turn – The turn is when the running end of the rope is wrapped around an object, and then exits the opposite direction of the standing end.
- Round Turn – A round turn is where the running end wraps around the object again to point in the same direction as the standing end.
- Pig-Tails – Tip of the running end left excess after tying the knot.
The Knot, The Whole Knot, and Nothing but the Knot
Ahead of our step by step guide in knotting, it is always useful to know what kind of knot is what in the sections to come.
Here is a little guide that may prove helpful, for an overall understanding of knots and what is not a knot:
| Type | Explanation of knot | Application of the technique |
| Knot | Tying securely fastened notches using a singular piece of material (commonly rope). | A simple knot for simple tasks, such as notches for measurements and in offering a better grip to you for various activities that involve you needing to pull something. |
| Bend | Interweaving two pieces of rope together using a knot. | To elongate any length of rope by lashing it to another firmly, would serve you greatly in any situation. |
| Hitch | The fastening of a rope to a solitary object. | Being able to tie your rope around a solitary object grants you purchase on the terrain. Make use of the line any way you see fit. |
| Loop | Using a knot to attach a rope to itself, creating a loop in the aftermath. | Used for tying down tarps with use of pegs, an also be used as a harness for around your waist, when tightened correctly. |
| Overhand | Taking the loop knot and passing a separate length of rope through the hole, then tying it off to the loop’s standing end. | Strengthens a loop knot and makes it harder to loosen. As a regular loop knot can buckle under too heavy a load, adding an overhand knot can ease the strain. |
| Half-Hitch | An addition to the overhand. By weaving the loose end of the rope through the loop, you tighten and better the overall knot. | Half-hitches can also be used to strengthen the regular hitch knot. Handy for creating a sturdy line, pulley systems for winches, etc. |
| Slipped | Less a type of knot, but more a modification simply added to any above technique, helping free any knot. | Helps even the tautest of ropes come loose in your hands with one easy pinch of the end of the rope. Saves time and effort when packing away. |
| Shortening | A knot that is used to shorten a longer rope. | Shortening a rope that is already too long can help in the packing of your line, tightening the slack of any rope in use. |
Now that we have the basics covered, we start to delve into the art of knotcraft and start learning some basic knot tying techniques. From all trails and trades.
Essential Knots that you should know
Let us familiarize ourselves with the type of knots we will be learning about in this article, their practicality in the field (or on the trail), and how to attach and fasten them correctly. To begin with, we will start with knots and continue through to hitches by way of a few loops and bends:
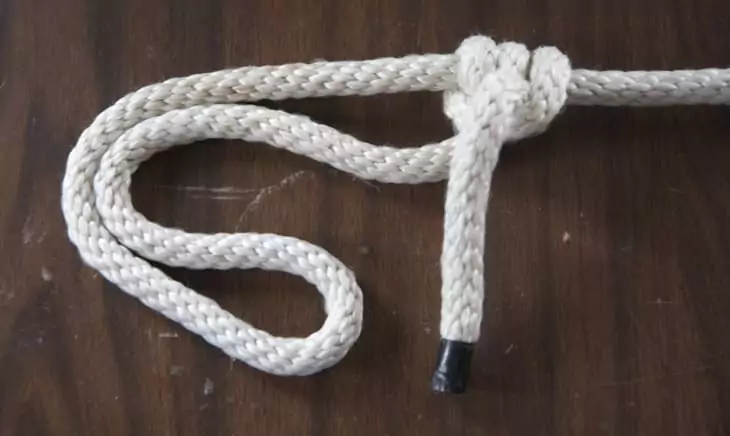
Bowline
The Bowline (pronounced bow-linn) is a fairly simple loop knot, and when tied correctly, it proves an extremely useful addition to any knotter’s repertoire.
The knot made its name by securing the line that keeps the weather leech of a square sail on a boat from buckling backwards. Deriving from the words “bow line“.
Best way to tie a Bowline is to:
- Take the end of your rope and make a small loop, keeping the base pinched between your thumb and index finger
- Feed the running end through the loop from underneath and pull it toward the standing end
- Turn the running end round the standing and bring back to the loop and feed it through again, over to under.
- Keep hold of both ends and tighten carefully, maintaining the knots overall integrity, until it is secure.
You may want to read our guide on the types of knots suited for hammocks, it will be a great help to you.
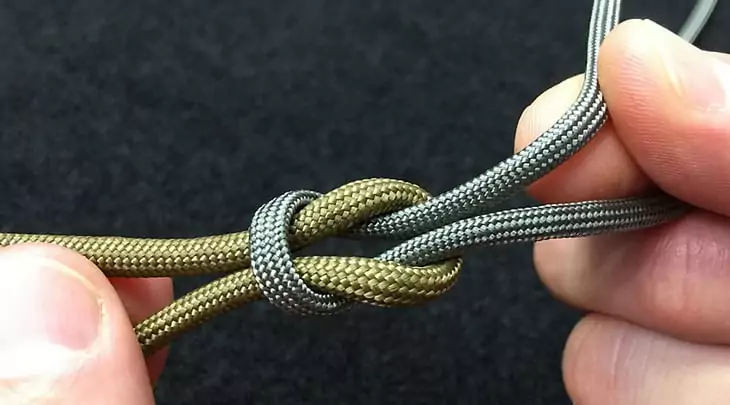
Square Knot
We have all learnt this knot before. Well, the first half of it at least. The Square Knot starts with the turn that we all use in the beginning of tying our shoelaces.
Connecting the two laces in this way offers a solid foundation to work on top of, when tightened and secured. This binding knot is categorized as a Bend as it joins two separate lines together.
Though it is not as strong as other bend knots, it is great for starters and can always be strengthened by way of an extra half-knot.
Best way to tie a Square Knot is to:
- Take the two rope ends that you wish to tie together and place them parallel to each other, running the tips in opposite directions
- Use a turn – right over left – and then secure the half-knot you have made
- Using the ends, perform another turn – left over right this time – and tighten to create the Square Knot.
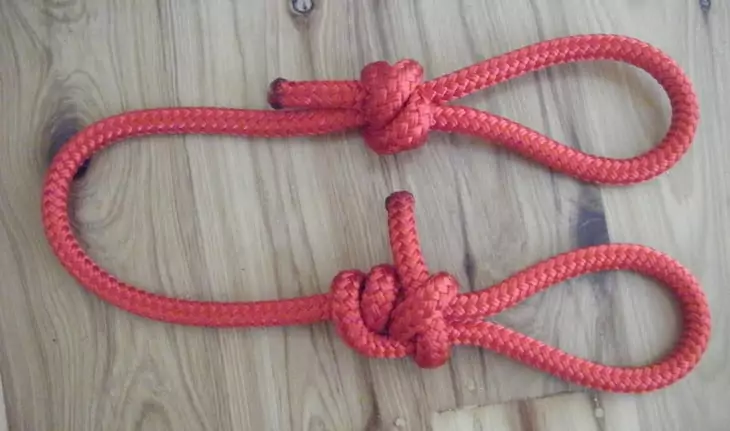
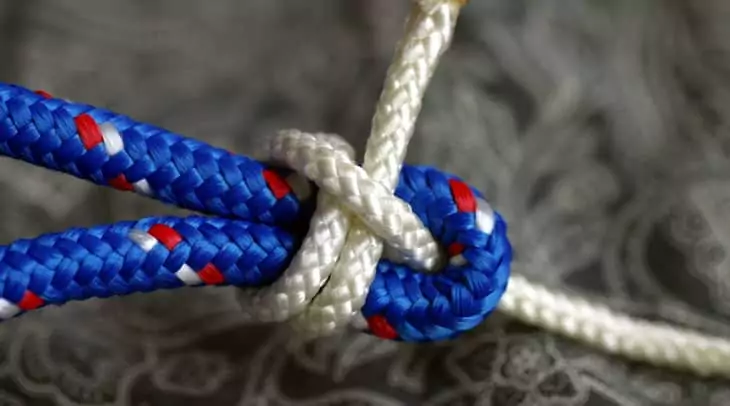
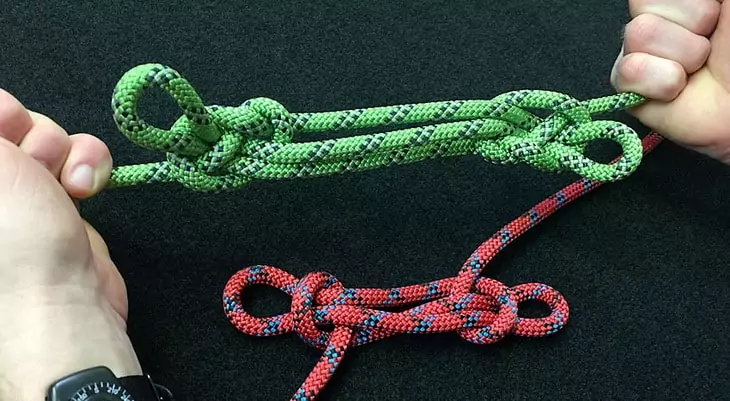
Prusik Knot
A hitch that is used to attach a loop to an already established line. Commonly referred to as a Friction Hitch, as it latches onto a rope tightly whilst it is carrying weight, then, when the weight is taken away, it becomes slack and free to slide along the line.
The Prusik Knot was named after Dr. Karl Prusik, an Austrian mountaineer who allegedly invented the hitch.
Best way to tie a Prusik Knot is to:
- Take a smaller line – preferably a piece of cord – that has already been tied off into a loop
- Place the loop under the rope you are attaching it to
- Pass the knotted end of the loop around the rope a total of three times, making sure that each of the turns line neatly parallel to each other before tightening the Prusik.
Thief Knot
A simpler version of the Square Knot, that is faster to produce. This knot earned its name by according to old sea tales, they were used by sailors to tie up their personal bags. Thieves would burgle the items and retie the bags with Square Knots.
Revealing to the sailors that their possessions had been tampered with.
Best way to tie a Thief Knot is to:
- Take the two rope ends that you wish to tie together and place them parallel to each other, running the tips in opposite directions
- Make a bight in one of the ropes and bring the tip of the rope back to the standing end
- Work the running end of the other rope through the loop that you have just made and bring it around the standing end
- Pull it back through the other ropes loop and tighten, making a Theif Knot
Surgeons Knot
Seemingly developed by physicians during the Second World War in a bid to find an effective, efficient way to tie off blood vessels, the Surgeon’s Knot came into the collective global understanding. Used in the same way a Square Knot is used – to connect two separate lines together.
This knot is fast and faster acting.
Best way to tie a Surgeon’s Knot is to:
- Take the two rope ends that you wish to tie together and place them parallel to each other, running the tips in opposite directions
- Lash the two rope ends together by performing up to three half knot bends
- Then, take the two pig-tails and overhand loop from the right over the left
- Then underhand loop and pull through
- Tighten both rope ends to make a Surgeon’s Knot
Stopper Knot
A knotter’s best defense to the loose end. Does what it says in the name: it is a stopper knot. Making a notch at the end of your rope, stopping the running end from running off. There are different versions of the Stopper, we will look at the Ashley Stopper Knot as it serves our purpose of a simple essential knot.
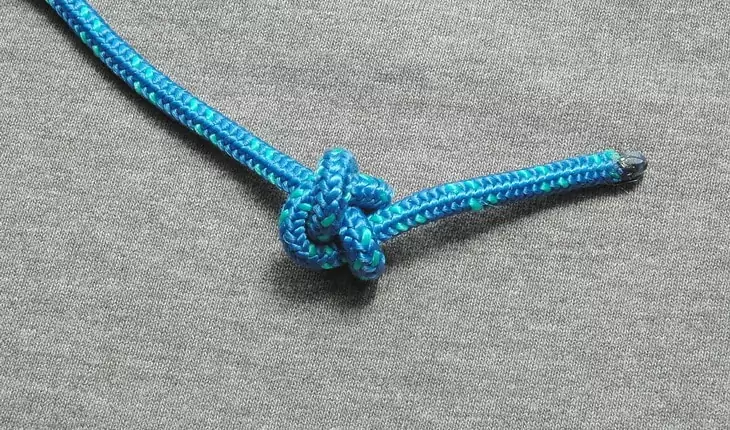
This knot was developed and perfected in 1910 by American author, and sailor, Clifford Warren Ashley.
Best way to tie a Stopper Knot is to:
- Make an overhand loop and pass the rope end through it twice
- Tighten the knot and pull it all down to the end of rope to make the Stopper Knot
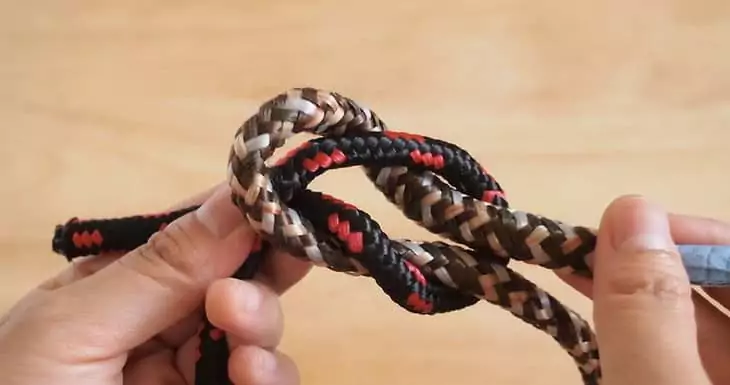
Water Knot
Also known as a Cove Knot. The earliest references to this knot date back to the 1400’s.
This knot is a strong, and resilient one and can be enhanced easily with the aid of more a couple more overhand tucks.
Best way to tie a Water Knot is to:
- Take the two rope ends that you wish to tie together and place them parallel to each other, running the tips in opposite directions
- Make them parallel to one another and turn a large overhand loop into the middle
- Take both rope ends and start to make four turns into loop each
- Tighten by pulling both standing ends of the ropes to make the Water Knot
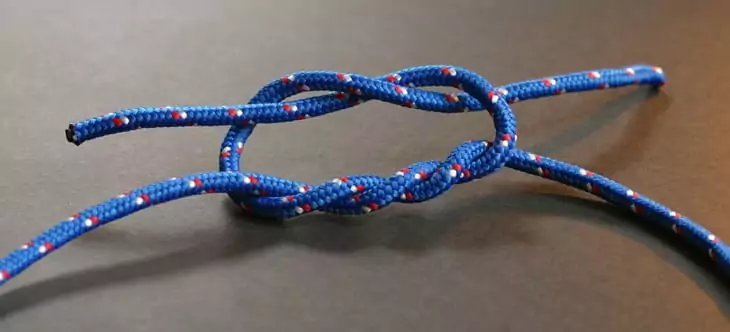
Figure 8 Knot
Considered as one the strongest types of knots, when tied correctly. The Figure Eight follow through, provides a secure loop, with a solid grip, that can be formed at the end of a rope.
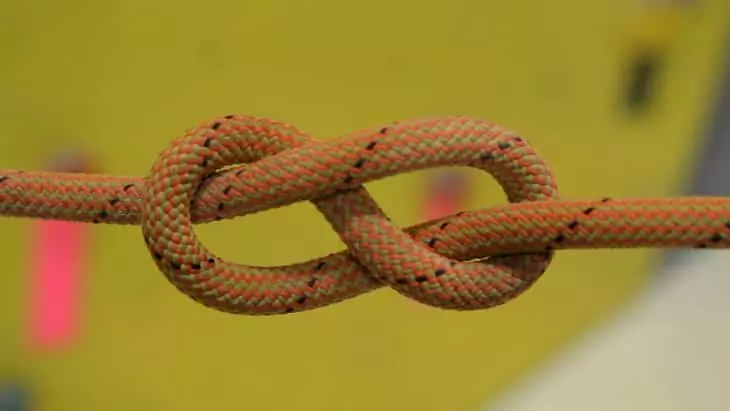
It can be used instead of a Stopper Knot if you wanted to shake up your craft a little bit.
Best way to tie a Figure 8 Loop is to:
- Pull a bight in your rope toward its end
- And make an overhand loop toward the standing end
- Then make an underhand loop under the standing end
- Bring the running end through the loop you first made.
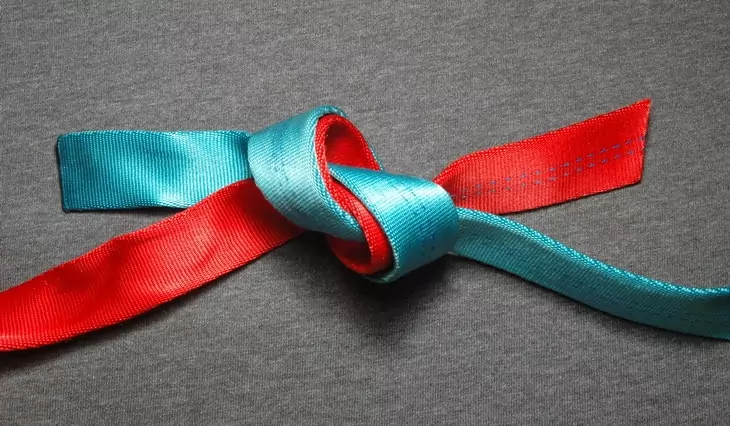
Sheet Bend
A valuable bend knot for your repertoire, as it works to connect two separate lines of rope regardless of rope size and materials.
Though we would not trust it with a lot of weight, but adding the aid of a double knot just to safe and secure will make any knot more effective.
Best way to tie a Sheet Bend is to:
- Make a bight from one rope end and pinch it back to the line to form a loop
- Pull the running end of the second rope through the loop you have made
- Turn it around the loop’s pinch, and pull under its entrance to the loop
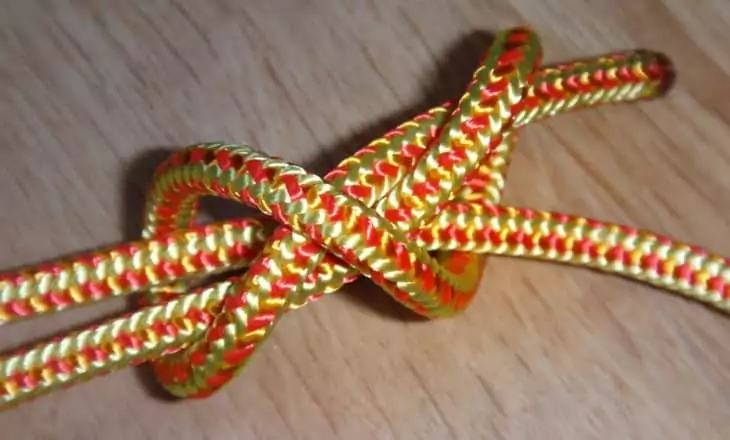
Ashley Bend
Another knot developed and perfected by our long lost friend, Clifford Ashley. Used as most bends, to connect two lines temporarily. This bend can fall to jamming if not tied correctly, and sometimes even then.
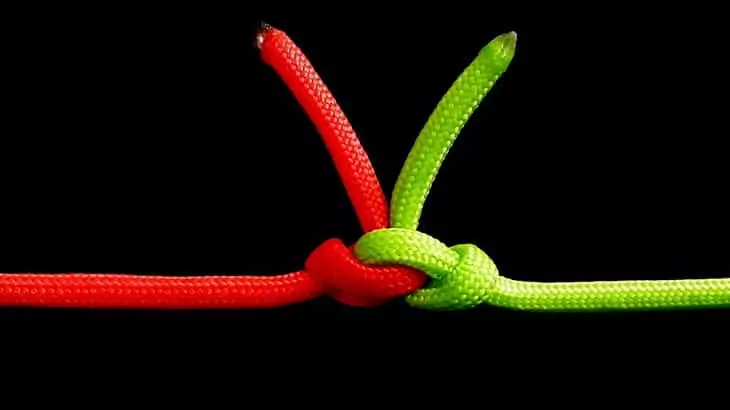
Careful when using this knot, and practice it often for best results for it.
Best way to tie a Strop Bend is to:
- In both ropes that you are attaching together, you need to make a bight in each and interlock them
- Overhand loops over their respective standing ends and bring to the loop in the center of both ropes
- Pull the ropes through from under the loop and tighten by pulling the rope ends away from their standing ends
Clove Hitch
One of the simplest knots to master, that offers endless possibilities to you as a knotter.
Forming the foundation of many knots, the Clove Hitch still a good binding knot in its own right.
Best way to tie a Clove Hitch is to:
- Turn the running end over the object you wish to tie your rope to
- Continue it over the standing end and around the object again, on the other side
- Pull the rope end through the turn you have just made
- And tighten to make the Clove Hitch
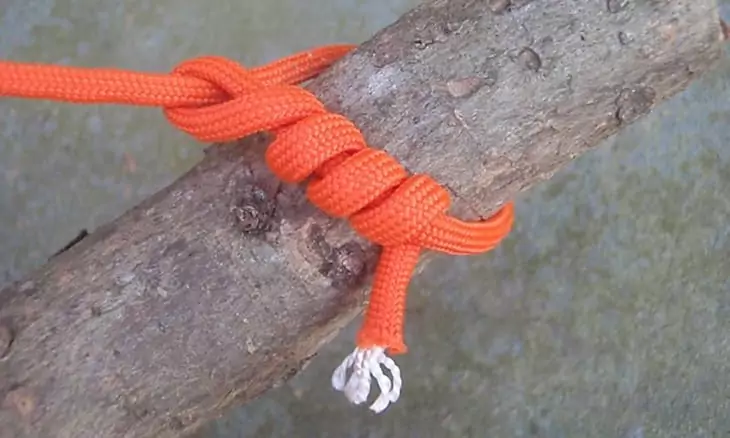
Rolling Hitch
A simple friction knot that can be used to attach a line to another rope, or to any object with a strong line to it. With friction knots, it is all about the weight being carried. When the weight is attached to the rope using the knot, it is difficult to move around the standing end of the opposite line.
When the weight is taken away from the equation, the friction knot becomes looser and offers more slack, allowing it to slide freely across the standing line.
Best way to tie a Rolling Hitch is to:
- Take the running end of one rope and overhand loop it over the standing end of another rope
- Bring the running end under the standing end to make a loop around the standing, then tighten to make a Half-Hitch
- Bring the running end under the standing, aging and through the stem of the first loop
- Make a total round turn and tighten slightly
- Bring the running end under the standing one last time and loop it through itself and tighten securely.
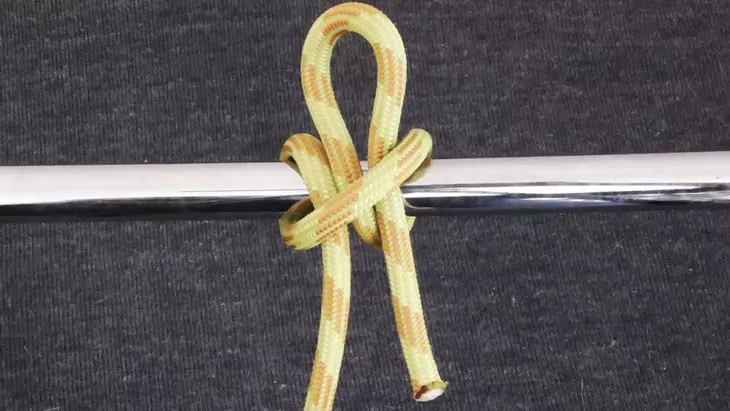
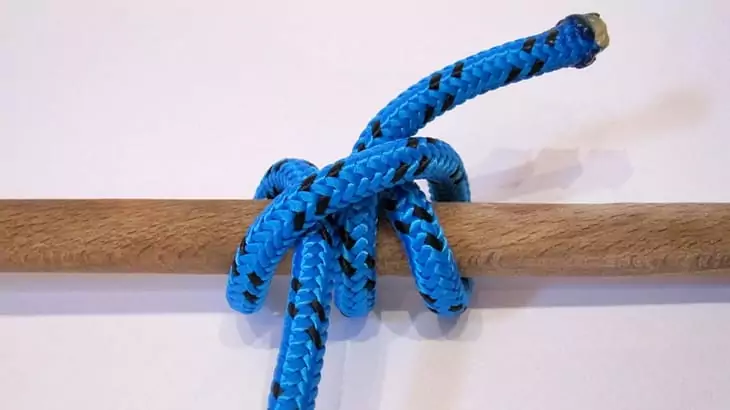
Timber Hitch
Effectively, this knot is a temporary acting noose knot. It provides ample use when tied around tree stumps, poles, etc.
It is advised that the thicker the object that this knot needs to be tied around, the more twists are needed to strengthen the knots grip.
Best way to tie a Timber Hitch is to:
- Make a turn around the object you wish to tie your rope to using the running end of the rope
- Bring back round to the standing end and make an underhand loop under it
- Then perform an overhand loop over itself and start making twists around the running end
- Make three twists, then tighter the knot into the Timber Hitch.
Cow Hitch
Often known as the Lanyard Hitch, this knot is generally used to attach a rope line to a ring, or a hoop. Much like those on your daypack.
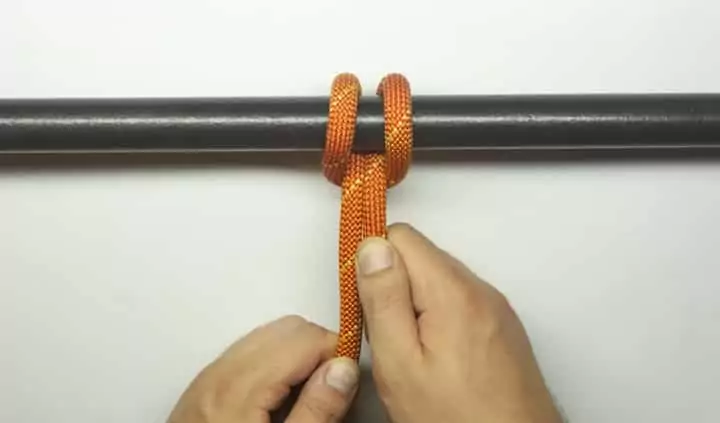
Though it is not the strongest hitch, it is a great knot on a temporary basis.
Best way to tie a Cow Hitch is to:
- Pull the running end through the loop you wish to tie your rope to, and bring it back down to the standing end
- Use an overhand loop over the standing end and bring the running end back to the loop from the opposite side
- Perform an underhand loop and pull the running end up, and then under itself
- Tighten to create the Cow Hitch.
Two Half-Hitch
Essentially a double knotted Half-Hitch knot, that is tighter and more secure in its fastening. Adding the extra turn to the Half-Hitch offers a more secure knot, and a better grip on the item in need of a rope.
This also a quick and easy knot to learn, with many different uses.
Best way to tie a Two Half-Hitch is to:
- Make two overhand loops around an object
- Bring the running end back to face the standing end
- Overhand loop the running end and then bring it under the standing to make the first Half-Hitch knot
- Pull it tightly and then repeat the loop to make the second Half-Hitch to complete the Two Half-Hitch
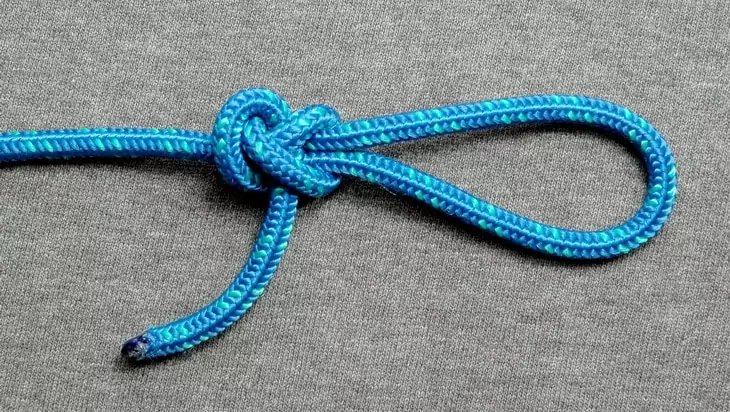
Slip Knot
Among one of the easiest knots to tie, perfect for a beginner’s gateway into knottery. A Slip Knot is one of the simplest loops available to make. Its name has changed a bit since it’s invent, as it is more a slip noose than a standard knot.

But the Slip Knot has always remained in this form.
Best way to tie a Slip Knot is to:
- Make an underhand loop and pinch it tight toward the end of the rope
- Prepare a bight with the rope end and tuck it into the tight loop
- To release, pull the end of the rope
Sheepshank
The Sheepshank is a fairly simple shortening knot to tie and is extremely valuable to a knotters repertoire as it is so easy to come loose when you have no longer use for it.
So easy to loosen in fact, that the second you take away it’s carry load, the knot falls apart.
Best way to tie a Sheepshank is to:
- Take the standing end of the rope and spin three small overhand loops, that lay close to one another but do not overlap
- Next, pinch the sides of the middle loop and pull them through the loops on the side
- Tighten the standing end then the middle loops running ends
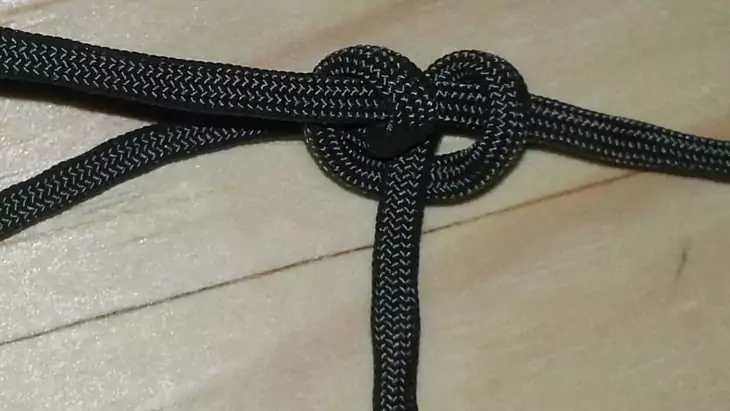
Loop Knot
A common use of the Loop Knot is to shorten the likes of a damaged rope, though it’s most common use is for towing automobiles.
The Loop Knot takes the weakest section out of play fr the standing end by tying it off in into the loop.
Best way to tie a Loop Knot is to:
- Make a bight in the standing end of the rope and pinch it together
- Turn an overhand loop in the new running end back over itself to make a loop
- Bring the running end through the loop with an underhand pass through and pull down to tighten
The best positioning for the damaged part of the rope is to be at the very tip of the night made, so that it ends up outside of the loop and the lines standing end complete.
You can check out our piece on the safest types of ropes for outdoor use to give you more insight.
How to Store your Rope properly
After you have put your rope under the pressures of all the knots aforementioned, it is rather important that you take care of the line for better later use. Making sure that all the tangles made have been untangled and any unnecessary knots have been set loose, you will need to keep the rope in a state that allows easy access and that keeps both ends tidy. Because, after all, a rope does not come all that cheap.
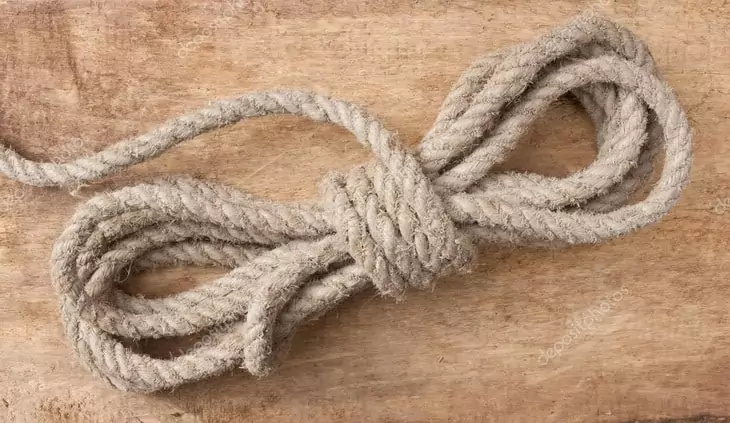
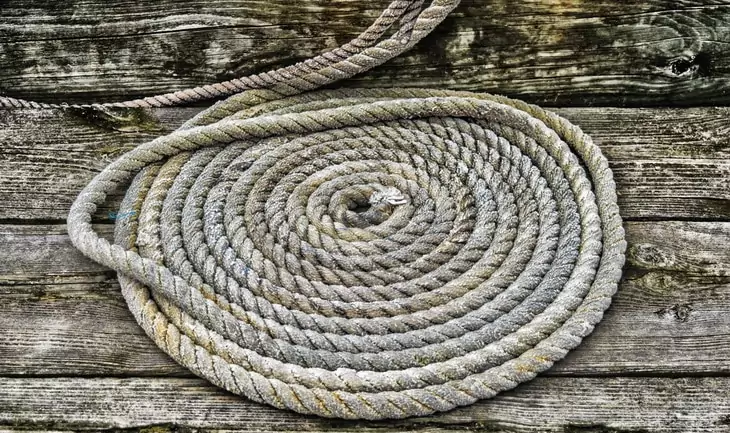
We recommend coiling your rope. This allows easy access, no tangles, and it is by far the best way to store the rope. Here is how it is done:
- Take an end of rope in your hand and start to loop the rest of it onto itself
- Continue looping and coiling the rope into your hand until you reach the other end
- Leave a good sized length of rope at the end to use, whilst you pinch the rest of the coiled-up rope to add length to it
- Take the free running end perform a minimum of two round turns around the middle of the bunched up rope and tighten
- Pull the end of the rope through the loop on either side of the rope and securely tighten
Before coiling the rope, make sure that it is dry regardless of material. As moisture build up will lead to a severe deconstruction of the rope.
Our article on how to select the best climbing ropes will help you, so check it out soon.
Final thoughts
Hopefully the knots that we have provided in this brief guide to how to tie knots have been beneficial to you and have provided you with a thirst to learn more. Some of these essential knots are simple, others are a little tricky, so take your time with each one and make you have followed the steps provided.
Keep practicing and learning, and you will be able to maintain this skill. Use it on your next camping trip to better peg down your tent, lashing all your gear to your daypack, to climb more securely, or even just to show off to your friends and family.
Just remember that it is a valued skill, one that will surely help you out of a tricky situation – or even a mild one – someday. And, if you feel like sharing some of your knotting experience with us, make sure you leave a comment in the comments section below.


You definitely know how to tie easy knots, but you will need the more advanced knots, especially in a survival scenario. So, you should get acquainted with as many knots as you can.
Knowing how to tie knots is a must know skill for any outdoorsperson. Make sure you know how to tie at least five knots.