
Hiking is an exercise-intensive excursion that needs proper preparation, from sufficient nutritious foods to delicious and nutritious snacks. You also have to bring along enough water, and other refreshing fluids such as the juices to your hiking expedition. But only healthy ones combined with healthy snacks please! The mistake that most of us do is to pack irrelevant and unhealthy snacks for our excursions.
Note that hiking, due to its inevitable exposure to unpredictable temperatures and energy-demanding trails, requires a careful selection of snacks just to spice up and refresh your journey. Check our meticulously compiled list of the best hiking snacks below to pick your desired ones.
Our list of the best snacks for hikers is predominated by homemade snacks because we strongly believe that they are cost-effective. When hiking, you do not have to break your bank by over-spending on the purchase of all essentials needed, whereas you can cut the costs significantly by doing lots of foods and snacks on your own. But then, you need to be a hobbyist in cooking to avoid terrifying your stomach with non-delicious intakes. I’m joking, I know you are indeed a good cook…
Now bear with us as we give you tips on how to prepare these snacks beforehand. If you decide to buy, instead of doing the snacks on your own, it’s still a great deal but just make sure you buy the best food. Let’s give you tips first that what to consider before popping out your hard earned cents.
Important tips to consider when buying
Surely you know that snacks’ selection for household consumption and for wilderness consumption is significantly varying mainly due to unstable temperatures in the wilderness and the inconvenience of having refrigerators or coolers. The wilderness unstable temperatures and uneven trails dictate our choices when buying snacks. Having noted that, you should be cautious about the types of food to buy. Take into account the questions mentioned below before making any purchase.
How many days will I be hiking?
The longer days you hike is the more snacks you will need. But, importantly, the perishable snacks such as the sandwiches and yogurts have to be avoided more especially because traveling with your cooler will be impractical. Instead, consider non-perishable homemade snacks that are lightweight to last you many days in the wilderness. To give you more options, here’s a list of our top energy bars to keep your spirits up, check it out.

For handy cookers, we’ve got you covered below with the selection of homemade snacks that are great for hikers. But, if you are going to stay longer than a week in the outdoors, we reckon that you plan your eating schedule to avoid depleting the snacks before your activity-driven excursion matures.
How long will I be hiking?
The longer the trail is the more snacks needed. Even if the trail is to be traversed in a day or two, you need refreshing snacks when you rest amid your hiking journey. How about treating yourself with granola or energy bars or some dried fruits? And the delicious beef jerky and whole-grain tortillas, how about refreshing with them? The choice is yours.

If you are going to hike for a day, perhaps perishable snacks can be a good choice but provided they are stored in lower temperatures.
How will I eat?
Although we emphasize having snacks for your route, they should not be taken on their own. The best choice is when you eat them as supplements to your normal hiking foods because the snacks alone may not give you the desired energy to complete your journey. Either way, you need a good combination of snacks and foods.
Overeating, for example, may negate the need for snacks thereafter.
Will it cost me more to buy than to make on my own?
Ready prepared snacks found in grocery stores are notoriously costly compared to the homemade snacks. Remember that your local store is determined to get profit, and their supplier too is also determined to get profit.

So, making your own snacks will be the best ideal, well it all depends on the type of snacks you want. Simply buy the recommended recipes and prepare before time.
Is it viable to travel with a cooler?
If it’s not viable, then why bother buying perishable snacks, knowing very well that they might decompose? Hikers are not fond of heavy tools not even their gear because that could be a burden to their activities. So the cooler is often the last thing in mind when you are faced with steep mountains to climb for hundreds of miles. To keep your food cool and safe, see our must-read article on the top backpacking cooler bags for more information.
This mistake of perishable snacks is prevalently committed by beginners. Please do not fall into the pit too. Well, unless you are traveling with a car, then a cooler might be a viable option and, in turn, such snacks shall be viable too.

Up to so far, we’ve done our best to guide you before you can purchase the snacks for your hiking expedition. Now let’s further discuss our core recommendations of homemade snacks. Before we delve into the list, please note that you are welcome to amend the recipes to your liking but meticulously.
Delicious Homemade Recipes
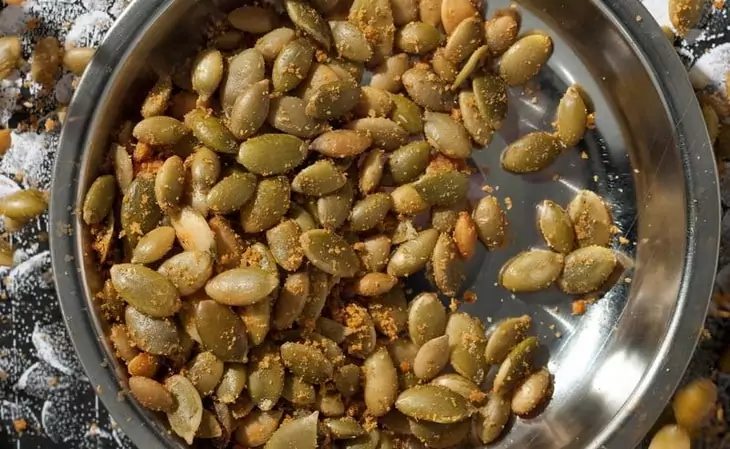
Pumpkin Seeds with barbeque or seasoned salt
Treat yourself with pumpkin seeds tossed with either a seasoned salt or barbeque. This could be your favorite snacks for subsequent hiking excursions you’ve planned. How to prepare it?Simply get raw pumpkin seeds from any store or collect the ones you left when cutting pumpkins, and then rinse them in a strainer to separate the seeds from the pulp.
The next steps:
- Preheat the over to about 380 Fahrenheit degrees and then put a stainless steel vegetable rack inside to put the pumpkin seeds while roasting them in a baking sheet.
- But put 2 spoons of oil before, and then stir frequently after 5 minutes until your pumpkin seeds are crisp and brown in color.
- It could take about 15 minutes to be fully cooked.
- Then remove your snack from the oven and sprinkle with seasoned salt.
- The option of serving them with a barbeque spice requires the addition of barbeque and the 2 teaspoons of salt while in the oven. Your snacks will be ready to pack.
For more vegan options, see our article on the best vegan backpacking food for your nutritious needs.
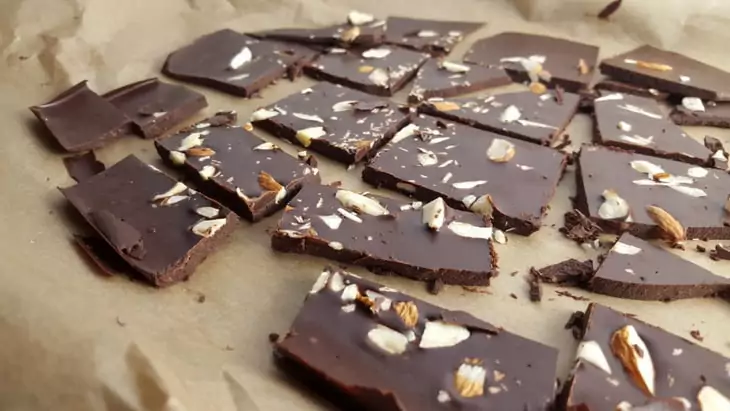
Chocolate Bar
If you are like me with the obsession of chocolates, this snack is definitely for you. These chocolate bars are not only super-healthy for your body, but also incredibly delicious provided you make them perfectly. How to make them?
Well, you need to buy a brown rice syrup, flax seed meal, crispy brown rice cereal and a wheat germ. You can find these recipes in your local health or grocery store. Subsequently, you should follow the steps as recommended below:
- Preheat the oven to 350 Fahrenheit degrees and put a rack in the middle.
- Then coat the butter on your baking pan ready to put your mixture
- Use the baking sheet to put the coconut, flax seed meal, almonds, oats, brown rice cereal and the wheat germ and then mix them before baking them.
- Then take the cooked contents to the rack.
- Put the brown sugar, cinnamon, peanut butter, salt, vanilla, and brown rice syrup in a saucepan preheated to medium heat.
- Stir until the sugar has dissolved in the mixture, and then pour them in the baking pan prepared.
- Then sprinkle the contents with chocolate chips and put them into the oven preheated at 350 Fahrenheit degrees until the crisps have melted.
- After that, remove the contents from the oven and spread chocolate into the contents.
- Cool the mixture on a rack and then store in a refrigerator for about 30 minutes until it has frozen
- Then remove to cut into bars and then wrap them in a plastic wrap.
- Freeze the bars for a few weeks before embarking on your journey.
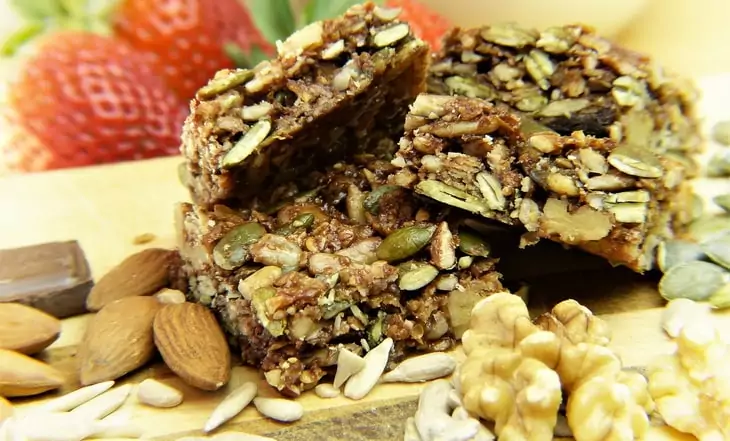
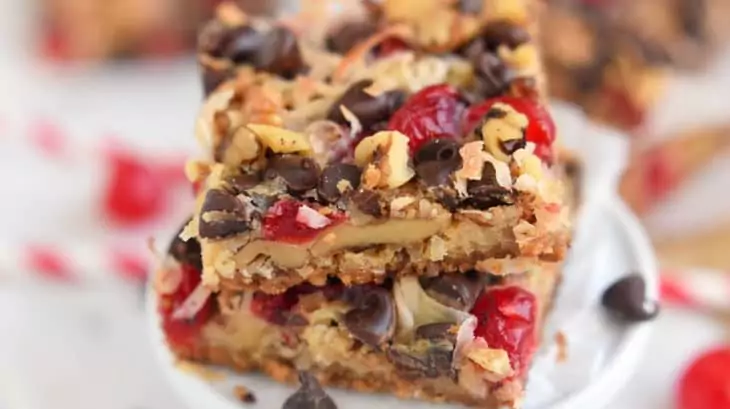
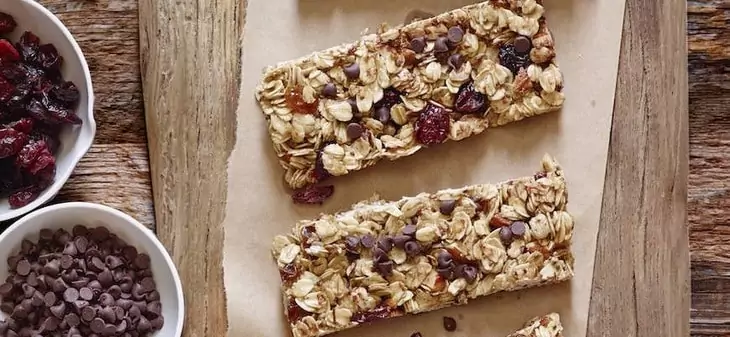
Cherry Bar
You can revive your morning with this cherry bar to energize your body before your next hiking adventure. Nothing beats the deliciousness of the oats, flax seed, wheat germ and the nuts in this bar. To make this cherry bar, buy the oats, wheat germ, flax seed, and nuts in your local health or grocery stores.
Then follow these steps to prepare your power bar:
- Preheat the oven to 350 Fahrenheit degrees and put the rack in the middle of the oven.
- Meanwhile, spread a butter in a baking pan and put it adjacent to the oven
- Then take oats, coconut, flax seed, wheat germ, almonds, and walnuts and put them on a rimmed baking sheet. Mix the contents with your hands and the bake them while stirring regularly until the nuts have turned golden brown.
- Subsequently pour the contents into a wire rack that is prepared in the oven. Reduce the oven heat to 300 Fahrenheit degrees.
- On the other side, prepare brown sugar, honey, cinnamon, vanilla, butter, salt and put them in a saucepan. Fry until you get a smooth mixture wherein the sugar has dissolved.
- Add oat & nuts mixture and cherries to the saucepan after removing the saucepan from the heat, and transfer the contents to the baking pan prepared initially.
- Then bake the contents until you have a pleasant smell and then cool them.
- The next step is to cut the slabs into bars and wrap them in a plastic wrap to store or freeze them before you go hiking.
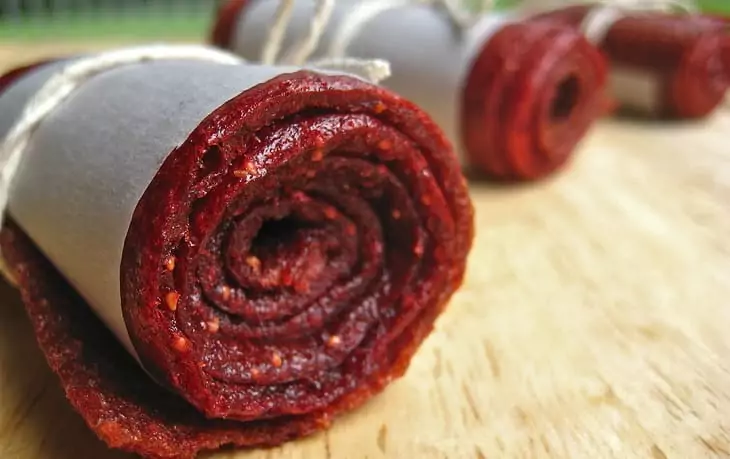
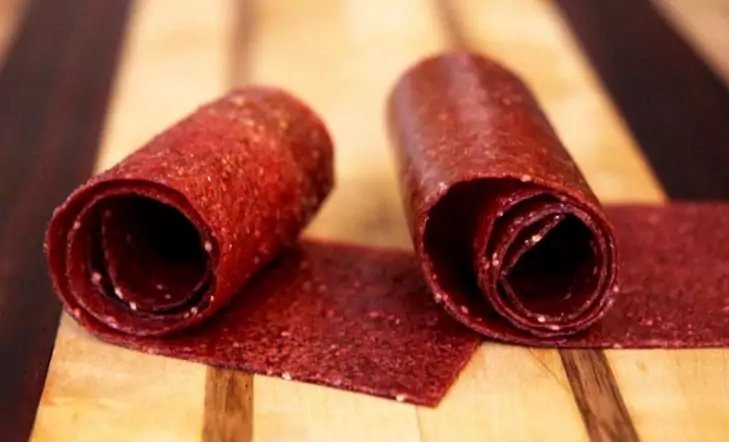
Strawberry Fruit Leather
No one can say no to the mouthwatering strawberry fruit unless allergic to it. Now we help you prepare a delicious leather made of strawberries only. Follow the steps below:
- Prepare the oven and preheat it with the rack in the middle.
- Then prepare a rimmed baking sheet with a silicone baking mat next to the oven
- Take strawberries, salt and sugar and put them in a blender and blend them until you get a smooth mixture.
- Subsequently transfer the mixture into the saucepan using the fine-mesh strainer. Use the spoon to force through the mixture until seeds remain, then remove the strainer to disperse the seeds.
- Put the saucepan over a medium heat to cook the mixture. Keep stirring the mixture until it thickens and then remove the saucepan.
- Combine the contents with lemon juice and then put them in a container to cool. Then transfer them to the baking mat in a form of a rectangle and spread evenly.
- Then grab the edges of the rimmed baking sheet and shake it.
- Put the contents in the oven until the fruit leather is a bit sticky. It can take about 5 hours to fully cook that. Then remove the sheet from the oven and cool it. You can pull out the cooked fruit leather and transfer to another sheet using kitchen knives to cut through to form desired shapes and then roll them. The fruit leather will be ready to store before you take your journey.
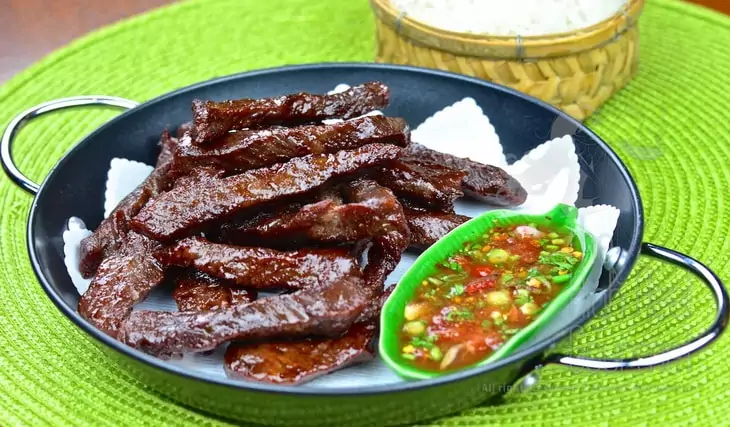
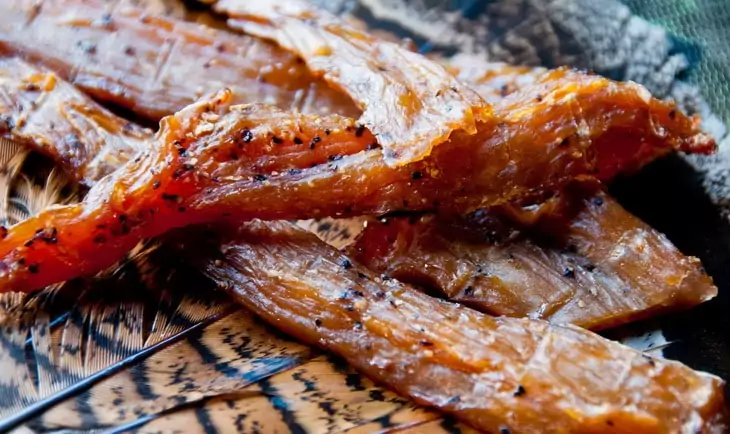
Thai Beef Jerky
Now try a Thai beef jerky as your best snack for hiking. It can be served with coconut sticky rice or just on its own. Experiencing new things is a pleasant and incredible feeling for any explorer. How to prepare this snack?
Before we continue, make sure that your oven has a dehydrate setting more especially if it’s new. So, to start with:
- Prepare a meat flat on a baking sheet and wrap with the plastic wrap. Then freeze the meat for about an hour
- Next put the meat on a cutting and remove any visible fat on it.
- Then make slices of about quarter an inch in thickness.
- Coat the beef strips with the marinade and then subsequently put them covered in the refrigerator for more than 10 hours.
- Next, remove the meat from the refrigerator to remove excess marinade and store it in a room temperature for half an hour.
- Prepare the oven and align the foil on the bottom and then preheat it to 160 Fahrenheit degrees.
- Then put the beef strips on the racks in a vertical or horizontal direction while the racks are removed from the oven.
- Now, as aforementioned, use the dehydrate setting to dehydrate the beef strips on the racks when put in the oven.
- When completely dry, you can store your Thai beef jerky now.
Turkey Jerky
How about we combine the beef jerky and the turkey jerky on our to-eat list? That could be a great menu for your excursion with a salty and sweet jerky with spicy marinade to make it incredibly tasteful. What you need to buy is a chile-garlic paste, salt and of course marinade ingredients and the turkey.
Let’s help you prepare it below:
- Prepare a turkey breast flat on a baking sheet and wrap in a plastic wrap and freeze it for about 2 hours.
- Remove it and put it on a cutting board. If there are visible fat on the turkey please remove them and then slice the turkey into quarter strips to marinade them.
- After marinading the strips, wrap them and then refrigerate for more than 10 hours.
- Subsequently remove the turkey strips from the refrigerator and then trim off the excess marinade. Leave them for 30 minutes at room temperature.
- Remove the racks from the oven and then align the foil in the oven before you preheat the oven to 160 Fahrenheit degrees.
- Spray cooking spray onto the racks and then align the turkey strips on them.
- Take the racks back to the oven and dehydrate the turkey strips until completely dry. Then remove the turkey jerky from the racks after removing excess oil on it. You can then store your jerky to take along on your next expedition.
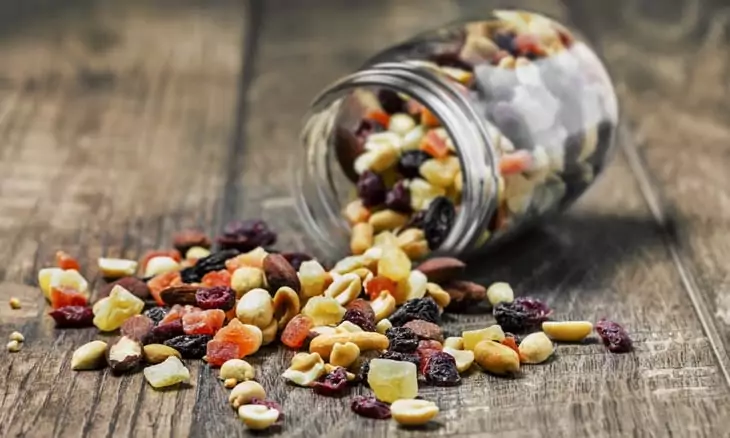
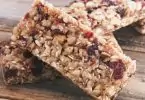
Granola
Now treat yourself with granola, which can be served with dry fruits or nuts. The granola blend can actually be customized to your preference. Honey and salt are still the great combinations as well. How to make this incredible recipe? Check out below:
- Preheat the oven to 300 Fahrenheit degrees and put a rack in the middle
- Prepare cinnamon, oats, salt and brown sugar in a bowl and mix them
- Stir another mixture of honey, vanilla and oil separately in another bowl
- Transfer the mixture into the oat mixture until oats are fully coated
- Then put the overall mixture on a rimmed baking sheet and then bake for about 15 minutes until the granola has turned golden brown.
- Subsequently put the baking sheet on a rack to cool the granola until it hardens after approximately 20 minutes
- You can then add your desired dried fruits, seeds or nuts to the baking sheet to combine with the granola, and store it for about 2 weeks prior to hiking.
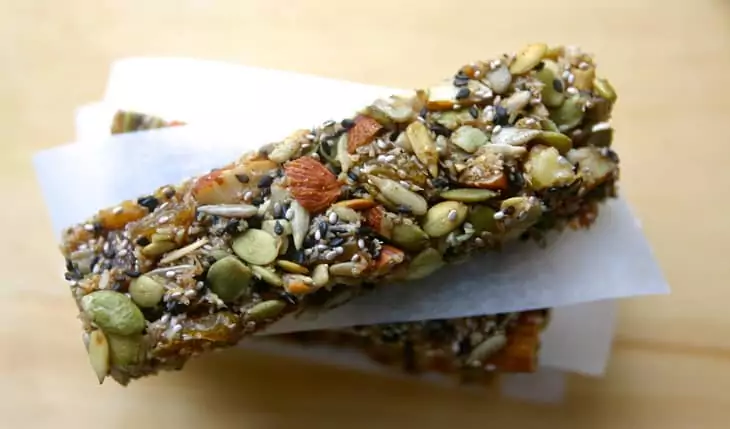
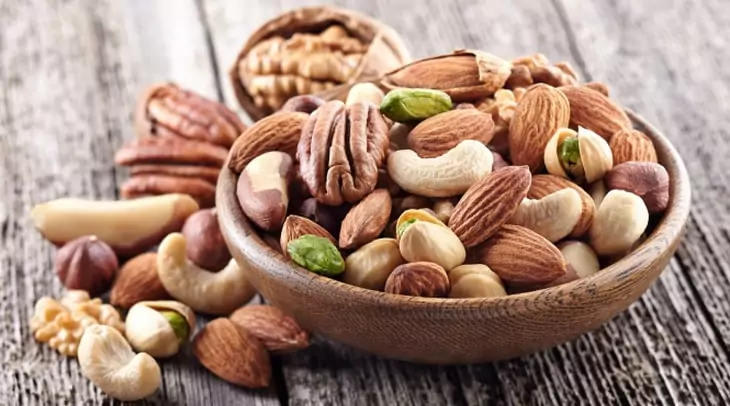
Nut Bars and Dried Figs
Here’s another exciting snack for your hiking journey. You need a candy thermometer as an indication that he honey mixture is fully cooked when preparing these snacks. Let’s help you prepare them below:
- Preheat the oven to 300 Fahrenheit degrees.
- Then chop almonds and hazelnuts
- Coat the pan with flour and butter
- Then mix cocoa powder, flour, cinnamon, cloves, orange zest, and fennel seeds together in a separate bowl.
- Add nuts and figs in the above bowl until they are fully coated
- Prepare honey and sugar in a saucepan and place them over a low heat and then gradually increase the heat until the thermometer reads 245 Fahrenheit degrees as an indication that the mixture is completely done.
- Then pour the nut mixture and stir, for the dry ingredients to be coated.
- After that, you must transfer the mixture into the pan to bake it until a toasty aroma results. It can take about 30 minutes to fully bake it.
- Subsequently remove the mixture from the pan and cool it. Then cut into bars to serve.
Wrapping it up
The list can be endless if we want to compile all the best snacks in the world. We have nonetheless brought the best choices to prepare yourself, although not all-inclusive. Obviously it’s a matter of personal preference to make an ultimate decision that which one can be best for you. However, we guarantee you that with these homemade snacks aforementioned, you will enjoy your hiking experience knowing that you have not broken your bank to have them.
Moreover, they can withstand any wilderness weather condition that you come across. But do not forget some fluids to drink in combination with these snacks. Water is a must-have.
For a complete article on the best hiking food guide, check out our must-read piece on this important topic.
Do you have any idea about other quick snacks that could be convenient for hikers? Please let us know below. If you have any further questions as well please let us know by leaving your comment below.


I tried the nut bars and dried figs recipe and I must admit that it is probably the nicest thing I have tried baking this year. It did not turn out as good as it looks in the picture but I had a field time eating the fruits of my labor. I hope the second attempt will be better because I plan to pull a surprise on my hiking buddies.
We love to hear it! Enjoy!
The Thai beef jerky looks so yummy, I can’t wait to try it. It looks like a whole meal though, and the cooking part also looks like quite a tedious process. All these snacks are mouthwatering, I must say that they are all worth trying to make. Thank you for posting, if I pull through with them I will come back here and give a better report.
You will definitely find the Thai beef jerky delicious, especially with rice and plum sauce.