
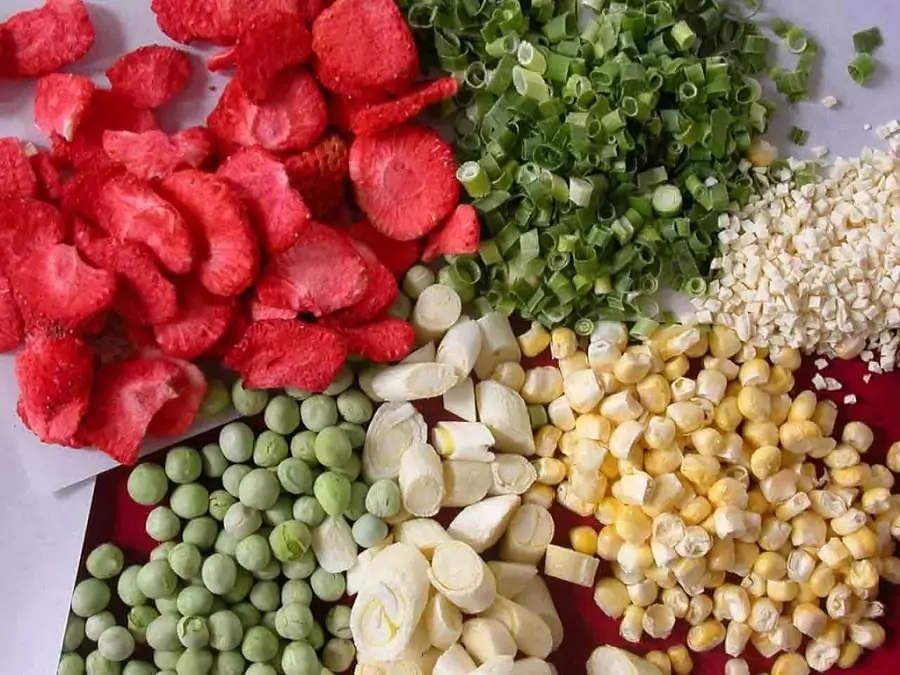
Dehydrating fresh fruits and vegetables is one of the oldest and simplest methods for preserving food. According to historical data, people have discovered how to dehydrate food a long time ago in the prehistoric times. Fruits that were kept at the sunny side were not so juicy, but they were sweeter and lasted longer. Soon after that, the dehydrating method was used for preserving food.
The tradition continued until today, of course with more or fewer changes. Among the first dehydrated foods are grapes, pears, apples, and cherries. Nowadays, people dehydrate food because it is the only method of preservation that is letting the vitamins and minerals stay on the fruit. A nice example of this is the quantity of iron and calcium in dried fruit is greater than in the fresh ones.
This makes it an ideal child nutrition candidate. Dried fruits and vegetables are rich in dietary fibers, thus providing better digestion. Mushrooms, on the other hand, depending on their kind, are rich in proteins, antioxidants, vitamins and iron.

Thanks to the thermal procedure of removing water from fruits and vegetables, bacteria and fungus can’t develop and cause food spoiling.
How to Dehydrate Fruits
Start by choosing the fruits
Choose fresh and truly ripe fruits. Unripe fruits have less intensive taste and color. Overly ripe fruits can be too firm or too soft. Wash them well in order to remove all the impurities.
Choose only healthy fruits that have no signs of rotting. Omissions of this kind may spoil your other fruits too. Before starting the dehydration process, start by softening the shell of the fruit.
This is done in order to speed up the water evaporation process. You can start by dipping the fruit in warm water for 30-60 seconds. After that, dip it in extremely cold water.
Destroy the bacteria with vitamin C
Researchers have proven that if you do a pre-treatment on the fruits with an acid solution, you can destroy the potentially harmful bacteria during the dehydration process.
This procedure has shown as effective against Escherichia coli, Salmonella and Listeria monocytogenes.
Mix two and a half big spoons (34 grams) of pure ascorbic acid (vitamin C) powder with one liter of cold water. One liter of this solution is enough for 10 kilograms of ripe fruit.
Lemon acid or lemon juice can also serve the same purpose of preparing the fruits for dehydration. If you prefer using lemon acid, mix 1 liter of cold water with 1 spoon of lemon acid. For lemon juice, you need to mix equal amounts of water and lemon juice.
Fruit Dehydration process
You can choose to dry the fruits in the sun, in the oven or in the dehydrator. In this article, we will focus on dehydrating food with a dehydrator. Prepare the fruits on a fruit platter by ordering them in only one layer with their “face” up.

Little pieces of fruits will dehydrate faster that the bigger ones. Around 6 hours are required for dehydrating thin pieces of apple. Peaches have more moisture, so they will require around 36 hours. If possible, turn them around every 3 or 4 hours during the dehydration.
At the end of the dehydration, food should be checked more frequently because food dries faster when there is less water in it.
If you’re planning to go on a camping trip, see our guide on DIY backpacking food for delicious, homemade meals on the go.
How to Dehydrate Vegetables
When you choose carefully which vegetable you will dehydrate, keep in mind that vegetables release different enzymes after harvesting. They cause changes in the fruit that affect the color, texture, flavor, sugar content and its nutritional value.
This is the reason why vegetables should be prepared right after harvest. Pick the vegetables with the highest quality. The exceptions to the rule are corn and peas. Pick them before they are truly ripened so that they can keep their sweet flavor.
Preparation of the vegetables
Wash the vegetables well in order to remove all the remains of pesticides and carefully dry it.
After that dip the vegetables in the same solution as described before in the fruit preparation process. This is how you prevent the development of microorganisms that can spoil your food faster.
Vegetables dehydration process
Arrange the vegetables in a drying platter in one layer with 1 cm thickness. If you have not yet decided on the dehydration equipment you can choose between electrical dehydrator and oven dehydrator.
Electrical dehydrator offers complete control over the process of temperature regulation. They are economical and suitable for dehydrating small or big quantities, and they are simple to use.
Use them in a well-ventilated area, and closed space with low relative humidity. Drying in an oven dehydrator requires constant observing of the process so that the food doesn’t burn out.
Turn around the vegetables every 30 minutes so that it dries out evenly. After the dehydration is done, leave it alone for another hour. Make your own backpacking food by reading our article on dehydrated food recipes to guide you.
How to Dehydrate Mushrooms
Start by choosing and preparing the mushrooms. You shouldn’t be reminded of the importance of the process of selecting mushrooms; some might say vital importance.
After that, cleaning of the mushrooms is in order. With the purpose to remove the impurities, a soft brush or a paper towel should be used. Whatever you do, remember that mushrooms are not to be washed with water because of this way, there is a great possibility that fungus and bacteria already present will spread and develop.
For larger impurities, you can use a wet towel. After that, make sure to clean them with a dry towel and detail remove the excess moisture.
After cleaning them well, cut them into thin pieces wide around 0, 3 cm. Such pieces won’t lose their characteristic flavor and they will be a perfect addition to every meal. You can also choose to dehydrate mushroom as a whole, without being cut, but cutting them will save you some time.
Arrange mushrooms in one layer. Make sure there is plenty of space for each piece so that you avoid them merging together during the dehydration process. The platter should not be oiled because then, the mushrooms will take on a different flavor and the dehydration time will increase.
Let them be in the dehydrator at 65 degrees. Only when the temperature is this high you should put the mushrooms in the oven. Remove them after one hour. Turn them around so as for them to dry evenly.

At the same time, with a paper napkin or a towel, remove the excess moisture on the surface. Put them back in the dehydrator and let them dry out for another hour. After that, remove them and check for moisture signs. If there is any left, repeat the same procedure and put them back in the dehydrator until they are completely dry.
You should be able to tell when they are dry just by looking at them, but just in a case break one mushroom in pieces. If they are completely dry, they should break like a cracker.
After finishing the dehydration process, let them cool down and put them in hermetically closed jars. This is very important part of the whole process. If you put them in jars while they are still hot, a condensation process will occur and water steam will destroy your previous work.
Drying on The Sun
A lot of fruits and vegetables can be dried in the sun, which is the simplest and economically most effective way of dehydration. Selecting and cleaning the fruits and vegetables goes as described previously in this article.
If possible, cut them on a wooden cutting board with a stainless steel knife so that they wouldn’t change their color. There are two methods for drying fruits and vegetables in the sun.

Both methods are keeping their natural aroma, flavor, and color.
- You can attach them to a string that you can put out in the open and put a net around it so that you protect your harvest from insects.
- The another method is arranging them on a wooden surface. You should also put a net around, to prevent your snacks becoming insect food.
Always place the fruits and vegetables on the southern side. If the sun is too strong, turn them around a few times a day so that they dry evenly.
For ideal results, let them dry in the sun for three days and after that, place them in a well-ventilated room to sit for another day. This should go without saying: Always protect the fruits and vegetables from moisture and rain.
Certain experts suggest that the fruit dried in the sun should also be dried in an oven dehydrator for a few minutes. For vegetables, 10 minutes is enough and for fruits, 15 minutes. If you don’t have this option, place them in hermetically closed jars and enjoy them the whole year!
DIY Food Dehydrator
When building a homemade food dehydrator, you should make plans for acquiring all the parts and understand how a dehydrator works. You can make the dehydrator by any dimensions you like, depending on your needs.
The most important part of a homemade food dehydrator is the ventilation. Think of it as the engine of the dehydrator. For optimal use of it, you should place the ventilation on the bottom.
This way it will allow for the dry air to pass through the ingredients and dry them out before exiting at the top. It applies the same principles as an essential oil distillatory. The only difference is that the dehydrator uses dry air to make its final product and the distillatory, steam.
Another important matter is the racks you would use for your dehydrator. They might be from an old refrigerator or an old stove. You can even order them or buy them. However, it is necessary that they are made from metal. The main reason for this is because wood sucks moisture in, and you won’t be able to dry anything if you use wooden racks.
The next problem to solve is the spacing. Spacing should be close enough so that rational space usage is ensured, but apart enough so that everything gets dried out evenly. The ideal spacing would be two to three inches.
The next step is covering the walls inside with the reflective aluminum material. Aluminum is kind of a metal thermal conductor. It is frequently used for projects like this because its cools off quicker than any other element.
This is the main reason why it is used in isolation; it radiates the heat away. In a way, it is conducting the heat in the right direction. As a front “door”, use Plexiglas cover.
If you want to improve the efficiency of your homemade food dehydrator, a fan on the top would be a nice addition. Since the hot air moves up and the cold air stays down, by adding a fan near the top you would make control conditions inside the hydrator.
The thermometer would also contribute to more controlled conditions. It should be placed near the top. This way, if you want to change the temperature inside the hydrator, instead of turning the button as in electrical ovens, the only thing you have to do is turn the dehydrator against the sun or away from it.
Now, vent holes are a must. They should be made on the sides. If possible you can change the vent holes with screened louvre vents. This is usually done if you want to dehydrate meat for instance.
Meat requires a longer time to dry out and wasps and insects tend to interfere in this process. Screened louvre vents will take care of this problem for you. You can relax and leave the dehydrator without your supervision for a couple of hours.
- Now that you have all the required elements and get the whole idea of the project, you can assemble the parts. Before adding the rack supports, cover all the sides with aluminum material.
- After that, attach the top of the dehydrator and the bottom part. They should also be covered with aluminum material.
- Finally, after assembling all the sides, place all the racks in and put the Plexiglas on the front.
Wrap Up
A food dehydrator is an ideal tool for the kitchen used for preserving the ingredients in a healthy way, without unhealthy additions one of them being excessive thermal heat.
Some people believe that the best way to consume food is by warming it or dehydrating it to the sun. And that should be the maximal temperature applied to any raw food. Cooking and warming the food on high temperatures causes losing the nutritional value of the food and losing some of the enzymes as well.
Whatever your beliefs are, you would agree that a homemade dehydrator is a perfect way to provide tasty and healthy meals for your family without cutting on your budget too much. Dehydration is a process where 95% of the ingredient’s moisture is removed. It improves the shelf life of the food and prevents it from spoiling.

Although many of you are probably using the dehydration process due to its nutritive advantages. Comparing to conservation or food freezing, dehydrated food has the best nutritive value. In a study of the Ministry of Agriculture Department, it is proved that 40% to 60% of the nutritive values are lost while freezing the food and conserved food looses 60-80% of its nutritive value; while the dehydration process loses only 3 to 5%. When you’re backpacking, read our article on dehydrated food recipes for survival for more information.
The best thing is that by dipping the dehydrated ingredients in the water you can bring back almost the original texture and flavor. Keep in mind that when you are dehydrating food, the amount that you produce is significantly smaller that the amount put in the dehydrator. This is why dehydrated food is the number one food for outdoor activities and nature trips.
See our article on the best food dehydrator to jump start your way to great health.
If you liked our article and found it informative, feel free to share it with your friends. On the other hand, if you feel like we left something out, leave a comment in the comments section below.


Dried foods have always saved my life in the wildness. They are easy to store, lighter to carry and I don’t have to worry about preservation. I have always bought the food already dry and good to go, but it is good to learn how I can do it myself. This way I can dry an assortment of foods of my choice
That’s right Paul, dehydrated food is good food and nutritious, too. I hope the article has helped you a lot and has given you a lot of options whether to dry it using a dehydrator or naturally, under the sun.
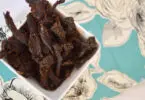
Allow me to brag a little about my husband’s jerky making skills. He makes the best jerky in the whole world. Whether for camping or to eat at home, his jerky is simply the best and anyone who had tasted it will agree with me. His spiced jerky is something I always look forward too when we go camping. He prefers to dehydrate the beef by smoking it and swears that it is the best way to make the jerky.
Thanks for this Mabel and wow, your husband is quite accomplished! We love beef jerky and it’s one of the best food to take with you when you go camping for days. Combined with dehydrated veggies, it makes quite a meal when you’re cooking outdoors at your campsite.