
Having all your hiking gear in one pack is usually important, especially when you are planning to take part in an extended outdoor expedition. As long as your pack can accommodate all your essential gear, then you are ready to go. A well-designed and fully-functioning pack is important as this enables you to arrange your equipment in one place. Problems arise when the zipper of your backpack malfunctions. As a vital component not only for your backpack, but also other equipment like your pants, jackets, and tents, malfunctioned zipper can create havoc and spoil your entire expedition.
It’s impossible to sleep comfortably at night if the zipper of your sleeping bag does not close. For some tips on how to repair sleeping bag zippers, see our article regarding this. Likewise, your rain jackets are useless if their zippers cannot close to lock out the rain and the cold. Therefore, when you are out in the wilderness, it’s important to have some pointers on how to fix a zipper in case it malfunctions so as to avoid these kinds of situations.
Zippers have not changed much since their invention, and neither have the issues people have with them. From teeth that won’t clinch, to stuck zippers, the problems associated with these components can be frustrating. If you are an outdoor enthusiast, you need to know how best to handle such situations when they arise. This guide offers some guidelines on how to fix a broken zipper. Before getting into the details, let’s look at what makes up a zipper.
THE STRUCTURE OF A ZIPPER
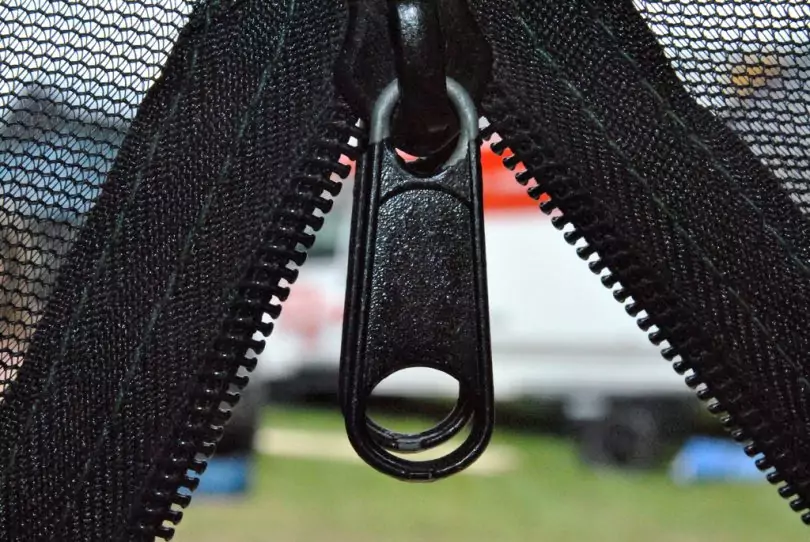
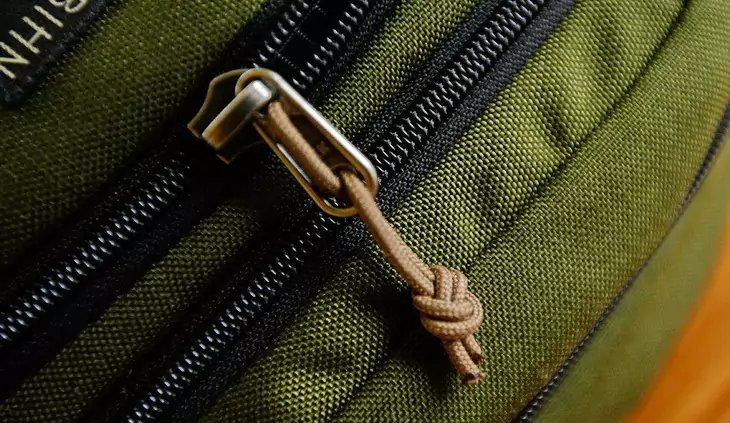
- Slider: This part of the zipper separates or joins the elements when it’s opened or closed. There are different kinds of sliders available depending on the use.
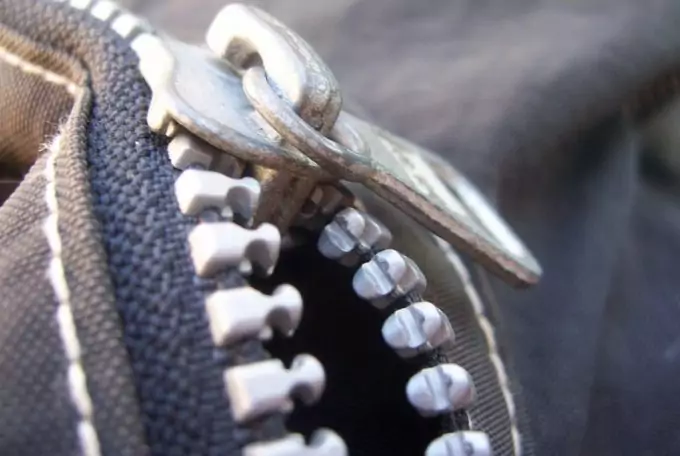
- Elements: The elements, also referred to as the teeth, are the parts of either end of the zipper that engage or mesh with each other when the zipper is in operation. When the right and the left side engage, they form a chain.
- Tape: The tape is designed exclusively for the zippers. It’s typically made of polyester. Depending on the application, cotton tape, vinyl tape, and synthetic fiber tape are also available.
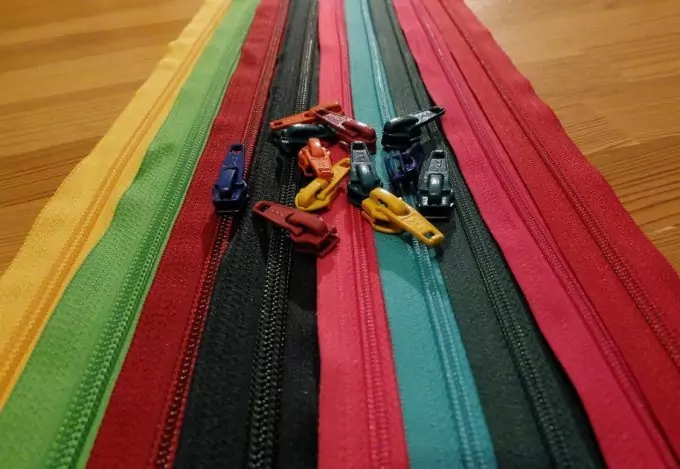
DIFFERENCES IN ZIPPER MATERIALS
- Metal chain: The metals zippers can be found in three different finishes: aluminum (this is a chain that is made principally from aluminum); black oxidized (this chain is made from brass which is chemically treated to create a black matte finish); brass (this chain is made of brass, a combination of zinc and copper); antique Brass (this chain is constructed of brass which has been chemically treated to provide the appearance of a tarnished brass).
- Molded plastic chain: These kinds of zippers have teeth that are individually molded, fused directly onto the zipper’s tape. The resin used in the manufacture of the molded plastic chain are strong. These types of zippers are suitable for the medium to heavy-weight application.
- Coil (nylon) chain: The teeth of the coil zippers are extruded plastic that is sewn onto the tape of the zipper. These chains are flexible and can be found in different sizes. The coil zippers can be used for different applications from the fashion wear to all sorts of canvas goods, tents, and bags.
- Gauge: The size or gauge of the teeth is available in #10 and #5 (#15 gauge is found in molded plastic only).
HOW TO SMARTLY USE THE ZIPPERS
- Unsmooth closing and opening of the slider: The gearing of elements can be destroyed by forcing a slider which doesn’t open or close smoothly. To avoid this problem, apply lubricating spray or paraffin to the back and front of the elements to ease the friction. Move the slider back and forth a few times to work the lubricant. This process will make the slider to work smoothly.
- A slider caught in the garment: Problems may arise when opening or closing the zipper. The slider can get stuck on the cloth or thread making it difficult to operate it. Trying to free the slider by force only worsens the issue. Pull it back removing the trapped cloth or thread. When the bite on the zipper is deep, don’t force back, but rather be gentle to ensure the trapped cloth or thread is removed.
- Loss of elements: Attempting to close the zipper of your overfilled bag will create pressure on the elements. As a result, this can force the elements to break out of its tape. This is a major problem, and therefore, it’s advisable to complete the zipper only after the elements near each other so it can be possible to move the slider with ease.
- Wearing and removing your clothing: Clothing should be worn or removed once the zipper has been opened completely. When attempting to close the zipper, the slider moves smoothly when the top button or hook is fastened beforehand. In case you leave the slider midway, more force is put on the elements, and this could lead to damage. You should give the same attention to gloves, boots, and accessories that have zippers to keep the problems minimal.
- Ironing your garment: When ironing your clothing, it’s important to use the right amount of heat so as not to tamper with the zippers. These components can be maintained and kept durable if they are ironed with the right amount of heat. Before iron, you are required to close the zipper and slider should be in the right position. Cover the zipper using a piece of clothing irrespective of what material it’s made of. The table below shows the iron heat resistance of zippers by materials. It should be noted that sliders and elements may be affected by direct ironing.
| CONCEAL | 160oC |
| EFLON | 150oC |
| VISLON | 130oC |
| L-type | 160oC |
- Suitable cleaning method: Before cleaning, the zipper should be fixed and closed. When left open, the tip of a slider could damage the fabric, or its tape could shrink or become stretched. Chlorine bleaching agents or strong alkaline detergents must be used with care when cleaning the zipper. If it does not function smoothly after it has been cleaned, apply paraffin or any lubricating spray, and work the slide several times until it moves smoothly.
FIXING THE COMMON ZIPPER PROBLEMS
- Stuck zipper: When the zipper is stuck, it’s always caught on something. In that case, it may not come down, and until the problem is fixed, you won’t be able to remove your jacket. There is a fast and easy way to rectify this issue. Get a graphite pencil and rub its tip on the teeth of the zipper. Try moving the zipper to see if it works. If it doesn’t, you can resort to using a lubricant. Windex is preferable since it’s not oil based, but you may also use lip balm or soap. Start applying the lubricant on the teeth from the zipper’s top to the bottom. Again, move the zipper down, reapply, and continue with the process until it can move freely.
- The teeth don’t close: One of the most frustrating issues with zippers is when their teeth won’t close. This problem results from a few reasons. Sometimes, the trick of using a graphite pencil or a bar soap will work, but in other cases, different techniques are required. When you experience this problem, double check to ensure that a piece of thread or cloth is not stuck in the zipper. After that, examine the teeth to ensure they are not sticking out. If they are sticking out, use a pair of pliers to place them back into position. If the teeth are clean and straight, take a look at the slider. With time, sliders come apart, and they stop clenching the teeth together. If that is the problem, use a pair of pliers to close the slider together. The solution is a bit completed when it comes to jeans. Where possible, you will have to remove the metal bumper at the zipper’s bottom and replace it using stitches. If this process fails, you may need to replace the entire zipper.
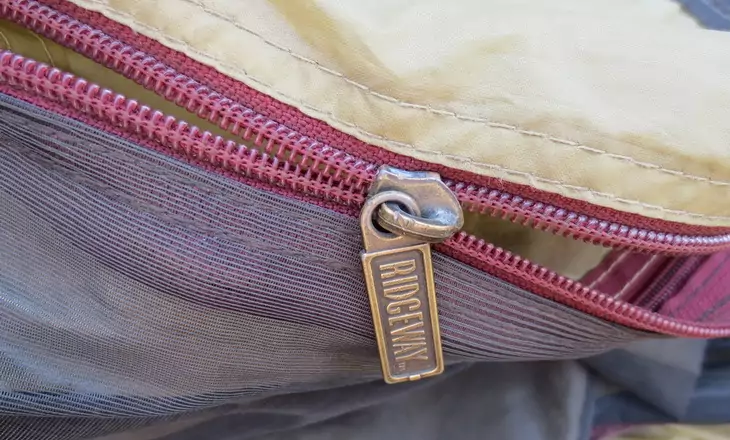
- The zipper doesn’t stay up: Zippers that don’t stay up can lead to all manner of embarrassing situations. Unluckily, this problem can’t be fixed permanently unless the full zipper is replaced. That said, there are two temporary fixes you choose. The easiest way is to slide the zipper pull, using a ring from your keys and attach it to the button on your pants. If you want flexibility, you may also utilize a rubber band.
- The slider and pull broke off: If the zipper pull and the slider come off completely, then you will need to replace them. For the pull, you can use a key ring, a paperclip, or a telephone wire in place of the pull.
Slide either of these items into the slider tab, and you have yourself a new zipper pull. You will need a pair of pliers to remove the slider and add a new one.
Replacing a slider is a simple process that should only take a few minutes. A step by step guide for replacing a slider is given below. Also, it would be a good idea to pack a multi-tool for camping in order to be prepared for anything. See our article on the best multi-tools to help you in any emergencies.
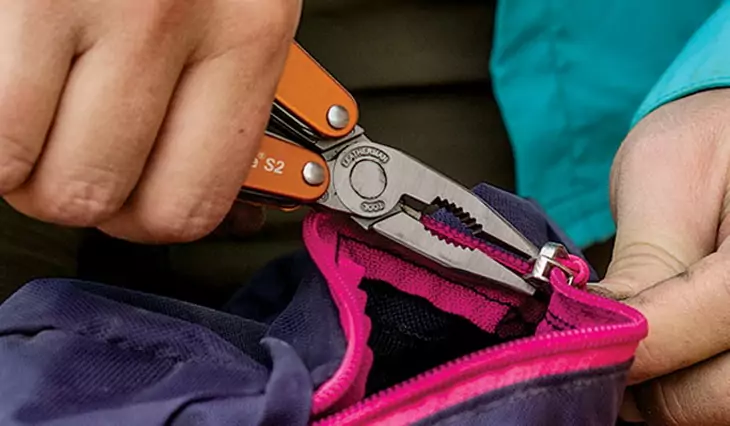
Image Credit: contohxsurat.co
STEP BY STEP GUIDE ON HOW TO REPAIR A ZIPPER
FIXING A BROKEN OR MISSING TOOTH
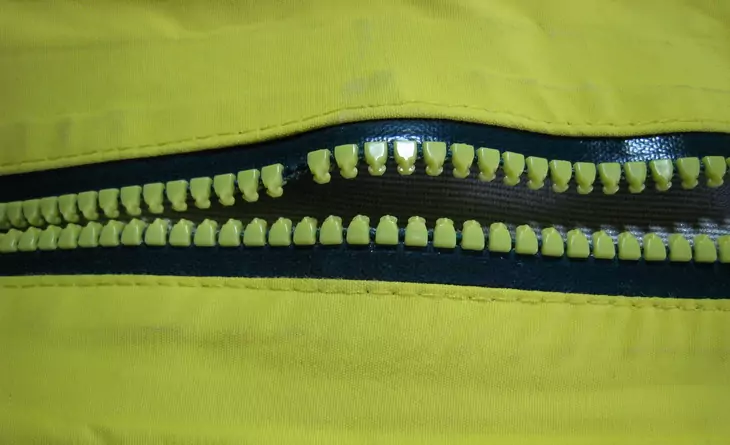
- One of the common problems that occur with a pant or jean zippers is that their teeth get removed from the tape. This mainly takes place at the bottom end of a short zipper. There’s no sufficient space to the material on and off, so it exerts pressure in the zipper resulting in the popping of the teeth. If the teeth are broken are the bottom or top of the zipper, it’s quite easy to repair. If the teeth in the middle are missing, the zipper will need to be replaced. However, though repairs can be made on the top or bottom side, it should be noted that the fix is only temporary. If the zipper broke due to an improper fit or poor quality, there is a probability that it can break again. Therefore, if you intend to make it last, avoid putting pressure on the zipper when wearing your garment.
- Move the slider to the zipper’s bottom.
- Angle the slider and place the opposite side of the zip in the slide’s bottom
- In some cases, the edge of a zipper is thick to get into the slider’s side easily. If you encounter such an issue, use a screwdriver to push in the edge
- Once all sides of the zipper are inside the slider, pull its tab to move the zipper. It may be a little tricky to move it at first, so wiggle the slide to and fro to get its teeth interlocking. Pull the slider further up, to lock the zipper and prevent it from coming down while closing the bottom.
- All you need to do is to free up the zipper’s backside to close the bottom. Use a razor or a seam ripper to cut the tack holding the placket layers together on the inside of the garment.
- To close the bottom, you require a stop.
- Insert the prongs of the bottom stop, in the space created at the zipper’s bottom. The insertion should be between the old zipper stop and the teeth.
- Flip over the garment and ensure the prongs are inserted correctly. This should be perpendicular to your zipper at an angle of 90o.
- Secure the prongs by crimping them using a pliers
- Using hand-sewing or a sewing machine, re-tack the stitching you remove in step six.
- You have successfully fixed a broken tooth!
FIXING A BROKEN SLIDER
- One common problem that occurs with zippers is that their stops at the top fall or get pulled off, making the slider to come free. To reinsert the slider, you’ll first need to open the zipper’s bottom. It’s impossible to return the zipper from the top as this would reverse its direction and make the entire process fruitless.
- Cut the thread tuck as illustrated in step six of the first demo
- Pull off the stop at the bottom using a pair of pliers
- Slide one end of the zipper into each end of the slider. Be careful to ensure that the slider is facing the right direction to prevent the zipper from functioning inside out.
- Ensuring an even tension on both ends of the zipper, gently pull the slider to work the zipper. Do not apply so much pressure when pulling so as to prevent the slider from coming off the top
- Zip all the way and push the tab down so as to lock the zipper while closing up things.
- Use a prong to close the bottom of the zipper as demonstrated in the previous guide. Make sure the stop is inserted against the last tooth. Do not leave any gap.
- You will also need to insert the top stops so as to prevent the slider from coming off the top.
- Directly place the stop over the top of the first tooth on the edge of the zipper tape
- Crimp the stop, using pliers. Make sure you obtain a good clamp on the stop and crimp it several times just to be sure it’s secure
- Re-tack the inside of the zipper using a sewing machine
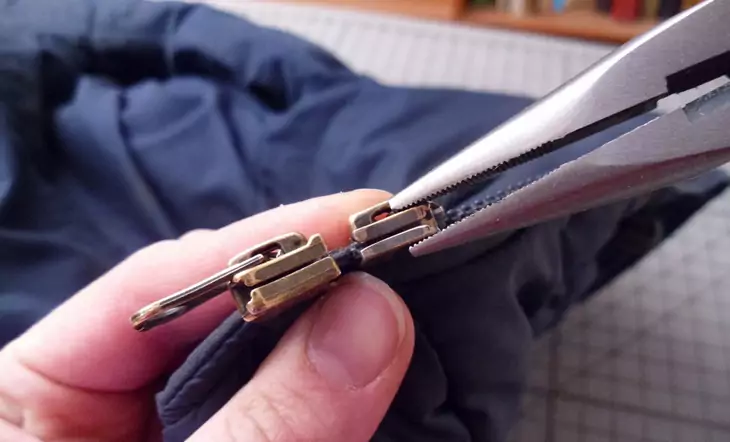
Image Credit: artandneedlework.com
FIXING A SPLIT ZIPPER
You are rushing to get to work when all of a sudden you slam the zipper of your favorite jacket in the door of your car. The zipper splits when you try to zip it and you are saddened by the fact that your favorite clothing has been ruined and you have no idea of how to fix a broken zipper. If such a case occurs, do not panic. As long as the tabs at the bottom and the teeth of the zipper are not damaged, you can still salvage your jacket.
The following process can also be useful if the slider removes the top of the zipper, the pull tabs collapses, or the teeth pull off close to the zipper’s top.
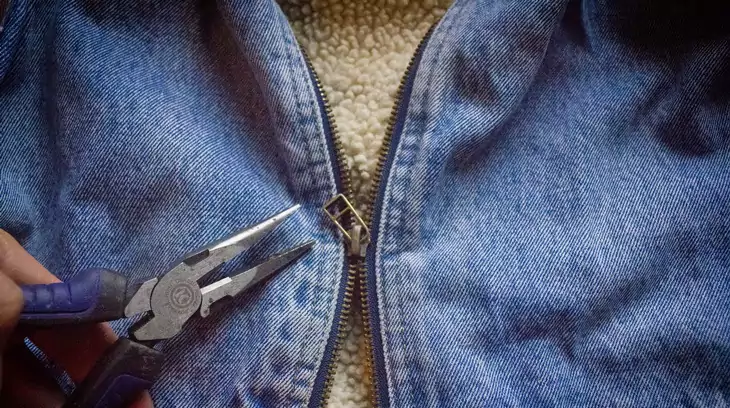
- Remove the stops at the top section of the zipper. You are to replace both stops so they can match one another. However, if matching is not a priority for you, you will need to remove the stop on the zipper’s side.
- After you have removed the top stop, take off the slider. When you look at its side, you will notice that there’s a gap that is not entirely straight. This is the case to allow the zipper to separate when zipping it. Since the slider does not properly engage the teeth of the zipper, you will need to replace it. However, if you are in a bind and cannot find a replacement, you can bend the edges back and see if it will work. It’s important to note that this is only a temporary solution as you may need to replace it later on in the future.
- Most zippers are usually numbered on the back to let you know what their sizes are. Sometimes, numbers that are not the usual zipper sizes may be included, but rather an arbitrary number that was added by the manufacturer. For instance, if the zipper says 5, then that is correct. Most zippers fitted in jackets are numbered 5. The heavyweight zippers such as those found in motorcycle jackets or the leather coats are numbered 7, 8, or 10. Most jackets are fitted with molded plastic or metal zippers, but there are some that have coil zippers. This makes it quite challenging to get one. In most cases, you will have to try various sizes if the damaged slider does not have markings on the back. You may also take the slider to a fabric shop and match it with the zippers they sell. If you get a match, just take the slider from the new zippers and use it to repair your garment’s zipper.
- On the side of the square tab at the bottom of the zipper, angle the slider in such a way that the tape’s edge enters the slot at one end of the slider. You should also remember that sometimes, the tape’s edge is thick and you may be forced to push it using a screwdriver. Wiggling also helps.
- After the edge has gone all the way, it should be able to move freely up and down. Trying zipping it as you would when operating a zipper, and check that the teeth don’t split. If there are splits in the zipper, you may be required to use a slider of different size
- Once you are confident that the zipper is in full operation, insert stops at the top. It’s important that both ends of the tape are fitted with stops, especially the side with a square tab at the zipper’s bottom. This is the side which always has the slider. If you work the zipper without putting the stops, the slider will most definitely come off.
WRAP UP
Zippers are an essential part of your outdoor gear. Not only do zippers enhance the aesthetic value of equipment, but also help in providing protection. Jackets and coats cannot function efficiently if their zippers malfunction. Tents and canvases also need functioning zippers to offer protection against external elements when you are out camping. For some guidelines on how to repair tent zippers, see the link to this article.
When it splits, it’s important you have an idea of how to get zipper back on so as to get the full benefits of wearing or using your outdoor gear.
This article has provided some of the most useful tips on how to repair a zipper so you can continue enjoying the comfort and serene of the outdoor environment without having to worry about the cold or the excess heat since zippers help to regulate temperatures.
Before you leave for your trip, make sure you have the basic essentials for your camping trip. Read our article to this topic to learn more.
We hope you found this guide helpful. Are there any questions or issues you need to be clarified? If so, please post them in our comment section below. We’ll be more than glad to hear from you.


Another super-useful guide! I may print this one out in case of any zipper emergencies when I don’t have internet access. I’ve done simple zipper fixes before, for a broken pull and a stuck slider, but have had to replace whole jackets because I couldn’t fix a broken tooth. Now I know what to do for the next time that happens.
Glad we could help!
If only I had found this article a few days ago, I could have saved my first hiking jacket. At any rate, I’m really glad to have this information now. Nice details on the kinds of zippers and what’s necessary for each kind of fix. The prevention info is super useful.
Thank you!