
If you’re a crafty kind of person who loves getting creative with pottery, embroidery, woodwork or jewelry design, you’d want to add making a paracord bracelet to your partisan repertoire. A paracord bracelet is a survival tool disguised as a fashionable bracelet. Indeed, there are many uses of the paracord, as shown in our article on how to use the paracord for survival – a must read!
Getting hands-on to make one is effortlessly simple. No workshops to attend or expensive equipment to buy. In fact, there’s a wide variety of paracord bracelet instructions online for you to get started. However, what are the functions of a paracord bracelet other than letting its wearer make a unique fashion statement?
Uses of A Paracord Bracelet
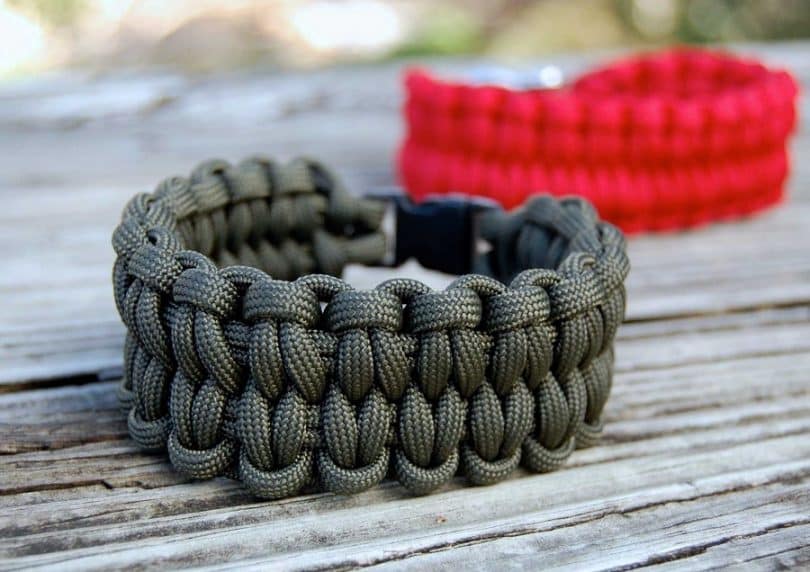
As its name implies, a paracord bracelet is made of paracord (parachute cord), a lightweight nylon which US paratroopers used as suspension lines since World War II. It was then that they discovered that the versatile and hardy cord can be useful and practical in many day-to-day activities.

Image Credit: singletrackworld.com
When weaved into a bracelet, a paracord bracelet goes beyond just letting you look stylish in the great outdoors. It’s actually quite the multipurpose tool for the handyman in the wild, with a myriad of emergency uses you may not have even thought of.
Quick fix for rips and tears
A thin thread of paracord from your survival bracelet can prove to be very useful and timely for patching up rips and tears in the backpack or tent in the wild. Bringing along your own needle for an outdoor expedition may not be so bizarre after all.
Mark a trail
To avoid getting lost in the woods, use the paracord from your survival bracelet to tie twigs around visible spots in the woods to mark your path.
Fish for food
After all that physical exertion in the wild, it’s time to replenish the protein. Unweave your paracord bracelet and attach a hook and bait for a makeshift fishing tool.
Great for hanging stuff
We never know who will decide to visit the campsite in the dead of the night. Wherever there is food, wandering rodents or even bears may be attracted to your campsite at night. So hanging your food in a tightly secured bag on higher ground could be a good strategy to prevent unwanted visitors in the wild.

String your paracord across two trees above the ground of considerable height and hang your bagful of food supplies on it. This makeshift line can also double up as a laundry line for your wet clothes and socks.
Build a quick shelter
The skies could decide to open and release an unexpected shower, especially if you’re in the tropics. Unravel the survival bracelet and lash together some leafy branches to keep yourself and hiking gear dry. You may also stretch a paracord between two trees and throw a tarp or poncho over it for some shelter.
Makeshift tow rope
During an emergency situation, such as when you need sturdy ropes to get yourself or someone else out of danger, you can easily unravel a paracord bracelet and turn it into a much-needed lifeline.

Or if your jeep breaks down in the middle of nowhere, you can tow it to a place where you can get help.
Replace a broken zip puller
We all know how tough it is when the zip pullers of our backpacks or outdoor jackets give way. Loop a small piece of paracord into where the zip puller should be for your zips to work easily again!
First aid
Nicks, scrapes, bumps and gashes are common in the great outdoors. The paracord from your survival bracelet can be made into a tourniquet to stop any bleeding. Nobody carries a pile of duct tape in the great outdoors. Should you want to make a splint for support, look out for sticks, branches or rigid bark and then unravel a paracord bracelet to securely fasten. To use a paracord as a sling for an injured arm, simply tie both ends of the paracord and loop it over your neck.
Floss
You can’t imagine what else a thin sliver from your paracord bracelet could do. If you forgot to bring along your floss for your outdoor escapade, a tiny piece of paracord could help you remove those remnants of food (which are really what gives rise to nasty toothaches) and stave off bad breath.
Shoelaces
It’s inevitable that those shoelaces decided to call it a day when you’re having the adventure of a lifetime.

Unravel your paracord bracelet and thread it through your hiking boots’ eyelets. For smaller shoe eyelets, simply remove the inner core strands which are usually thin enough to thread through. Of course you’ve to remember to burn and melt the ends a little to prevent them from fraying.
Belts and drawstrings
While the rugged outdoors may not be the best place for a fashion parade, you may sometimes lose a belt or discover that the elastic band of the infrequently-worn hiking pants has become a little too loose for your liking. Loop the paracord from your survival bracelet around your waist and it makes the most durable thing for holding up your pants.
Therapeutic paracrod bracelets
While the paracord bracelet could be an essential item for the outdoors, it also can bring health benefits for the wearer. Paracord bracelets embedded with electromagnetic frequently technology to ease inflammation of the wrists are a relatively new invention in the world of survivalist paracord bracelets.
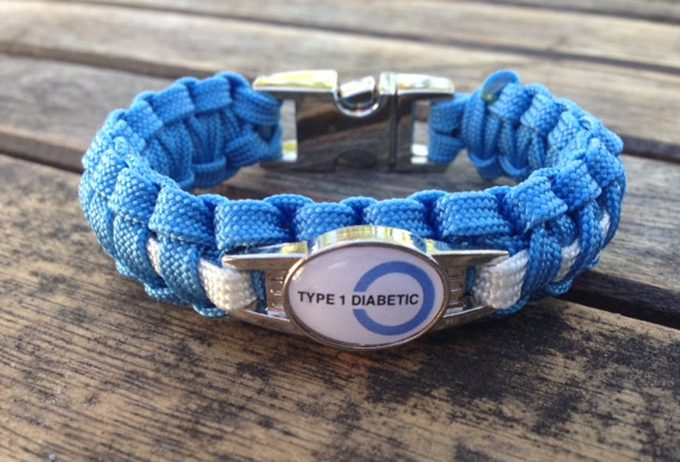
When these specially-made paracord bracelets come into contact with the body, they stimulate the sympathetic nervous system which increases blood circulation and oxygen intake while reducing inflammation of the joints.
While therapy paracord bracelets can be cool, nothing is as unique as investing your time and creativity into making a stylish one. So check out these survival bracelets instructions to make one for yourself or your loved ones.
For more tips and tricks, see our article on the many uses of the paracord bracelets to give your more insight.
Things you need to make a paracord bracelet
Frankly, the few things you need to start making your first paracord bracelet are easily found on Amazon and even in your house. The survival bracelet instructions here are for a one-color, two-strand core bracelet using the simple cobra stitch so that an absolute beginner will be able to get the hang of it.
- Paracord or a hardy type of cord of about 1/8” thick. In this example, we’re using 10 ft of paracord for a wrist size of 7 inches.
- Side-release buckle made of plastic or metal. Most people prefer a plastic buckle over a metal one as the former is lighter and comes in a huge variety of colors to match your paracord.
- Scissors
- Cigarette lighter or torch lighter
- Something heavy to hold down the paracord bracelet when you’re making the knots. It can be a couple of very thick books stacked on top of one another.
Step 1: Measure your wrist size
To estimate the length of paracord you’ll need, wrap it around your wrist and take note of where the ends meet. Then measure the paracord length with a ruler.
Note the measurement as this is your wrist size. The actual length of paracord needed is 1 foot of cord for every inch of paracord bracelet length. Hence, if your wrist size is 7 inches, you’d likely need 7 ft of paracord.

Tip: never only use the exact length of paracord that matches with your wrist size. Always remember to use a slightly longer paracord so that it’s easier for you to work with. For example, 10 ft of paracord is good for making a survival bracelet that fits a 7 inches wrist.
Step 2: Loop paracord through buckle
Hold two ends of the paracord together to find its center. Push the center of the paracord through the buckle and now there’s a loop. Put two loose ends of the paracord through the loop and pull to adjust tightness to fasten it to the buckle.
Step 3: Measure the length of paracord you need
Unclasp the buckle. Insert the two ends of the paracord through the other part of the buckle (the part with prongs). Slide it up until your wrist size. Allow one inch more for a more comfortable fit when the bracelet is completed.
Step 4: Start making knots
Cobra stitch (also known as Solomon bar or Portuguese sinnet) is a very easy-to-make knot commonly used for paracord bracelets.

This is how to complete one cobra stitch:
- Bring the left-side cord under the center strands, forming a loop.
- Bring the right-side cord under the left-side cord and over the center strands through the loop of the left-side cord. This is considered a half-knot.
- Tighten up the half-knot so that it sits just next to the buckle before proceeding to make the right-side half-knot.
- Bring the right-side cord under the center strands, forming a loop.
- Then bring the left-side cord under the right-side cord and over the center strands through the loop you’ve just made. This is one completed knot.
- Adjust the cords on both sides to the same tightness (but not too tightly).
- You’ll have to continue forming the knots following the instructions above.
- Should you realize you’ve done it wrongly along the way, you’ll just have to undo the last knot and do it again.
Step 5: Adjust tightness of knots evenly
Keep on knotting through to the two ends of the buckle. Always remember to evenly adjust tension/tightness on both the left and right sides of the knots so that they’re of the same sizes as you go along. Otherwise, you’ll probably end up with a twisted bracelet or one with awkward ‘bumps’ here and there.
Tip: stick the buckle under several thick, heavy books. This makes it more convenient for you to evenly adjust the tightness of every knot.
Step 6: Completion
Snip off the loose ends of the paracord near the last knot. To make sure that your paracord bracelet doesn’t become undone on its own, it’s necessary to seal the ends. Use a cigarette lighter to lightly melt the exposed ends. Then quickly press the semi-melted ends into the surrounding cord so that it attaches and seals itself. As the semi-melted ends of the paracord can be very hot, make sure that you don’t burn or hurt yourself when sealing your bracelet.

Tip: use a metal spoon, hammer, soldering tool or other types of tools around the house that can help you safely and firmly press down the semi-melted ends of the paracord without the fear of getting scalded.
The above instructions are for a two-strand cord, mono-toned paracord bracelet.
Here’s an easy-to-follow video on how to make your first mono-toned paracord bracelet:
With the simple cobra stitch, there’s a myriad of wonderful patterns you can create for your paracord bracelet. Crank up your creativity with paracords of two different colors using the cobra stitch:
A king cobra stitch (also known as double Portuguese sinnet or double Solomon bar) is a promise of something even more gorgeous. King cobra stitches are actually another layer of cobra stitches on top of the first set of knots. This means that your eventual paracord bracelet can be a unique creation like no other. Check out how to make a king cobra paracord bracelet here:
More Sophisticated Knotting Patterns
If you’re hungry for more sophisticated knotting patterns other than the tried and tested cobra stitch, these more advanced knotting patterns will keep you entertained. You can even learn how to make paracord survival belts to use in your next camping, so check out our piece on the topic.
Crown sinnet (box knot): uses paracord of two or four different colors for a colorful effect.
Caterpillar sinnet: also known as chain sinnet which makes relatively small knots. They’re great for people who doesn’t like the bulk of some knotting patterns.
Saw tooth: this produces a saw tooth pattern that will look great using two contrasting colors.
With the availability of glow-in-the-dark paracord perfect for night runners or hikers, the sky’s the limit for stylish, one-of-a-kind paracord bracelets. Here’s our easy instructions on how to make useful paracord knots, check out our article on the topic.
Even though we’re not Indian Jones or Lara Crofts who always get into tricky situations in wild, obscure locations, we never know when having a paracord bracelet could be a godsend. Go on, make your very own paracord bracelets today!


I use paracords often for field applications, like tying down valuable equipment, or for building a temporary shelter using sticks or by tying up the corners of a poncho or tarp. But why should you care for paracords instead of a nylon rope? Although a nylon cord can also be used, paracords are at least 3 times stronger than the nylon cord. Each paracord also has 7 internal yarns and each of those internal yarns is also made of two individual strands. Paracords are amazing and inexpensive considering they have a number of applications out there in the field!
The sophisticated knotting patterns look intimidating to me right now so I have to start with the simple weaves like the simple cobra stitch. Once I get the hang of that, will try the King Cobra stitch. I am not crafty nor too patient so will struggle making this bracelet but I think my wife would appreciate it since I don’t normally make stuff nor do crafts for her.
That’s right – paracords are strong and inexpensive. They can be used in almost any circumstances – outdoors or indoors. I love how even kids can make their own bracelets and have a lot of fun doing so. My dad taught me how to make a paracord bracelet when I was a kid and it fascinated me to no end!
Hi Jack and thanks for dropping by. I do appreciate that you tried making a paracord bracelet. It’s not that difficult although when you’re just starting out, it may seem intimidating. No worries, once you get the hang of it, you can make one for yourself or to give away. Good luck on your future creations!