
If you’ve ever constructed something before, you understand how important planning is if the project is to be successful. Building a DIY tarp tent in the wilderness is no different than constructing a homestead project. You should not rush into the construction stage without making proper plans. Before selecting a site for the shelter and building, make sure you have all the materials in place.
Many videos and articles have been posted online about building a tarp in the wilderness. However, these have all failed to tackle the most important phase of building a shelter – planning. To avoid wasting your energy and time, it’s essential, first to have an idea of what it is you want.
This guide will give you a good start on what to think about when considering a shelter in the outdoors. You can check and recheck your plans as the work continues; and although you may need to evolve the plan as a result of emerging factors, at least you will not be caught off-guard.
What to Consider When Building a Tarp Tent
Before you even start working on the tent project, you need to know how to make a tarp tent and to know what you have to pay special attention to. So, to make it easier for you, we have included all the important questions you need to ask yourself before the start.
What are the tools available?
If you have a small knife, you will not be in a position to cut large wooden poles for the main frame of your shelter. When facing such situations, you’ll need to utilize fallen dead wood. All the green sticks you may harvest will be utilized in creating the main frame.
This will influence the durability and design of your shelter. You will need to adapt the tarp’s design based on the available resources. It is recommended to have a survival shovel when building a shelter in the wilderness.
Is it a solo or a group thing?
If you are solo, you will need to construct a simple shelter, which doesn’t require assistance from another individual. Nonetheless, if there are other people in your group, it’s advisable to get everyone involved in the construction. Divide the workload depending on the number of those present.
Even those who aren’t participating in the construction can be kept busy by doing other activities such as fetching firewood, water, or preparing the meal.
Do you have adequate time?
When stranded in the wilderness and you need to construct a shelter, you’ll always have a deadline, and that is the evening. Since you’ll want to get the roof over your head, it’s important to know what the local sunset time is.
If you don’t have much time left, it would be sensible to concentrate on gathering firewood to last the entire night. In such a case, your sleeping bag will also be of great assistance.
How big do you need your shelter to be?
While this aspect mainly depends on the situation you are facing or the number of people you’ll need to accommodate, it’s important to have an idea of the size you want your shelter to be. A two-person tarp will be large enough to squeeze inside and utilized the heat generated by the body of occupants to stay warm.
If there’s a larger group and you’ll need to face cold condition, a larger design will be necessary; something which can accommodate a fire. Most individuals will be ambitious and build something large. They don’t think about the availability of materials and the availability and capability of the workforce.
You’ll need to find a suitable spot in the wilderness. Caves, rock formations, or other natural structures would go a long way into making your construction easier. Make sure to indicate some marking on the floor so as to create the limit of your shelter.
This has to be done to establish whether or not the shelter is big enough to accommodate everybody. You may lay down on your sleeping positions inside the marked footprint so as not to undersize the shelter.
Know about the local weather and how it can affect the shelter
You need to do some research about the place you’ll be camping before you begin your explorations. Learn about the environmental elements of the region so you can protect yourself. You need to know about the wind direction so you can know how to build your shelter to avoid destruction.
Image Credit: qrcodematrix.com
Additionally, the wind’s direction is instrumental when you want to make your fire. You need to know the kind of fire you’ll need so as to build one based on the wind and the direction it is blowing.
The position of the sun is not essential, but this is important as it helps to keep you warm in the cold season. There are large snow patches which never receive sunlight. You can quickly identify these places in the summer long once the snow has melted. This is the last place you should be setting up your shelter.
What are the dangers you should be aware of?
When you are planning to build a shelter in the wilderness, you’ll need to put the environment into consideration. This aspect is important as it will help you to identify the potential risk you could be facing. Floods, rising water, falling rocks, falling trees, dangerous animals, avalanche, poisonous snakes, among others, are the kinds of hazards that you could be facing. Our informative article on how to treat snake bites in the wilds will be a big help, so check it out.

Look around to see if there are any animal tracks within your camping zone. You don’t want to build your tarp in an area surrounded by predators. Also, look up for a potential avalanche, rock falls, or falling trees. Ascertain the strength of the wind so you can assess whether your shelter is safe or it will be blown away.
However, falling trees are the most dangerous risk anyone could face in the wilderness. Therefore, be on the lookout for these kinds of hazards.
Tarp Shelter Designs
There are a dozen tarp tent designs and we have made a list of the basic ones.
Sunshade tarp design
To build this kind of shelter, you’ll require four anchoring points that you’ll use to tie the paracord. This shelter is parallel to the ground and is meant to give a hundred square feet of shade during sunny conditions. Some people will use this kind of shelter in rainy conditions as the water collects in the middle making it easier to collect it.

If you want to make your shelter sturdier, add poles to the corners. The sunshade tarp shelter will offer maximum protection against the heat from the sun but is not ideal for use during cold weather. Moreover, this tarp cannot support the rain for long.
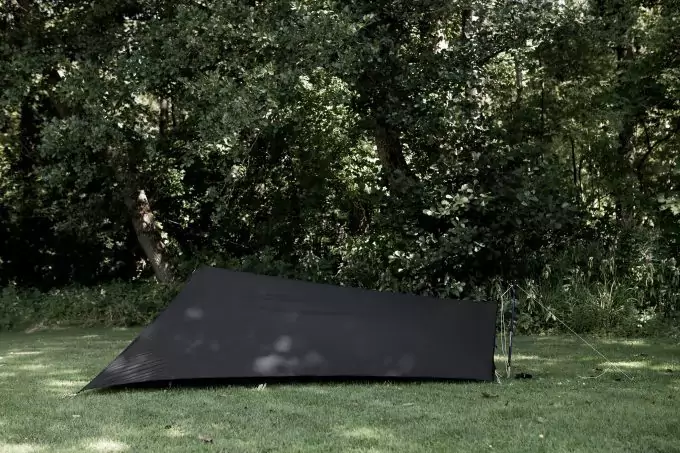
The A-frame design
This kind of shelter is probably the easiest and most common design anyone can make. The A-frame can be built by stringing the paracord between poles. Draping over and staking the tarp are the last steps needed to make it. The thirty-degree angle of the roof creates a ten-foot-long area to live.
This shelter will be 2.5 feet tall and 8.6 feet wide. It offers an excellent snow and rain runoff, as well as a perfect deflection of the wind. The greatest drawback of this design is that there is no floor. Additionally, if the paracord has not been stretched tight enough, the shelter will sag in the middle.
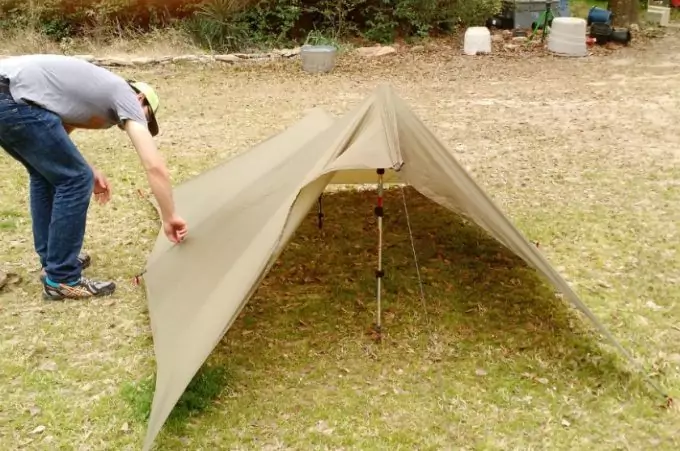
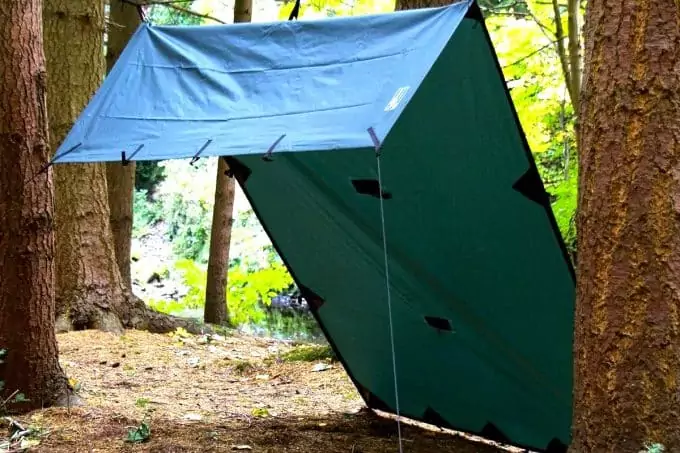
The Lean-To design
This is another tarp design that is simple and straightforward when it comes to building it. The Lean-To tarp is ideal for deflecting the wind and offering sunshade.
To create a shelter of this kind, you’ll have to secure the tarp on the windward side and build support with the paracord between two anchor sections. A thirty-degree angle will offer eight feet in width and five feet in height.
This model is an “on the go” design since it is much easier to set up and you can take it down with ease. It offers superior wind deflection, and it provides protection against the sun and rain. However, this shelter has no sides to protect you from other outside elements.
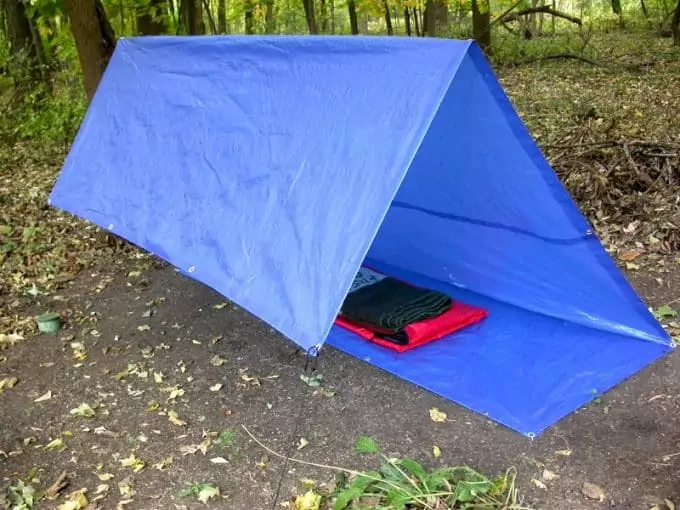
The tube tent design
This is a sturdy design that offers a floor. When well-secured to the ground, the tube tent will prevent the rain from seeping in.
To build this model, you’ll have to secure the paracord between two trees and wrap over the tarp with the opposite sides secured together. The 60 degrees walls will offer 3 feet of headroom and 3 feet of width. This should be adequate for a single adult.
The cornet tarp design
This model uses the entire length of a paracord strung from a pole or tree to the ground. In this design, the tarp is draped over diagonally, while the edges, fold under to create the floor.
When building it, the corner should be faced towards the wind’s direction. You’ll need to tie some drip lines above the shelter’s entrance to prevent the rain from getting into the shelter.
The cornet tarp is an excellent design for rain/debris shedding and wind deflection. However, this model has a downside in that it does not provide adequate head room. Tall people will not have enough room to accommodate them as well as their gear.
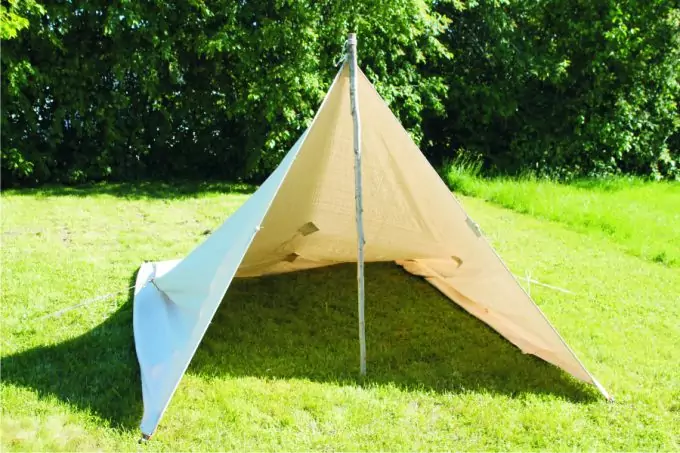
The mushroom fly design
This model is quite similar to the sunshade shelter, but it incorporates a central support pole at the midpoint of the tarp.
This design is meant for snow and rain runoff, and it is sturdy when the four corners of the tarp are secured well enough. You can make the mushroom fly design as short or as tall as you want, depending on the pole’s length. This shelter offers a perfect runoff from snow and rain, but there are no sides to protect you from cold and the wind.
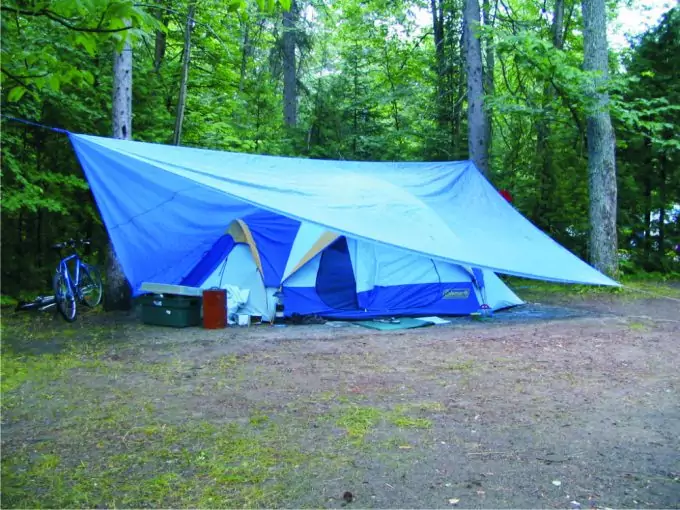
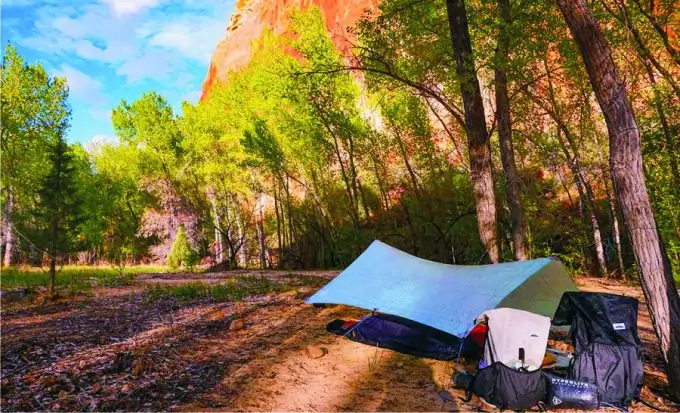
The dining fly design
This design is preferred by campers, and it is quite a simple model to build. It offers an excellent sunshade and adequate headroom without giving up too much space.
This model keeps away the rain, but it offers limited protection against the external elements since it lacks sides. When it is tied down and staked, the dining fly design becomes a sturdy shelter.
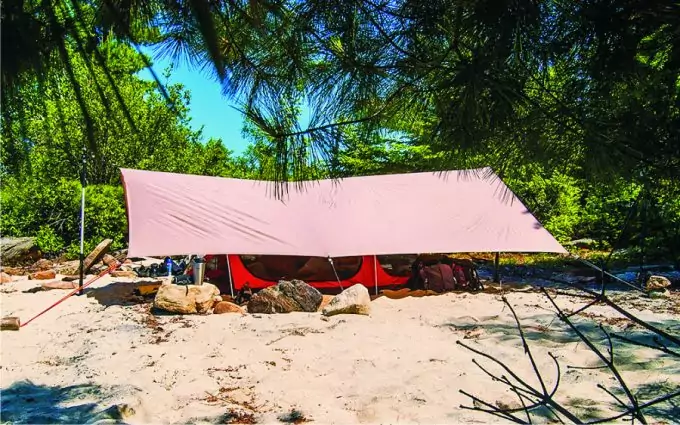
The height of its support pole often dictates the size of headroom. This shelter is a perfect model for desert survival since it offers adequate coverage as well as proper ventilation.
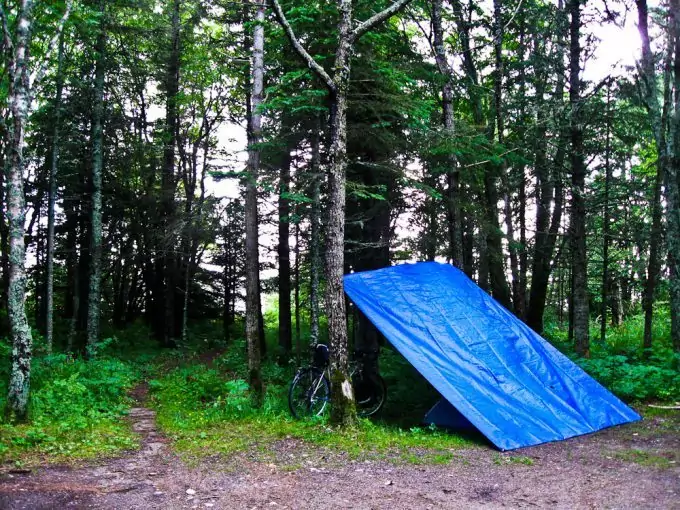
Fold-Over Wind Shed design
This model is similar to a traditional wind shed. However, it provides more coverage by giving up the groundsheet. The paracord ridgeline’s height, determines the roof’s angle as well as the footprint of this model.
The Fold-Over Wind Shed provide suitable wind deflection and rain and snow runoff, but it does not offer complete protection against other elements as it lacks sides and a floor.
The wind shed model
This kind of shelter needs some practice to build it the right way. You’ll need to fold your tarp into thirds and ensure the leading edge of its roof to hang above the groundsheet for sufficient runoff. While stretched between two pole/trees, the ridgeline needs to be secured using paracords.
A paracord needs to be added the fold’s bottom, where the groundsheet and the back panel meet. It offers superior wind deflection, but requires many secure points. A hanging roofline could sag when under rain loads and direct the runoff onto the groundsheet.
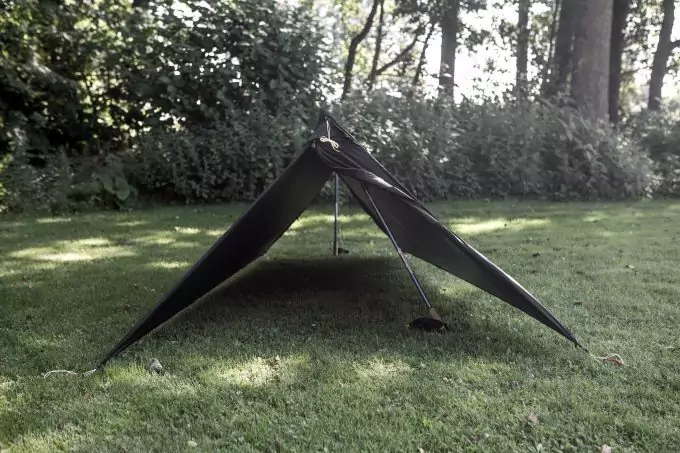
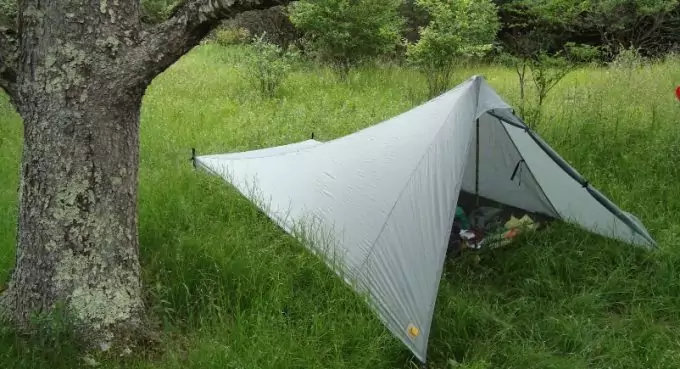
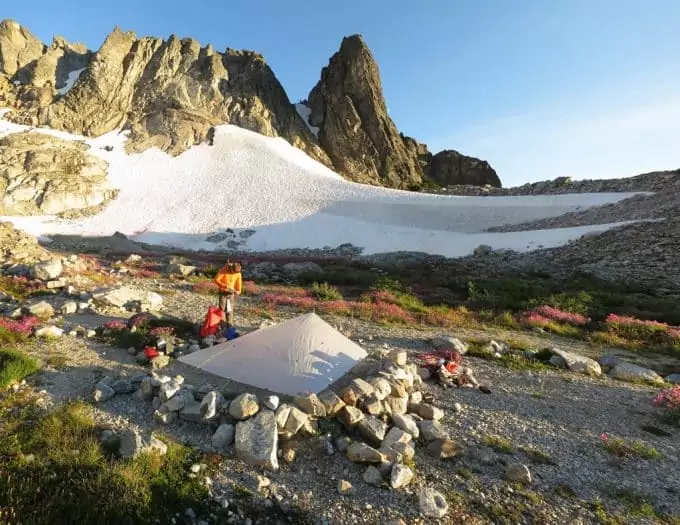
The arrowhead design
Begin the construction of the arrowhead shelter by supporting the midpoint of two perpendicular edges using a five-foot pole or by using paracord to attach the edges to trees. You’ll need to stake to ground the opposite corners so as to create four-triangle series. This model will offer thirty-five square feet of living room and five feet of headroom.
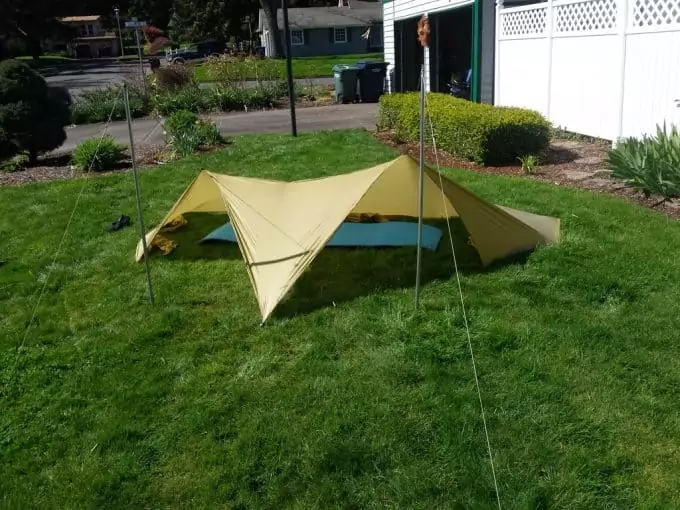
Image Credit: northwestfirearms.com
The poles should be supported using paracord tie-downs. This is an ideal shelter for windy environments as it deflects the wind through its low profile. It also offers adequate room for occupants.
The diamond fly tarp
This model is ideal for two individuals, and it is easy to set up. When building this design, you will need to secure the paracord to the ground and a tree, and drape over your tarp at a diagonal.
The angle to which the tarp is tied and the length of the paracord will determine the width and headroom of your shelter. The steep sides will shed rain and deflect the wind if these sections are well staked.
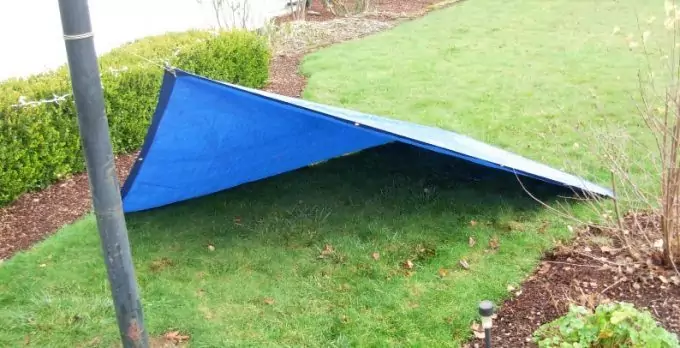
This tarp design requires drip lines, the same way as the cornet shelter. Depending on its size, the shelter can even accommodate more than two individuals, but its lack of flaps and floor will not keep out the outside elements. The shelter could easily be compromised if the wind happens to change its direction frequently.
How to Make a Tarp Tent
Having in your backpacking bag a versatile equipment such as a tarp will be instrumental or your outdoor survival. This item will help you collect water, camouflage your other equipment, and provide a perfect shelter in case you have nothing else to use.
However, to keep your head dry and ensure you are protected, it’s imperative to have an idea of how to make a tarp tent when out in the wild.
A polyethylene tarp will be significant, and you should pick one for the bug out bag. This product is durable, lightweight, waterproof and draft-proof. A tarp is available in a variety of color and sizes, and they do not cause a dent in your pocket.
Building a tarp shelter is not a tedious affair, and there are many patterns and ways to construct a shelter with a single tarp.
Before you can create one, you need to put the following pointers in mind:
- Your shelter’s location is quite important, and you should plan carefully about where you are going to set up your shelter
- The direction of the wind is also worth putting into account, to prevent your shelter from sailing away
- If you are planning to have a good night’s sleep, the floor of your shelter should be as comfortable as possible. Pointy rocks and other debris will keep you awake.
- Make sure you construct your shelter in a slight slope for the rainwater to run off
- In case there are no slopes, you’ll need to dig trenches around the shelter to help with the drainage
- Take into consideration the function of your shelter and ensure it is as large as it is required to be
- Consider the weather condition and select a model which is stable and doesn’t collapse when it rains
A Step-by-Step Guide
This guide will explain every step from the beginning to the end. Read carefully.
Begin by learning knots
When you want to build a tarp shelter, begin by learning the simple knots, and practice tying them until you can create an effective knot in a bad weather or in the dark. Chances are, that is the time you will most desperately need an emergency shelter and you don’t want to fumble around. To find out how to tie these knots, see our article on this important topic.
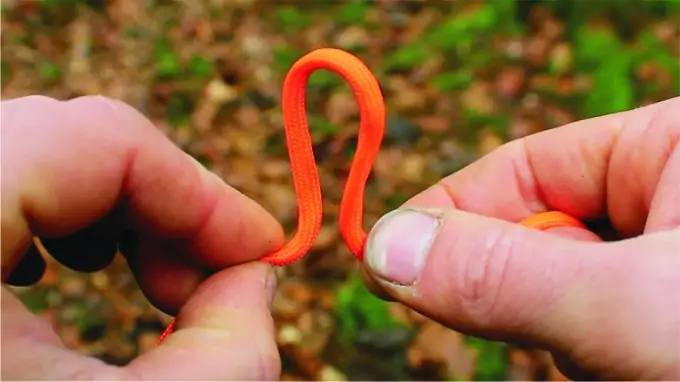
Image Credit: kabarbolaterbaru.xyz
The A-frame is one of the simplest shelters to construct. Basically, this is a line that is set up between two points, with the tarp draped over it. The A-Frame resembles a pup tent by without ends. The knots will assist you to set up a line between the two anchor points.
You can use a timber hitch to secure one end of the line. The friction knot is quick and easy to tie, and the more the pressure used on the knot, the tighter it gets. On the other end, use a trucker’s hitch. This hitch makes it possible for you to tighten the centerline by pulling on a tag. The hitch will allow you to stretch the rope tightly.
Choose a campsite
The next step is choosing your campsite. Try to find a place with solid objects that can secure one end of the tarp. Remember to check out for fallen and dead branches around any potential site.
Ideally, you need to find a ground that is slightly slanted for easy drainage. If this is not possible, you’ll be forced to dig trenches to help with the drainage.
Insert a stick
You will need to insert a stick in a rope loop in a grommet. This is a simple concept. The line is threaded through a grommet, and the stick is positioned in the loop.
This holds the tarp at a given point on the line, allowing the rope to be tightened. You can evenly tighten the tarp, and the rope/stick combination helps in protecting the grommets from tearing in heavy winds.
You can use this technique in windy and rainy condition to secure a tarp over your gear and the cooking area. It will help in draining the water easily, and your tarp will not be compromised.
Use aluminum tent stakes
These items are quite beneficial and weigh less. The aluminum tent stakes can be used in taking down the sides and corners of the tarp. While you may want to use rocks to anchor the tarp’s corner, these are sometimes not handy.
Don’t forget the trekking poles
Ski poles, walking sticks, or trekking poles are essential as these can be used as potential support for the tarp shelter. Within minutes, you can use a pair of the trekking poles to make your A-frame shelter. See our must-read piece on the best hiking poles you can use in your camping.
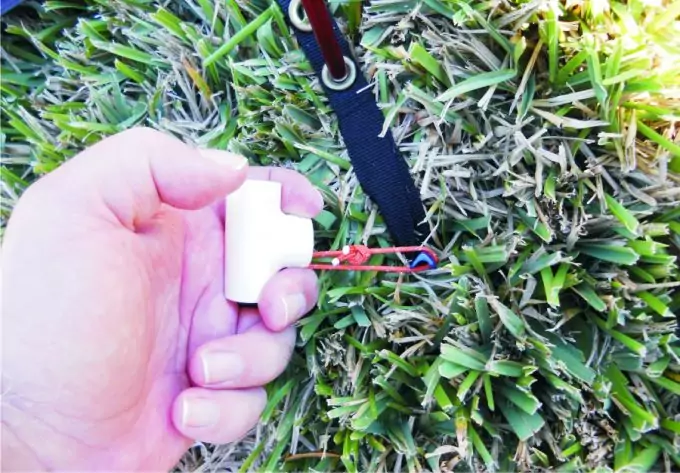
Prevent the corner grommets from tearing
The idea here is to distribute the strain and stress, so the corner grommet will not get torn out by prolonged gust or a blast of wind. Ideally, you thread a paracord between the grommets on a corner.
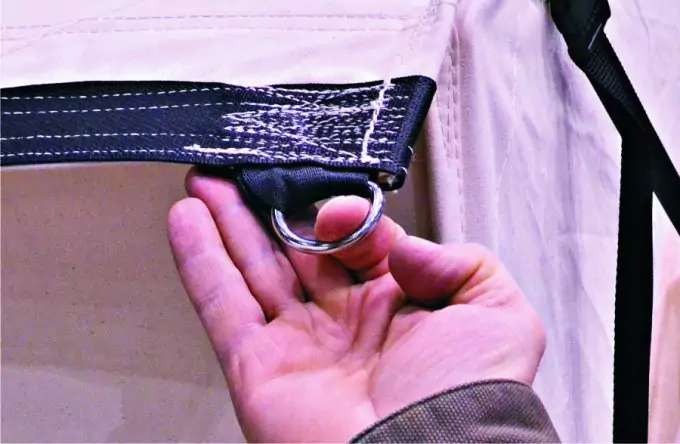
The resultant loops are threaded through the carabiner. With the stress distributed between the three grommets, there’s no way the full brunt of wind gust can focus on one grommet.
Wrapping It Up
When you are out in the wilderness, it’s important to have the basic survival tips in mind. Constructing a tarp is one of the essential survival skills every outdoor enthusiast should know about. You should know how to make a tarp tent to avoid being caught off-guard in the rain or extremely sunny conditions. For more information regarding the best tarp for your camping needs, see our link on this topic.
The above tips can contribute to the construction of an efficient shelter, which prevents your exposure to nasty weather conditions. So, did you find this guide helpful? Please let us know by posting your views below. We will be more than happy to hear from you.


My next day off will be spent trying out all of these cool tarp tent setups. I can already do an A-frame pretty quickly but it can never hurt to learn more tent designs. Plus, my nieces will love watching me struggle to put together an arrowhead tent in the backyard, lol.
Have a great time and don’t work too hard!
I’m brand new to setting up my own tents, my hiking group just started exploring the possibility. Is there any certain thickness that a tarp tent should have? I’m responsible for buying a tarp and bringing it to an outing next week so we can all learn. Thanks for the article!
There is no certain thickness, just be sure that it will handle wind and weather.