There are many personal visions of what the word camping implies. These vary from open air sleeping on the warm ground to bivouacking in mountain snow caves through to somewhat luxurious “glamping”, as in glamorous camping, in the African savannah.
They all require different attitudes and equipment to ensure enjoyment of the surrounding environment to the fullest. However, there is one piece of camping equipment that will be useful in any environment and that is the humble tarpaulin (tarp).
A whole campsite’s shelter requirements can be built around tarp camping or a tarp can be an extra useful piece of equipment added to a sleeping bag, hammock, tent, or even a vehicle.
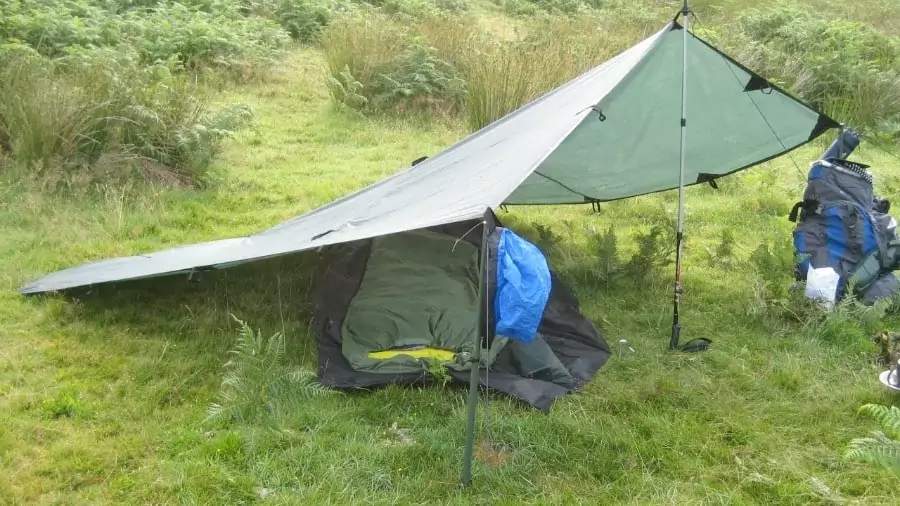
With such a simple piece of equipment a well planned tarp tent setup using any number of tarp shelter configurations will give a wide array of camp comforts, with few disadvantages.
The Pros:
- Stay close to nature: Camping is usually about enjoying the world outdoors, getting back to nature, simplifying needs and life to a minimal level that is still within your personal comfort zone.
Utilizing a tarp at a camp site ensures a measure of openness where one can still feel part of the environment yet be assured of some measure of shelter. If you are sleeping in a tent you can’t see the stars or feel the kiss of a breeze across your cheek. - Extra security for low investment: For a relatively low cost, a tarp will provide high value protection in many environments, whether for fleeing refugees, rock concert followers of picnicking day trippers. If pitched correctly, what started the day as summer shade can easily become a rain shelter.
- Tarps are low weight: if you are backpacking and really want to carry minimum weight, there are lots of options for lightweight, durable synthetic tarps that you can stuff into a corner of your backpack. Or if you expect rough weather a tarp will give extra protection for your tent or camping environment in general.
- A very useful extra camp addition: as a sheltered area to commune in, and as a cooking area where a campfire can be tended without filling a tent with smoke or the risk of damage from flying embers. They are easily repaired with duct tape or special repair kits if they do suffer any damage.
- Able to be configured in a multitude of ways: Tarps can be configured in many ways depending on their construction and size so can be easily altered to fit the best shelter in the changing environmental conditions.
The Cons:
- Less warm: Tarps cannot compete with tents for warmth and unless the user is trained in harsh environment, survival skills, tarps should not be considered replacements for tents where temperatures are likely to be very low. This of course includes the likelihood of places with high wind chill factors.
- No protection from insects or bugs, so in areas with high risk of mosquitoes or other serious numbers of biting insects tarps may not be the best choice for primary shelter. There are other ways of dealing with insects though, like netted hats, portable mosquito nets, covered hammocks, etc.
- No structural framework included: with tarp configurations, everything needs to be improvised or carried as extra. For above tree line camp sites or where trees and structures are limited, more planning has to be done for these possible improvisations. For instance, in some instances extendable walking poles are enough to build a suitable shelter.
- Little privacy: Tarps do not offer much privacy so in crowded camping areas they are not likely to be so popular for sleeping under.
Knowledge is Power – Learn some Tarp Skills
To utilize a tarp to its best advantage a reasonable level of knowledge and skill is required to pitch it in the best configuration for the shelter required, for instance wind or rain or both.
These skills are easy enough to learn with a bit of effort and they should also be practiced in a safe environment before they are critically needed, and not on some mountain side with rain and snow threatening to carry away all and sundry.
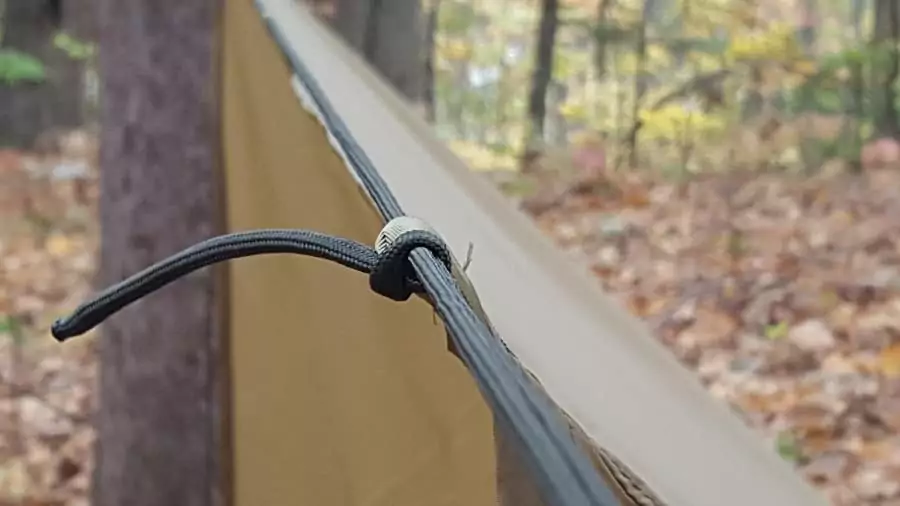
When considering purchasing a tarp consider a few aspects regarding where, when and what you are most likely to be using it for. Err on the side of the most extreme situation you will use it, as there is no point purchasing a cheap porous sunshade that you will use on the beach yet might consider taking hiking up a mountain pass.
If all your camping is done out of the back of a vehicle you need not worry about the weight or packing size so may opt for a larger size.
Consider features such as:
- Fabric: does it need to be waterproof, ripstop,
- Color: does it need have bright color for possible emergency or be camouflaged for bird watching
- Construction: sealed seams, reinforced stitching, reinforced corners, number of grommets, tabs
- Weight: for backpacking, or in a vehicle
- Packing size: for backpacking or in a vehicle
- Size: is this for sheltering one person or a group
- Shape: Square, rectangle, sewn in panels for shaped configuration. Square shape is the most versatile, however rectangular may give a better weight ratio for effectiveness. Shaped tarps may be simpler and faster pitches, but less options
- Attachment Points: placement, style and number of reinforced grommets, tapes
- Extras supplied: stakes, guy ropes, ridge ropes, carabiner
Check out our piece on DIY tarp tents to jump start your creativity and skill.
A Little Planning Can Save the Day, and Your Life
Wherever you are planning your camping, always make sure you get current weather reports and plan for bad weather even if it says sunshine. If you are a novice err on the side of caution and learn as much as possible from other experienced campers and hikers.
The problem with being a novice is that you do not know what risks to look for. You may not even be aware of what questions to ask. Make sure you have adequate clothing for the environment – that is the first level of shelter before your tarp or tent.

Practice using your tarp before you go on any difficult journeys either by setting it up at home or take easy trips until you are confident to know how you can erect ot swiftly and effectively in difficult conditions. This includes the different methods of tarp tent configurations as well as knowledge of suitable knots to tie in various pitches.
Regardless of what you are planning it is always advisable to have knowledge of the environment you are going to be in as well as the weather. Make sure you have first aid skills for wilderness areas and hiking craft skills concerning possible dangers.
Special care should be made concerning extremes of temperature. Heat can lead to heat exhaustion followed rapidly by life threatening sunstroke. On the other end of the scale wet skin in cold environments can quickly lead to hypothermia and death.
There is some discussion that all beginners should start their camping experience by using a simple tarp and various pitches, however to do that safely requires skills and knowledge so the question is, “What comes first the chicken or the egg?” I feel novices are better with the benefit of a warmer tent and to acquire tarp skills on the side.
Tarp Configurations for All
The most versatile tarp shape is the basic square for which there are numerous tarp shelter configurations, also known as pitches. Other tarps are rectangular while others are sewn in panels for pre-shaped rapid pitches. Learn with a basic shape and purchase a special one later if you think it’s your style.
It’s useful to know that tarps are traditionally sized according to fabric cut, as opposed to finished size. This can lead to some confusion when purchasers buy a 10’ x 10’ tarp, but measure it to find that it actually measure slightly smaller. Check before purchasing if the final specifications are important.
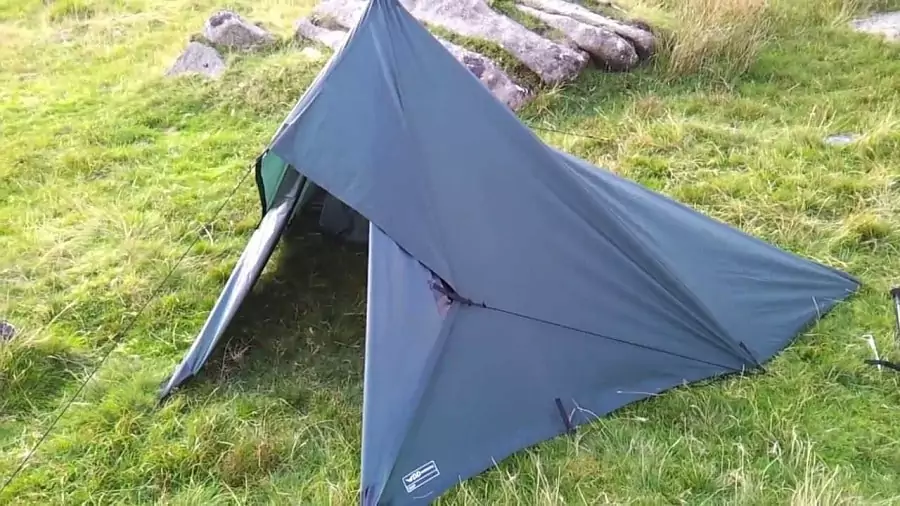
The most basic use of a tarp is a ground sheet. Camping with two tarps gives a myriad of options for a comfortable campsite. The ground sheet can be just an extra seating area or a place to keep packs or precious firewood dry.
Placed under a tent, a tarp protects the floor from sharp rocks and provides for extra rain proofing. It is much easier to pack away a damp tarp, but a dry tent and than a soaking wet tent floor.
Any tarp is always handy to cover spare equipment and keep it clean and dry in camp. Even if you have a tent you can set up a tarp for extra wind shelter, especially when it comes to cooking and preparing food.
Basic Rain Fly. If you just want to pitch a basic shelter to protect from sun or rain, suitable for cooking, eating or communing under, you can set up a basic rain fly. This can be done two ways ,
- A ridge line is strung between two trees or other suitable structures and the tarp draped over and secured to the line on diagonal ends. The remaining opposing diagonals are secured to give an effective slope for rain to run off using guy ropes or to other trees. If tied high enough, people can easily move under this.
- Center the tarp over the ridge line on one edge and secure at the center point of the hem. Secure the 4 corners with guy ropes, 2 each side. Versions of these are suitable for setting up over a hammock or over a tent as an extra rain fly.
If more effective shelter is required, configure the tarp closer to the ground and use available natural wind breaks.
A-Frame configuration is like the rain fly, but at ground level and simple and effective for a single or double person sleeping depending on the size of the tarp. A ridge line is set up and the tarp is secured over the line.
Each side hangs evenly and close enough to the ground so that the sides can be secured at ground level with pegs or rocks. If the ridge line is taken even lower, the bottom edges of the sides can fold inwards to form a ground sheet with the corners secured with rocks or pegs. This configuration is ominously called a Body Bag but is snug and secure.
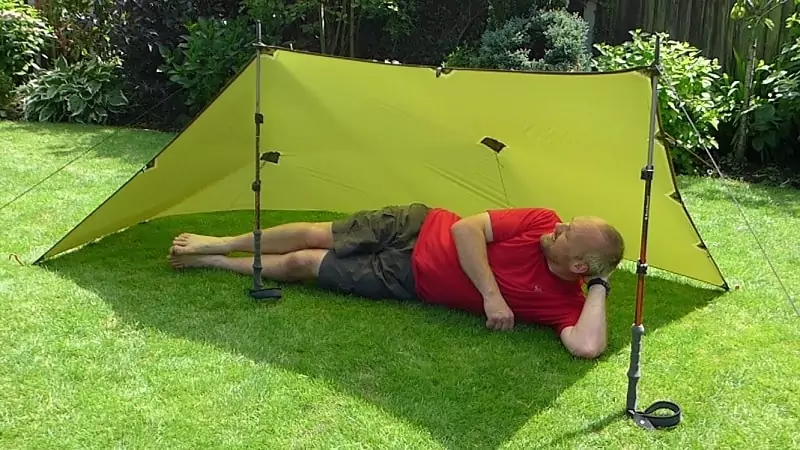
For a Lean To take a long edge of the tarp, and secure it either side to trees/structures at a height so that when and the tarp is pulled back at 45o angle the opposing edge reaches the ground to be secured with pegs or rocks. Even lower and the bottom edge can be folded inwards to form a ground cover for dry seating know as the Envelope, again securing the edges with rocks or pegs or both.
The opposite version of the Envelope called the Windshed Wedge secures the bottom edge on the ground and the extra fabric, instead of being a ground sheet is draped over the top and secured with guy ropes out front for extra wind shelter. If the tarp is large enough, you can combine the Envelope and Windshed Wedge to have both ground sheet and wind shelter.
If you need to pitch a shelter rapidly, the Diamond Pitch is secure and cozy. You attach a rope to one corner of the tarp (or have it pre tied) and secure it on the windward side of the tree. (I know that sounds wrong, but bear with me).
Then secure the diagonal corner back out from the tree with pegs, followed by the other two corners out each side which should give you quick, secure shelter to cook or rest under, protected by the tarp behind and tree in front. Another version of this is tied lower on the tree so that there is enough side fabric to be tucked inwards for use as a ground cover to form an Arrowhead pitch.
The Square Arch pitch gives a wide low profile that is suited for two persons. Two parallel ridge lines are set low to the ground and the tarp draped across both and the sides secured. There would be no runoff for rain though, so this is for dry cold weather only.
When there are no suitable places to secure ridge lines alternative methods must be used. If you need to be prepared for the eventuality of not finding suitable poles or sticks, then you need to pre purchase suitable poles or plan to use expandable walking poles. The latter serves as great tarp poles for pitching tent-like structures.
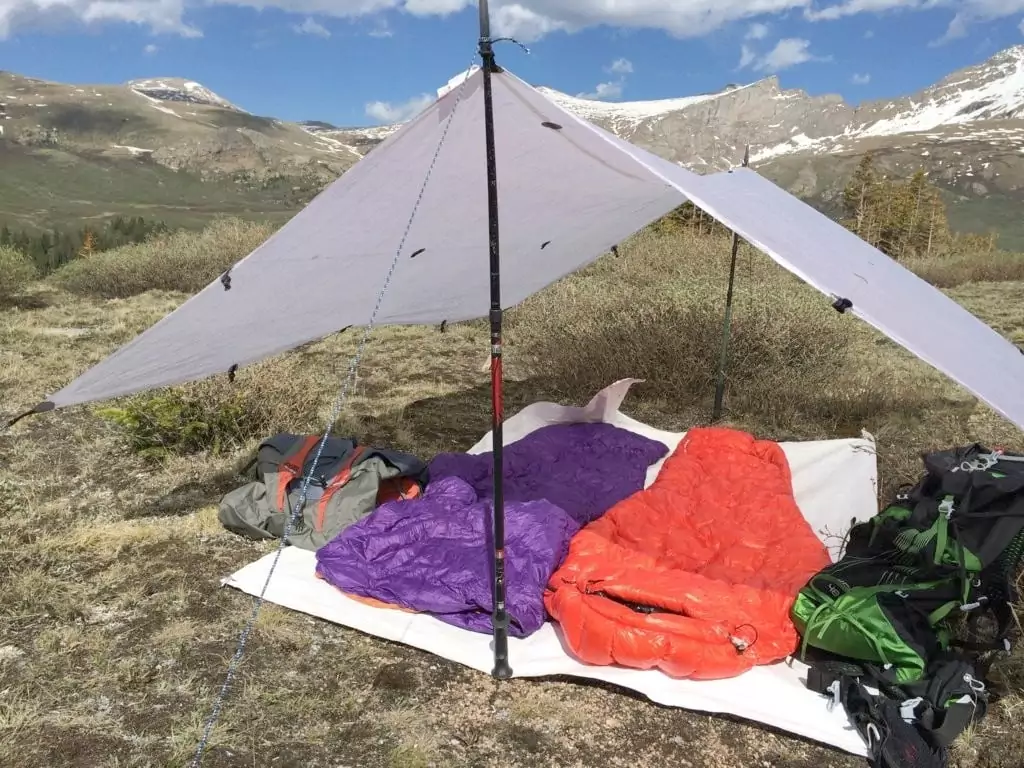
The Forest Tent is a version similar to the Arrowhead but instead of using a ridge line for holding the structure up, two poles are angled and joined at the center top and held in place by two guy lines out to the front. If you only have one pole, you can place that in center of the front edge. It won’t be quite so secure as the Forest Tent but will still offer snug protection.
The Trekking Pole configuration ropes have an edge secured at the back then two poles are placed to hold up the center front, leaving the sides to fold down and form side shelter. Everything is secured with guy ropes, pegs and rocks. The rear edge can also be raised up and tied with ropes secured higher or other poles at the back to form the Two Person Trekking Poles pitch. For some outstanding tarp tent setups, see this article for more easy designs to please you.
These are only a few of the most commonly used variations for tarp shelter configurations to give you a start for the tarp tent setups. They more than adequately cover most situations for temporary shelters. However, with research and using ones imagination, there are many more variations one can design.
Learn Some Extra Skills
Learn basic wilderness skills to ensure you pitch your tarp in a safe place. Avoid any old dead branches overhead that may fall in high winds. Choose a ground area that is wide and flat where possible.
Always take note of wind direction when pitching to make use of natural placed wind breaks. Ask yourself if the wind direction is likely to change and plan to change your tarp if you need to at any time. If it is windy with no likelihood of rain, then a hollow may add extra shelter. Likewise, if it is likely to rain, check out drainage channels and make sure to choose higher ground that will not flood.
Holding more than basic knowledge of how to tie great knots will also stand you in good stead for making the perfect tarp pitch. Make some effort to learn and practice before you head into the wilderness. Here’s our piece on how to tie knots for your camping needs, check it out.
There are also extra tips like making a quick release attachment by doubling a thin cord through a grommet hole and placing a sturdy stick through the protruding loop to secure the guy rope.
Also, there are accessories that make pitching easier and quicker. Poles can lightweight aluminum and collapsible for easy packing. Pegs and stakes come in various shapes made of either steel or aluminum. The former is stronger but heavier as aluminum pins will bend easily in rocky ground. Flat angle shaped pegs are suitable for using in snow and sand where round pins will not work.
Furthermore, if there are tabs/loops on the top of the tarp, ridge lines can also sometimes be secured through rather than running under the tarp. This keeps fabric more water tight and stops any wear of the rope on the fabric. Karabiners can also be hooked through these loops and the ridge line run through these for a quick set up.
Extra guy ropes with adjustable clips can make it easier to keep good tension. Ridge line ropes can be purchased in various lengths and strengths. Often the guy ropes and ridge lines supplied with tarps are of poor quality, so consider upgrading as soon as you can.
Tarp clips can be added to the edge to add guy ropes or other attachments just were you need them. Tarp clips also hold firmly but don’t damage the tarp fabric.
Wrapping It Up
So, there you have some basic information concerning purchasing and knowledge required on how to have some fun tarp camping. See our article reviews on the finest tarps today to give you more selection for backpacking.
Each tarp tent setup is relatively easy to learn and you may even be able to add some more tarp shelter configurations to the list before long. If so, please let us know which configurations, you used, in the comments section below. Happy tarping!

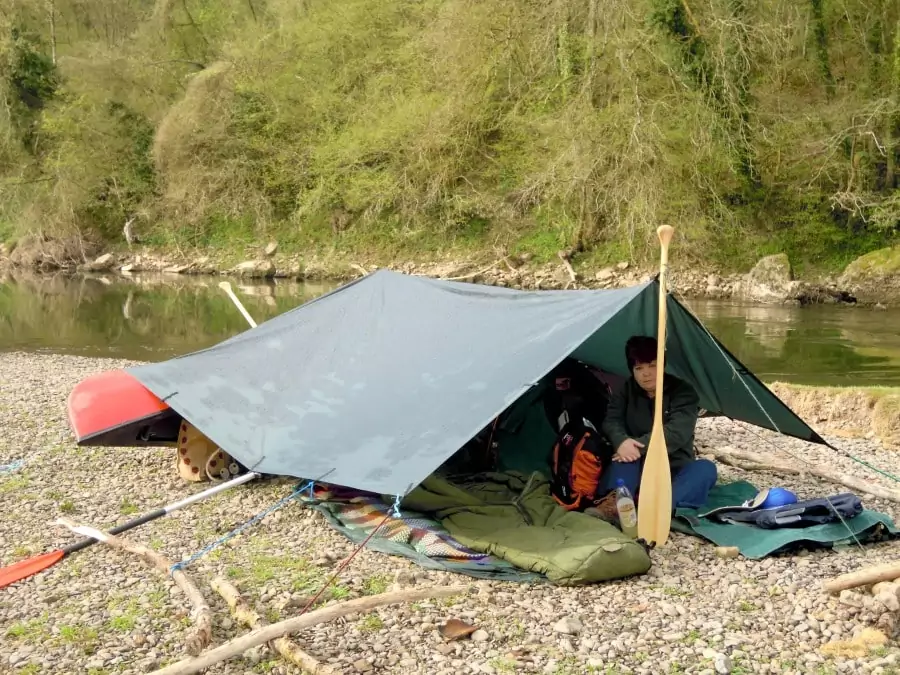


You will never catch my dad in a tent. He prefers camping under an ordinary tarp and says that tents take the fun out of the outdoor experience. He has this one tarp that he has used since we were kids and every time he pulls it out, I get pleasant childhood flashbacks of camping with him.
Tarps offer protection and ventilation, so people are drawn to these products. The openness of the tarp makes this very popular with people camping in good weather. I can’t blame your dad for choosing the tarp over a stuffy tent! :o)
This was a really nice read, thank you for sharing this information on tarps. My boyfriends and I do a lot of warm weather camping and I think a tarp would be a good idea if we are camping in a relatively safe environment. Are there any particular brands you can recommend?
There are several good brands. The FT Waterproof Rip Stop Rain Fly Hammock Tarp Cover Tent Shelter is something you should consider. It’s quite large and very durable.