
When you are first starting to learn how to make a bow drill, you need to create some conditions and your bow drill makes such, that the shot of acquiring a coal is the best. If you don’t have a clue about the sentiment a coal beginning to be discovered, then you may not have the capacity to overcome the most difficult situations.
For this, it is good to select the “easiest woods” and do some practice utilizing the set in a protected area, for example, a basement or garage. Discussed in this article are the necessary steps you need to start making a bow drill. So read on and learn!
Selection of Wood
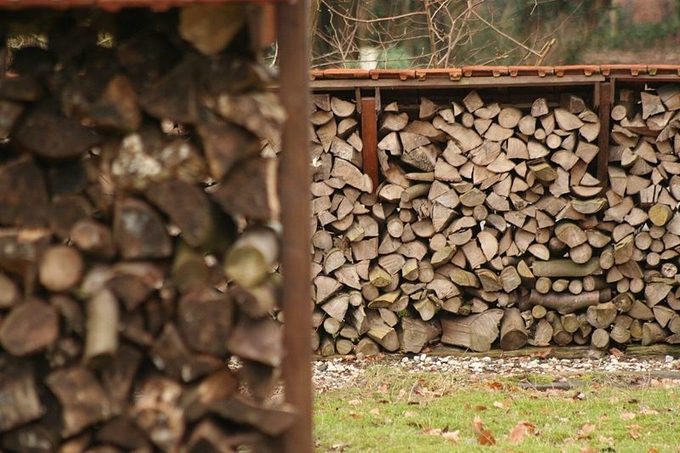
Even if you are yet to get a coal, it is ideal to obtain the wood from the Timberland yourself. Getting it from a wood yard is simple, but you learn practically nothing. Likewise, getting wood from common sources guarantees you don’t incidentally get weight-treated wood, which is usually highly toxic when caused to smolder.
Here are examples of some great woods for practicing with (and useful for real survival usage as well):
- Eastern White Cedar
- Most Willows
- Basswood
- Spruces
- Stag-horn Sumac
- Balsam Fir
- Aspens and Poplars
There are still many other ones. These are focused more on the northeastern backwoods communities of North America. A great tree identification book will enable you to know potential fire-effective woods. Also, ensure you make it a normal practice to carve and feel diverse woods when you are in the forest.
A decent approach to get great wood for practicing with is to look for a recently fallen trunk or branch that is relatively straight and has the thickness of a wrist or greater than that. Then cut the wood with a saw. It is ideal if the wood has recently tumbled off the tree.
The willow and aspen woods usually sever limbs, particularly in ice storms. If you cannot find any green wood, then make use of strong dry wood. Cedar is always found in pretty great condition just like standing skeletons. Maintain a strategic distance from areas of wood with plenty knots and wood that has cracks in it.
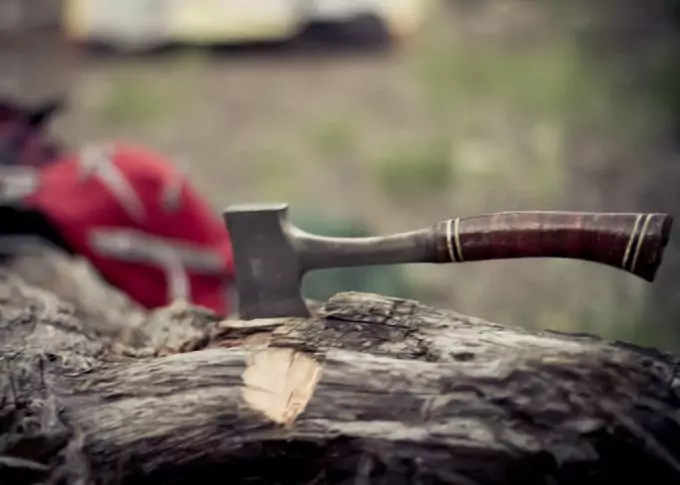
When you have discovered a great section of wood, then split it into equal parts with a knife or axe to make it dry. A branch that has the diameter of a fist and several feet long is a decent size to practice with. You need to have plenty materials to practice with as you burn through spindles and boards. We’ve featured the best camping hatchets for your needs, check it out for more options.
Give the wood a chance to dry for about seven days in the sun if conceivable, longer in the shade. And after drying your wood, then you can start making your set. In the next section of this article, we are going to show you how you can successfully make your set. But safety first. Make sure you read our article on the best first aid kits for camping to better prepare for emergencies.
Making The Bow-Drill Set
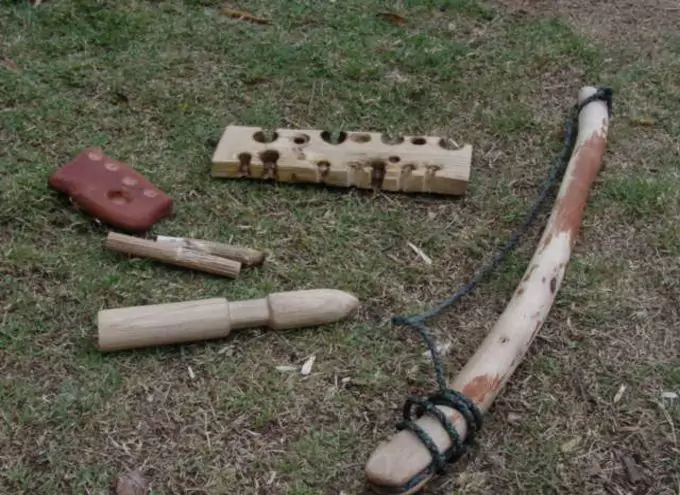
There are five sections when it comes to the bow-drill set. These are the bow, the spindle/drill, the string, the board, and lastly, the handhold. The drill turns against the board on one side and is sustained vertically by the handhold part at the flip side. The drill is then spun by the string and bow.
Before making a set, you have to know how to use a knife. Ensure you have an easy knife to practice with because this will make your work more charming and more secure. We suggest you use a light knife that has a blade of around 1/16″ thickness. Slimmer blades require less energy to be forced through the wood.
Don’t try to use knives that have finger guards as these simply act as a burden. A relatively light blade (at around 3″) is simpler to practice with. The handle should not have any sharp, uneven surfaces or boxy angles. Make sure you Keep your knife sharp always. It will be ideal to get many knives. See our article with the list of the top hiking knives you can use around the campsite.
Mora knives made in Sweden are exceptionally pleasant and not expensive. Do not hesitate to make use of the ground as a surface for bracing your wood. The steadier the wood you are cutting is, the better. The information below shows how you can carve the parts of a fledgling set from a bigger piece of wood.
1. The Board
Carrying the once-split tree branch, cut it with a whittle or saw and snap the wood into a foot-long length. Utilizing a knife or axe and baton (a short, strong branch for beating the back of blade cutting edges) blend, split the branch equally down the center.
Continue splitting it until you arrive at a level board that is around one-inch thick or the thumb thickness. Whittle it down to expel any distensions so you eventually get a level, straight-sided and rectangular shape. Keep in mind that the board needs to be around 3 inches wide, but any measurement above two inches will also be good.
2. The Spindle
Choose a foot-long straight-grained area of wood (if possible, take from one of your past splits) and whittle the wood into a somewhat less than 1 inch diameter straight and flat dowel. The dowel needs to have a similar diameter like the knuckle of your thumb finger.
Shave the last inch of every end into sharp edges. The fatter the spindle of the wood, the less wear it puts on the string, however, a more drawn out bow is required to bring about a similar number of revolutions taken for every bow stroke. Basically, this works similarly like the gearing on a bike.
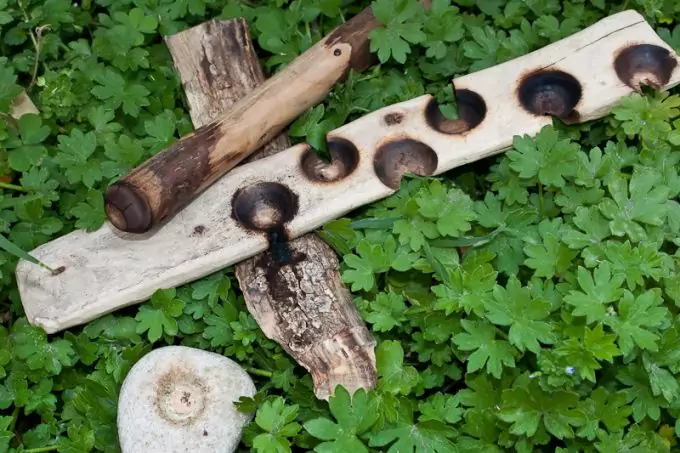
3. The Handhold
Carry the other half-split tree branch and saw through an area around 4-5 inches in length. Scrape the edges to evacuate any harsh spots and to give a smooth surface to for easy grip. On the level side of this, precisely in the inside from each of the four sides, carve out a hole using the front point of the knife.
Make the hole to be about a half of an inch depth. Try to make the side levels of the hole incline out at a 45 degree point in order to frame a cone formed depression.
4. The String
There is a wide assortment of materials that strings can be made with. These are nylon, cotton, leather, jute, rawhide, jute, buckskin, and a wide assortment of wild plants. Generally, utilize a string that is no less than one and a half times your bow length. The string needs to be relatively thick. A quarter-inch thickness will keep going quite a while.
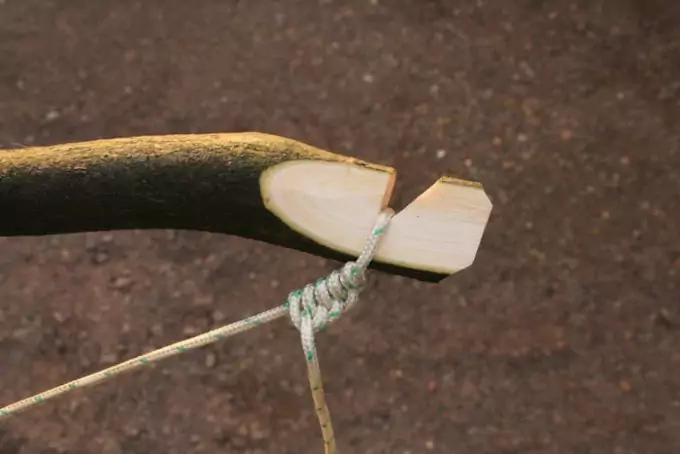
Image Credit: survivor.sk
Shoelaces are normally not sufficiently thick for continuous use. The cotton hockey skate bands will work well. It is best to stay away from synthetics, for example, nylon as they in some cases liquefy from the grating unless sufficiently thick. The thick cotton string is just about perfect for continuous use.
5. The Bow
Get a segment of a green (live) tree branch that is around an index finger thickness and straight or marginally bent and the length of an arm from elbow to the fingertip. The bow needs to be sensibly flexible but not unstable. It should not be bendable, more than 2 inches from a straight line when bent utilizing a little energy.
If it twists too easily or is inclined to snapping, get a somewhat thicker tree branch or utilize a thicker wood. If it barely twists at all, then you need to carefully whittle away a little wood within the curve. Ensure it bends equally, to avoid feeble spots. The bow’s flexibility is critical in the general feel of the set.
In the event that the bow doesn’t twist, the bow string will slip much of the time and soon get damaged. If the bow is excessively flexible, the string will likewise slip and you won’t have the ability to apply the required torque. Split the first 2 inches of each bow end with a good knife. This is the reason you require a green tree branch.
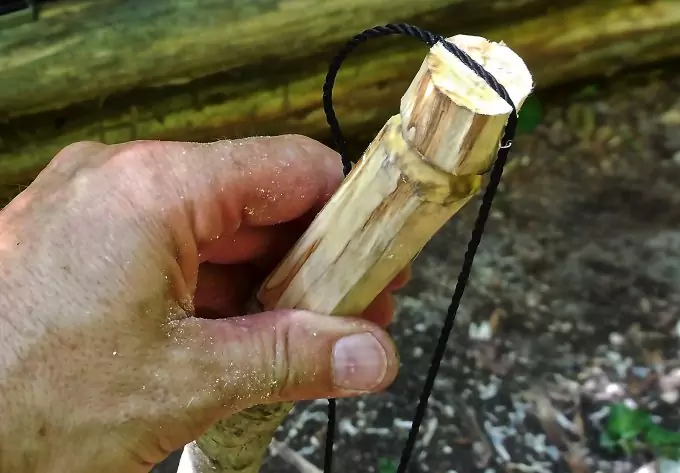
Image Credit: survivalsherpa.wordpress.com
A dry tree branch won’t split well. Ensure you have an even split and mustn’t keep running off to the side. The introduction of the split is vital if there is any curve part in the bow. When the bow is placed on a level surface, the splits ought to be parallel to that work surface.
Select two small lengths of cordage and cozily tie them half way around the splits. Utilize square knots of another kind of knots that won’t work loose. The clove hitch is actually useful for this. Tie an end of the bowstring directly into a knot. Then set the end into the bow-split so that the knot will be on the bow’s side that is bending far from it.
Ensure that the string is held firmly by the bow-split by shifting the short area of cordage up to the bow-split toward the bowstring area. This will adequately fix the bow-split. Take the flip side of the bowstring and do it again on the opposite side.
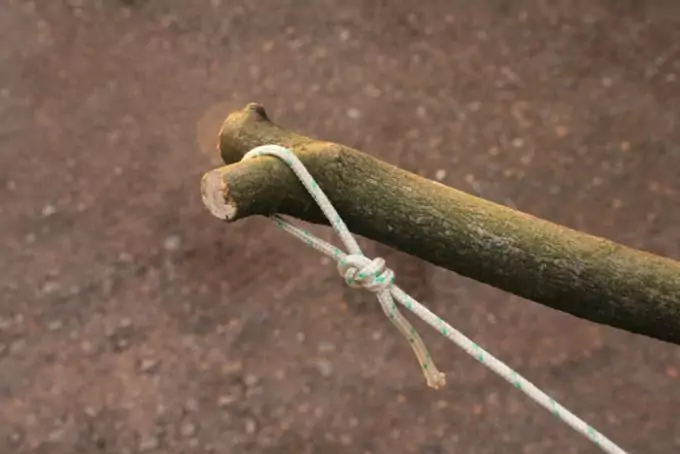
Image Credit: survivor.sk
The quantity of slack present in the bowstring is something that should be balanced through experimentation when the spindle is fixed. For the time being, the string needs to be slightly loose or you won’t have the ability to stack the spindle.
Techniques for Bow Drilling
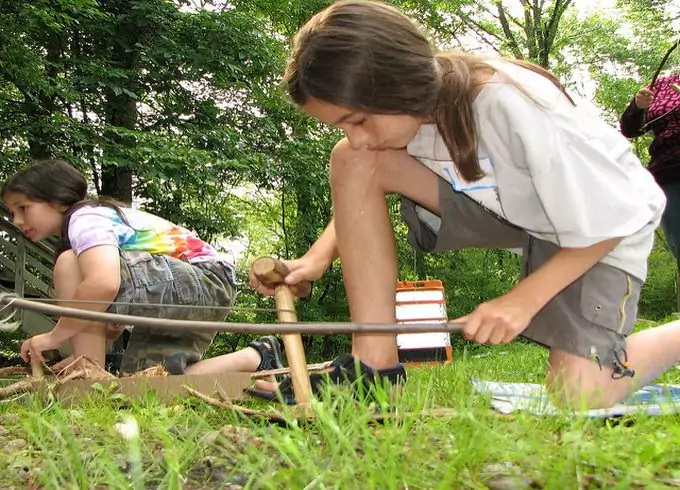
If you are a right-handed person, then hold the bow using the right hand. Put the board on the ground surface so it is steady. Carry your spindle and then force the point straight into the board in order for you to make a stamp. This stamp should be around a full axle width from the board edge (around an inch long).
It should likewise be toward one side of the board so as to have enough space to put your foot. Take your knife and create a shallow opening like the kind present in the handhold. After that, place your left leg on the board (that is if you are a right-handed person) so inside the wad of your foot is beside the shallow gouge.
You should put your right knee on the floor and be sitting on the right foot. Your right side leg ought to be in the same direction with the board. Or, you can elevate your butt away from your foot and rest your chest region on the left side knee – make use of anyone that seems easy for you.
Fill the spindle by enfolding the string all through the spindle, thus making the spindle to be outside the bow. This process may require some string adjustment. The spindle ought to feel like it will fly out. The more tightly the string turns into, the better, simply do not make it very tight that it damages the bow.
Taking the bow and loaded spindle in your right hand, put the base edge of the spindle into the opening in the board area. Cap the flip side using the handhold and apply some weight to shield the spindle from flying out. Release the bow. The bow ought to be directing itself up towards you. On the off chance that it is pointing down, refill the spindle to make to point upward.
The Burning-In Process
You can now start the burning-in process. The burning-in process is to gouge the handhold opening. Simply start stroking the bow forward and backward gradually. Keep the weight on the handhold slightly high. In the end, you should see a little amount of smoke erupting at a side or both sides of the axle.
Get a tiny bit of speed until both sides are producing smoke. It is most critical that the handhold end produces smoke now. If it declines, even when you choose the speed and push it down harder, refill the spindle so that the top area is now the base and the other way around. Repeat the process again until the handhold begins to smoke.
Continue going until the gap has a similar diameter like that of the drill. It needs to match the drill point curve precisely now. After that, you should grease up this end (monitor which side is down and which one is up!) This is to shield it from smoking and exhausting your energy so that you can concentrate all your energy on the lower end.
Empty the spindle and snag the top into the opening in the handhold. Blow away any dust. Then push the bow-drill directly into the handhold and gradually turn the bore-drill. Once more, Blow away any dust. Then, rub this end at the edges of your nose and into your hair. This is to rub the wood with the natural oils on your skin.
Do the pushing-in process again. You might need to push the spindle-end against a smooth shake. This viably solidifies the spindle-end by packing the wood. Baseball players usually regard it as “boning”. Redo the squeezing of the spindle straight into the handhold opening and then rub the tip into your hair till it builds up a sheen.
Keep all dampness far from this as it will make the wood grow and it will tie in the handhold, thus resulting in burning and friction. You need the frictionless spindle-end to be highly rounded. This circulates the weight constrains over a more prominent region, decreasing the inclination of the spindle to penetrate into the handhold.
On the off chance that you envision an electric bore, a little piece will require less push to bore through a material compared to a big one. In order for you to keep the drill from burning up at the spindle-end, then you should utilize a large surface range.
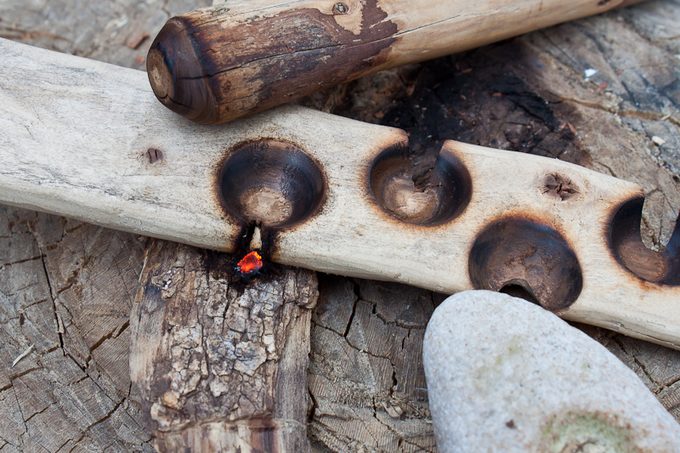
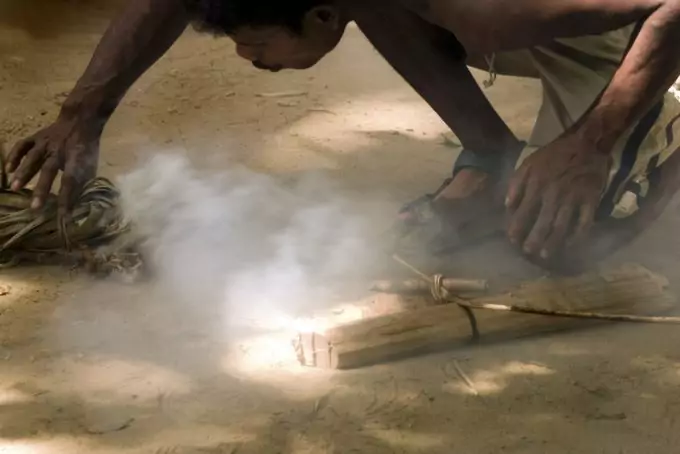
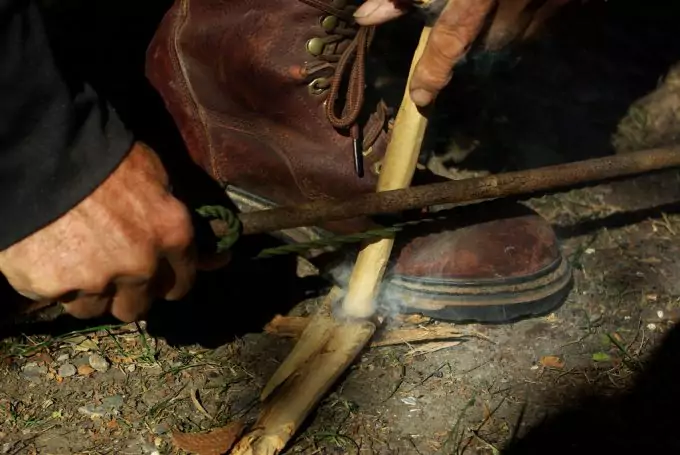
Getting the Coal
Put something below the board where the notch will get the coal. This can be in the form of birch bark, paper and so on. Always remember that if you are on the floor, the coal will dissolve it. Bring yourself into the position that was clarified earlier and start drilling. Ensure you place the lubricated side of the bow-drill in the handhold.
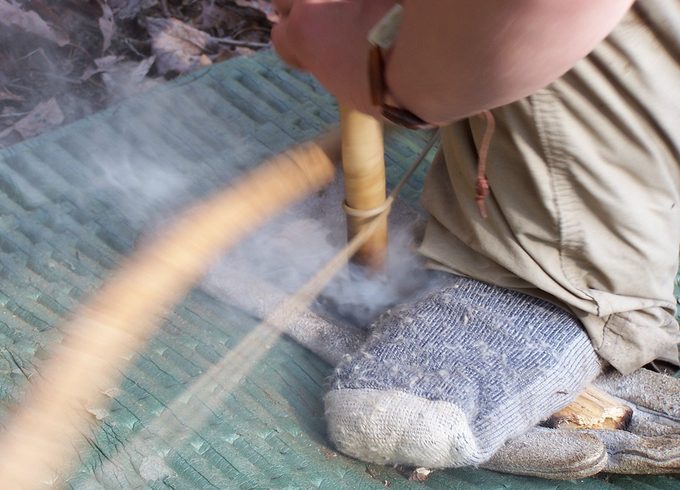
Then you can now start the powder process. Drill gradually and with firm weight until the base end starts smoking. Hold the smoke down to only a wisp. You ought to see powder gathering in the notch. Ensure you keep this moderate pace until the notch is almost filled. Then lighten up the weight and bore quickly. This is the “warm” stage.
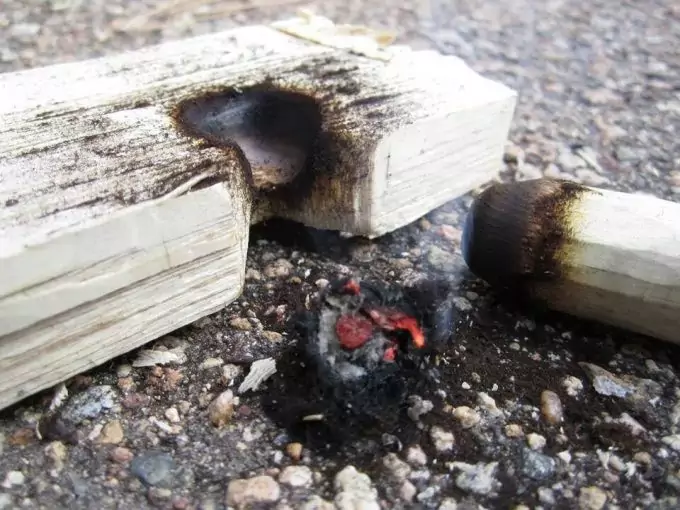
The thought is to make warm, not powder. It ought to start to smoke intensely. If not, apply more force until it does. Continue going until you are completely encompassed by smoke. Now, quit drilling and carefully evacuate the drill. In the event that there is smoke coming out from the powder heap for more than a couple of seconds, then you most likely have coal.
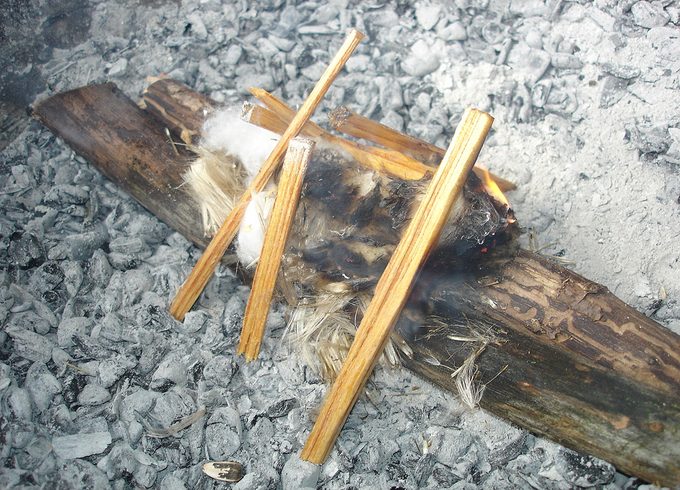
Tenderly blow on the coal till it starts to shine red. You may now transmit it to a tinder package. This is just a fist-sized heap of dry grasses, stringy internal bark of specific trees, and so on. Keep blowing until it flares up.
Powder Reading Process
If the drill starts to smoke at the handhold end, then you should apply more lubrication again. You may need to switch the spindle ends as one end might be somewhat harder than another. Another solution to it is to shoulder the spindle’s lower end. This is basically diminishing the diameter the drill’s last inch or so.
This brings about less pressure being required to bore the spindle right into the board. This always takes care of the issue of the handhold burning and also the issue of the lower spindle’s end refusing to begin burning. Issues can frequently be unraveled by looking at the consistency and color of the powder.
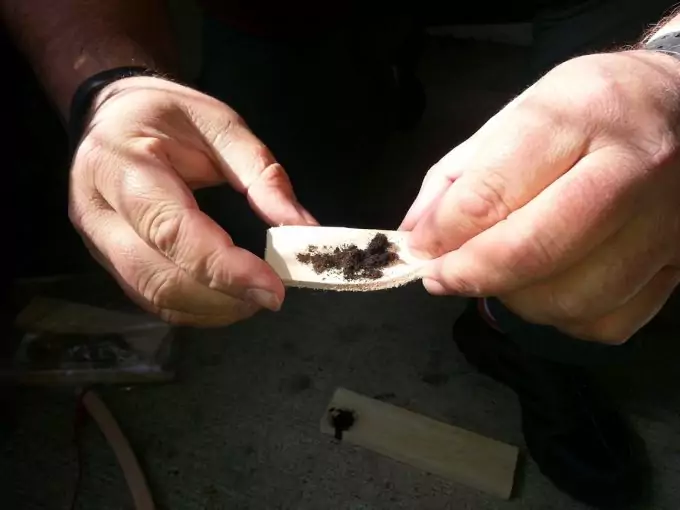
Image Credit: ageofdecadence.com
Keep in mind, the suggestions underneath are for the powder process. The warmth process should deliver a minimal measure of powder with the most measure of warmth. In other words, you need to be pushing down, just enough to make plenty smoke, but no extra powder.
On the off chance that you push down excessively, you risk making hard powder and pushing all the great powder that you produce from the notch. This isn’t so vital with soft, dry woods, but rather is imperative when utilizing moist or somewhat harder than good woods.
Color is related to speed. Light dark colored means there is insufficient warmth being created, hence you should drill quicker. Black means there is a lot of warmth produced, although you must be mindful so as not to push too heavily. Consistency is related to downward pressure. Dusty implies small floury parts are being scraped off.
This isn’t really an issue in itself, yet it ordinarily happens because there is insufficient pressure down and insufficient speed. Fuzzy is great. This gives the most amount of the surface zone for ignition to occur. Crusty implies there is excessive pressure down. This often happens in blend with a lot of speed.
This powder won’t light up easily since there is a minimal surface range for ignition reactions to occur. This will usually enable you to adjust your procedure and get a good coal. However, this is not possible. For example, if you are trying to push down as much as you can and still obtaining a dusty powder or scarcely any powder with all the technique.
Your next choice is to shoulder down the spindle somewhat more as was said before. Along these lines, the set will need less downward force to create more powder enabling you to load the notch with a similar amount of strength. A drawback of this technique is the set turns out to be more sensitive, thus making it less demanding to push too hard!
Final Thoughts
We believe you get a lot of useful information from this article. It is very significant that the basics are learned before trying the more advanced strategies. If you don’t figure out how to know what the wood is letting you know, your coal-making reliability will be eccentric in the more difficult situations.
You should have the ability to get a coal almost every time you attempt when utilizing a proven set before moving on to produce-from-scratch bow-drills. Keeping a day to day record of your experiments and experiences will incredibly help in enhancing your ability.
Don’t forget to stay out of harm’s way. Our article on safety tips around the camp is a must-read for you; check it out before heading for your next adventure.
Have you tried making a bow drill? What are your experiences during the process? You can share them with us by leaving a comment below! We’d love to hear from you!


This site continues to impress me with its well-researched tutorials! It’s been a long time since I first learned the basics of making and using a bow drill, so this was a great refresher course. I love the section on how to read the powder, so you can learn how to fix your bow drill no matter what’s wrong. Thanks!
Thank you so much!
I’ve never made a bow drill before but I feel like this guide can walk me through it. This weekend is looking like a good time to practice. Is this the kind of tool that I could make every time I’m out on a new hike, or is it meant to be longer lasting so I can bring it along?
You can use the same one until it gets worn out and make a new one.